
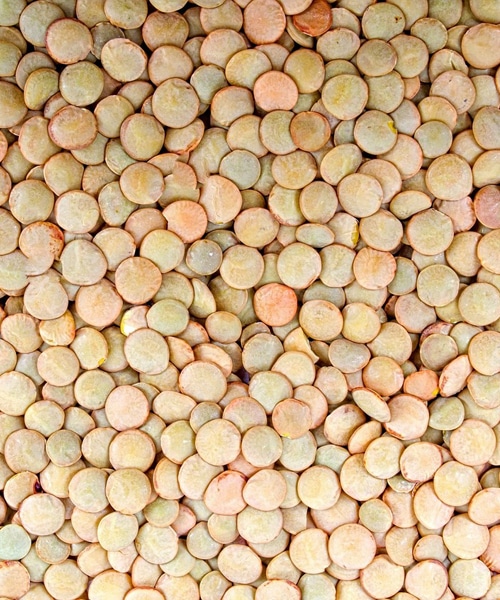
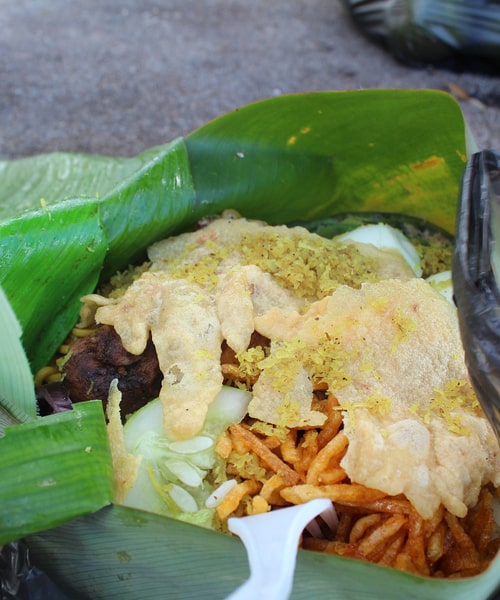
You would be surprised at just how dried beans can be added to a meal, and then completely change the texture and taste of that specific dish. Now, when we talk about dried beans we are referring as a general term as we know there all kinds of different dried beans out there, all with different colourings, flavours and textures.
One of the great benefits to dried beans is that they can offer you a brilliant source rich tastes that work well as part of any well-balanced diet. On their own they may not offer enough taste to get you going but as part of other dishes they do. One important part of cooking dried beans is the preparation though, and this is a key place for us to start.
The first step you will need to take may seem tedious but believe us, this is a step you don’t want to skip especially if your end result is cooking for a number of guests. So before you start cooking you want to sort out the beans by discarding damaged, bruised or shrivelled beans from your pack, at this stage you can also add them into a sieve and then run cold water through them, this will remove dirt and other foreign objects from the beans.
The last thing you want to do is serve your dinner guests beans that may contain small rocks or pebbles, they will only end up with a nasty surprise!
The next phase depends on how much time you have available, so are you cooking this dish tomorrow or do you need to get on with cooking the dish asap? If you have time you can slow soak the beans overnight which allows that you fully cook the beans when you do come to cook them.
If you don’t have that spare time then you can choose the faster soak, which essentially consist of putting the beans into a saucepan and then slow boiling them for a few minutes so they soften up. Leave them on the side, with a lid over for about an hour.
If you already have your beans in a saucepan then keep them in there with enough water to cover them, you can then add yourself a bit of olive oil (a tablespoon is enough). The olive oil is a little trick you can learn which stops the amount of foam over you get from boiling beans, pasta etc.
The beans can take anything between 30 minutes and up to 2 hours of cooking time, all dependant on how full your saucepan is, what beans you are using and what method you used to soak them (the slow or fast method).
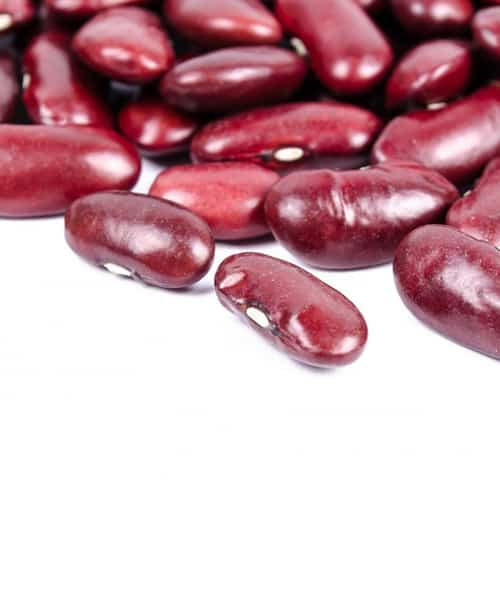
For example, the black bean is one of the quickest requiring abut 30-60 minutes, whilst the red kidney bean can take 120 minutes.

Pick up one of the beans from the saucepan pot and then squeeze it between your fingers, if the bean is tender then it’s done. If you have undercooked them then they will still be crunchy, and if you have overcooked them they will become very mushy.
Firstly you can use them to create your own baked beans, but if you want to really challenge your culinary skills then there are a few simple recipes that you can follow below:
The most popular choice for beans is to create a chilli dish with black and red beans, you can optionally add some mince beef to this dish or you can keep it ‘bean only’, that’s up to you and your guests. Boiling up some rice, grating up some cheese and creating a chilli styled sauce is all that is keeping you from a warm lunchtime meal with a bit of a kick to it.
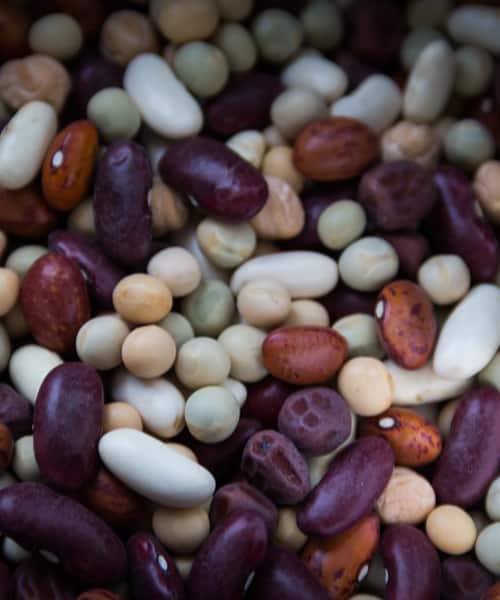
The final recipe that we think you will like is creating a five-bean soup which consists of using different types of beans, from red kidney beans, mung beans, pinto beans, lima beans and black beans. You can add a few scoops of rice to the side of the soup or cook some French bread for dipping.
To do this recipe you just need to cook the selection of beans and then add your favourite vegetables to a saucepan and bring the soup together ready for serving.
The opportunities that you have with beans are plentiful and you can really experiment with certain foods and dishes, using beans as alternatives to your usual meats. For example, try using red beans in a hummus recipe to give yourself a bit of a change to the usual ingredients or think about a Caribbean red bean and rice seafood dish.

If you are a deer hunter then you will already know how to get your hands on the finest Venison that the country has to offer and the fact that the longer the meat stays on the carcass the much more tougher that meat then becomes to eat.
However, what if you have no idea how to cook venison? Or the different ways you can cook deer meat that brings out a variety of different tastes and textures.
The first principles of venison that we need to understand is that it should be aged for a good two weeks before you begin to cook it. This two-week period just helps make the meat much tastier and takes away that game taste, as you don’t want to taste that.
Also, you should be aware that whilst the likes of pork and beef fat tastes amazing when cooked and adds delicious flavours to the meat, the same does not apply to dear. Dear fat tastes awful and adds absolutely zero value to the cooking process.
So before we get to preparing the meat for cooking cut off the fat and get rid of it.

Most avid venison fans will tell you that to get the best from venison you will need to marinade it in a dressing for the period of 24 hours, and they are absolutely right. Usually venison goes quite nicely with the likes of BBQ, and Italian dressings but you can create your own seasonings and marinades by using a selection of ingredients from garlic, vinegar, olive oils and onions.
The other angle to approach is to remove that game taste by looking at zests and citrus flavours that can easily overpower the game taste. Half a cup of lime juice with olive oil, some cilantro and green chilli, combined with a teaspoon of cumin and tequila is all you need to really charge up the perfect marinade.
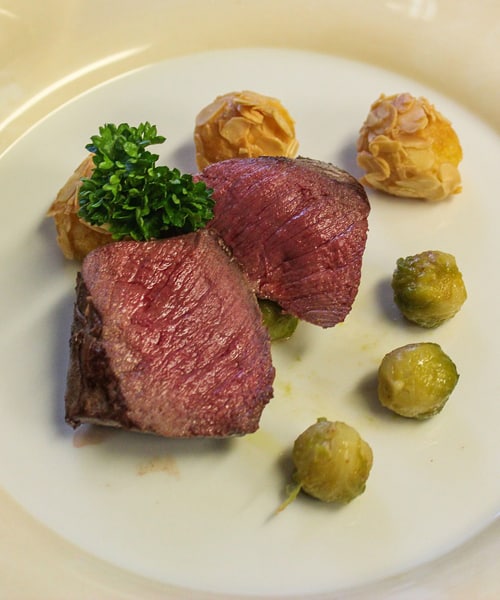
Now, depending on the cut you have will all depend on how you cook it. Generally there are a few different methods that work well with cooking venison though, starting with grilling. If you are in possession of venison steaks then this is the perfect way to cook them so turn up your grill to a high heat and preheat it before you add the steaks.
One thing when cooking venison that’s important is that you bring it up to room temperature otherwise you aren’t going to get the inside cooked well enough. A simple 20 minutes out of the fridge will do this no problem.
If you haven’t marinade the steak then this is the point you can add some salt and pepper to the steaks in order to season them. Do this to both sides of the steak and then place them under the grill for about 4 minutes on each side.
To check that the steak has cooked to the optimum temperature you will need to use a thermometer and look at 130F or 54C, any higher and you are going to make the meat toughen up more.
Tip: Brush your steaks with some butter to keep it as moist and tender as possible.
Roasting you Venison
The second popular method of cooking venison is to roast it in the oven which allows for you to really jazz up the aroma and infusion. Take the venison and make several diagonal cuts to the surface of it and then stuff those cuts with vegetables and bacon which will help produce a fat source and inject flavour into the meat.
Remember that we removed that awful tasting deer fat early on so adding bacon or butter is a tastier alternative to that venison fat.
If you are wondering what kind of herbs go well with your roast venison then you can try rosemary, sage or some thyme which will all provide wonderful aromatics for you. Preheat the oven before you slide in the venison (which needs to go into a roasting tray), you can also add your vegetables around the roast venison to cook as well.
If time isn’t of the essence then roasting is ideal as it takes about 3 hours to cook on a heat of about 325F, and once the meat has cooked don’t forget to leave it on the kitchen side for around 15 minutes so that the juices and fat all disperse evenly throughout the venison, allowing it to taste much more tender, and moist.
Once you have left it resting for that time you can then start to carve up the deer meat, add the vegetable to a plate and then make a nice gravy from the juices left in the roasting pan, that can be served on the side of the venison.

When you think about the food culture of the USA the first thing that comes to your mind is fast-food, and that primarily comes down to the fact that America is the central hub for the likes of McDonalds, KFC, Burger King and other popular fast food chains. Aside from quick food there are also other dishes that you can expect to see when you visit the land of opportunity, all of which are gut-busting but very, very tasty.
In today’s article we wanted to take a closer look at the foods that have come out of America, some of which we eat in other countries now due to franchises, but some that haven’t made it out of the USA. Either way the dishes we are about to talk you through are what make America, America. These are rich cultural foods that we just love to get our teeth stuck into.
Since the 1950’s and the spate of fast food diners that opened up throughout the States, hamburger and chips has been a part of every American persons menu during the last 60 – 70 years. Why? These are usually part of quick fix dishes for busy Americans who either don’t have the time or the expense to eat from home.
The beauty of hamburger and chips at popular fast-food stores is easy to see, not only are you getting a meal but you are getting a meal that can be ordered and in your hands within minutes, and of course the price you are paying is next to nothing.
It doesn’t matter where you are up and down the country this traditional culture food is a staple in many peoples diets and since the 1950’s it’s become a popular success in many places across the world.

If you were a fan of 90’s American teen dramas then this food will have popped up on a number of occasions throughout the programs. If you didn’t you would have almost certainly spotted these at local fairs throughout the country.
A corn dog is simple a regular sausage that is then covered in a thick layer of cornmeal batter, then a wooden stick is places lengthways through the centre of the sausage ready to be eaten. Usually ketchup and mustard are popular sauces that are used with this dish and despite them not being talk about as much nowadays there are still plenty of corn dog vendors about, from fairs to sports games.
If you do go to the States, this culture food won’t be hard to find.
This dish comprises of Russian or Thousand Island dressing to give it that rich taste. The sandwich is cooked using corned beef, sauerkraut and Swiss cheese, and the bread (which is generally Rye Bread, is grilled each side).
As it’s an American delicacy the sandwich is literally crammed with the meat and cheese, and makes for a very hearty snack, especially in the fall and winter periods.
The one thing you will find with this sandwich is that over the years different variations have been brought out, so from New York to Texas, you are bound to spot different takes to this culture food.
You can’t get more American than a Taco Bell, and thanks to this company which is a complete American invention this fast food choice is eaten up and down the country by many Americans.
Taco’s originally from Mexico has been taken by the USA to provide an American food culture with fillings that range from beef, pork, chicken, cheese, vegetables and even seafood’s.
Again the best thing about this dish is that you can eat it on the move because its classed as a take-away food.
Finally the fifth and final food choice on our list is the food old bagel which isn’t originally an American food as it was first a big part of Jewish delicacy. However in the North American region this has become a huge part of cultural food choices and it’s not uncommon that people wake up for breakfast with bagels stuffed full of eggs, ham and Philadelphia cheeses.
The bagel can be toasted on either side to give it that crispy texture, and this American food culture has even made its way overseer’s where the likes of European countries have adopted the food as an alternative breakfast choice on their menus.
Best still, these can be eaten anytime of the day so they aren’t just left as part of a breakfast meal, they can also make great lunchtime snacks.
Next time you venture out to the USA don’t forget to give some of these cultural dishes a try as they could be a whole new experience for your taste buds!

Britain’s love their food and over the past 20 years there have been some incredible dishes created in England alone, some have taken off but some have failed miserably. In more recent times, Chefs such as Heston Blumenthal have ventured to great lengths in experimental food dishes, but in today’s article we wanted to look at the dishes that make England, England!
These are traditional food cultures of England that have lasted the lengths of time, but are a staple in our weekly diets now.
Let us introduce you to the food culture of England…
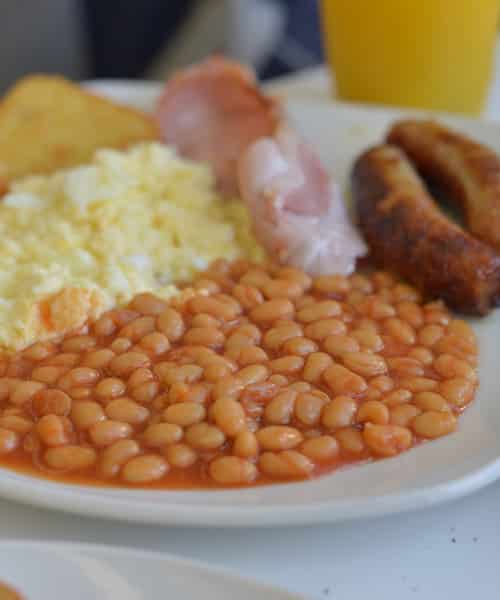
When you think of England and food you instantly think of the good old traditional English breakfast which is usually complimented with another English favorite, and that is a cup of tea. The English breakfast dates back years and usually includes the likes of hash browns, sausages, eggs, bacon, mushrooms, black pudding, tomatoes, beans and toast.
Wow, we are hungry just thinking about it!
Whilst most English people don’t eat this on a regular basis, i.e. each morning. It is more of a luxury that is left for weekend mornings or during vacations.
The side splitting, gut-busting meal will have you full and content until tea-time!
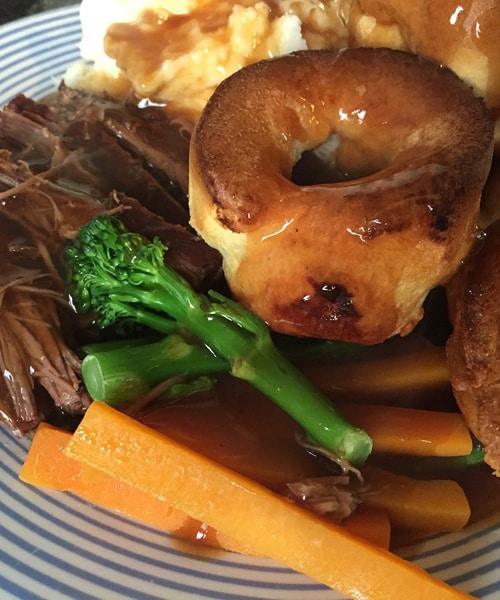
Still a very big tradition in England is families sitting down to dinner on a Sunday to be presented with a Sunday roast and all the trimmings. Whether its chicken, pork, beef or lamb this English food culture is a way of bringing all the family together at the end of the week, and before the new week commences.
A general Sunday roast will consist of Yorkshire pudding, plenty of vegetables, stuffing balls, pigs in blankets (bacon wrapped around sausages) and lashings of thick gravy.
As the years have moved on family sit downs have become fewer and the Sunday roast in some areas has spilled over to other weekdays, but the concept of the Sunday roast is still strong and a firm English tradition.
This is a wildcard entry as it isn’t a meal but then again we are talking about English food culture on a general basis. The tradition for years in England has been an 11am break time where people pour themselves a nice hot cup of tea, with some biscuits on a plate.
Although the “elevens” break has slowly phased out from the War time era, the tea and biscuit break has probably become more and more popular in the country. Not only does it give people the opportunity for a good natter but they get to drink and eat at the same time, this is always a good point in English tradition!
Whether it’s a stroll down the Blackpool promenade or a visit to your local chip shop, this dish is served in different forms up and down the country. Fish and chips is one of England’s go-to foods and because there are so many fish and chip shops around each street corner, you aren’t going to need to walk too far before you bump into one.
The fish and chip dinner is usually deep fried chips with a battered piece of fish (usually cod). Back in the mid-20th century these would be served in newspaper to form a cone, but as time has gone on you tend to see them served in either conventional white paper or polystyrene boxes.
Best of all, fish and chip dinners are usually quite inexpensive and you can feed a family of four one night in the week for less than £10, and you can even have some left over!
Finally we come to our fifth and final English tradition which is bubble and squeak, and let me tell you we don’t get more English than this recipe. Now if you have a sensitive stomach the likelihood is that this will make you feel a little queasy.
This English tradition stemmed from the days during World War II when rations and restrictions to food were in place. Families wouldn’t dream of casting out leftovers when they could find ways to create completely new dishes that the family could then go on to eat the following day. However, some 70 years later and this dish is still seen around many homes across the UK.
Bubble and squeak is essentially the leftovers from your Sunday roast, so potato’s and vegetables constitute a large part of this dish. Usually they are mashed together and then fried in a frying pan, then served. If you have meat leftover you can also throw this into the mix but make sure that you dice it up into chunks.
So next time you head to England, don’t be afraid to ask for one of these authentic culture dishes and see what you make of them!

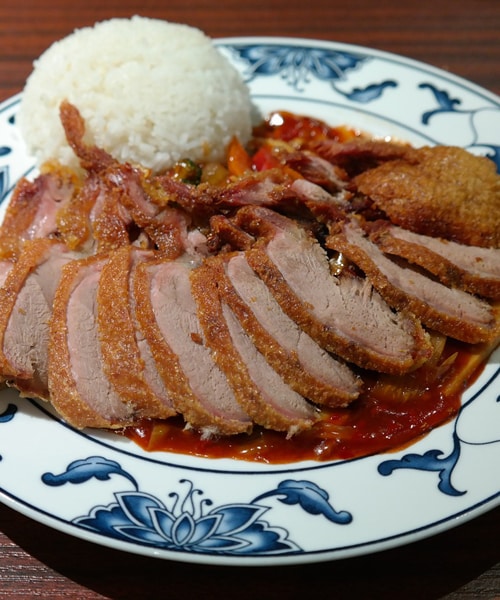
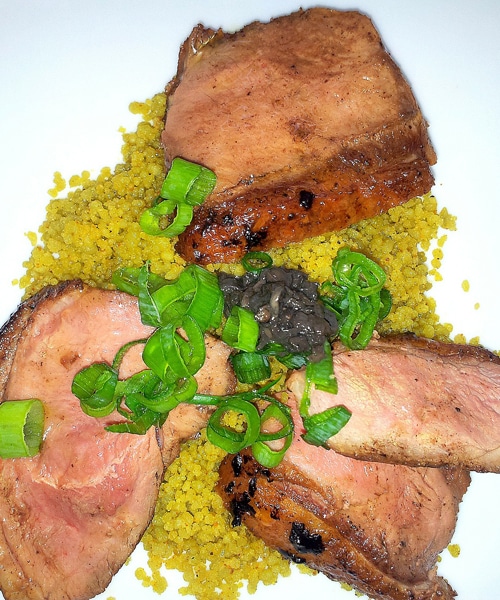
Duck breast is a very succulent and tender part of the duck and when it is cooked correctly, you won’t find many meats that offer this substantial exquisite taste. However when it comes to cooking duck breast it’s also all about how you prepare the breast, because both the cooking and preparation stages entwine together for that final tasty end result.
Of course, it all depends on how you want your duck cooking, whether you can hack rare duck, medium or whether you want it well-done. On the whole though the preparation takes 10 minutes and cooking a duck to well-done usually takes just under 20 minutes.
Firstly like always you are going to need to whack that oven up to around 220C in order to get it preheated to a level that is hot enough to introduce the duck breast to. By reheating the oven you are circulating the heat around the oven, so that it’s at its maximum temperature.
While the oven heats up we can start the preparation stage…
You should have sitting in front of you a couple of quality duck breasts, the first thing you need to do is remove them from any packaging and then using some kitchen towel or paper you need to pat any excess moistures of the breast. This will help the skin become crispy and you will only benefit from doing this step (that most people tend to forget about).
Once you have patted down the skin of the two duck breasts (or more if you are catering for a larger party), you need to take a sharp knife and then start scoring the skin. Usually scoring in diagonal markings down the length of the duck breast is the preferred method by many professional and amateur chefs.
Finally in the preparation stage you will want to season your duck breasts, a simple combination of salt and pepper will work well here, making sure that you divide the seasoning evenly across te duck breast and into those score markings.
Once you have completed this step we can move onto actually cooking the two duck breasts.
There is no need to heat up a frying pan or add oil with this method; you just want to place your duck breasts skin side down into a non-stick frying pan on a medium heat. Leave them in there for around 7 minutes when they should have adopted a nice golden brown colour. Switch the duck breasts to the other side and cook for about 30 seconds just to seal it in.
You can now turn off the heat and remove the duck breasts from the frying pan, ready to add them to the oven part of the cooking process.
A rack in a roasting tin is probably the best way to cook duck breasts, just so that the breasts are lying a few inches above the bottom of the tin away from the dripping fat. It also helps the underside cook much better if you leave them on a rack.
Put the two duck breasts skin side up this time, on the roasting rack. Remember your oven will be nicely heated now so it’s up to you to decide on how you want your duck cooking. If you want it well done then you are going to need to leave it in the oven for a good 18-20 minutes, however if you want it rare then 10 minutes should suffice.
If you are looking for a medium level of cooking then place the time somewhere in the middle at about 15 minutes.
The final part of cooking is to just let the duck breasts rest on the side of your kitchen counter for a further 10 minutes, all that this does is allows the juices to disperse inside the breast which will help keep the duck breasts tender but also moist to the pallet. What you don’t want is a dried out piece of meat that has no tenderness.
Once the duck breasts have been resting for 10 minutes you can now either cut them up for your guests or serve them as a whole breast, whatever you are looking to do is your choice at this stage.
Duck breast can be shredded up and used as part of a simple salad, and because orange seems to have the perfect complimenting touch to any duck dishes you should think about creating an Chinese inspired soft duck salad with radish, chicory and sweet orange.
The other alternative is to create a warmer dish such as a duck, potato and bacon main meal which brings together infusing flavours and warm winter tastes, perfect for those late winter nights when you want something healthy but quick to cook.

When it comes to food variations you aren’t going to find many places that come close to Vietnamese food, let alone beat it. From the more modern day dishes to the traditional native flavours from the past, the food in this part of the world really does provide an insight into the climate, and trade that has helped to inspire and guide Vietnamese cuisines.
Rice itself plays a main staple to the diet of Vietnamese people but because of the seacoast and routes inland, there is also a rich tradition of fresh fish that has helped influence stir fries and noodle dishes in the area.
In today’s post we wanted to look a little more closely at the main types of food you can experience in Vietnam, but foods that you can also try your hand at even if you don’t live in the country. Just like we make fresh pizzas in the UK or US, which are Italian based dishes, we can also experiment with Vietnamese cuisines right from our kitchens.
Duck is known as an expensive meat but you would be surprised at just how cheap it can be when sourced properly. In this recipe, we use duck, noodles and other inspirational Vietnamese ingredients to whip up a tasty and colourful lunchtime snack that can be prepared anywhere in the World.
The first thing you need to do is set your ovens to about 220C, so it is nicely preheated ready for the duck leg. Grab some five-spice and rub this all over the duck leg to season it and then place that onto a baking tray ready to roast in the oven for about 25 minutes.
Once the duck leg is in we can prepare the salad part of the dish. To do this take about 150g of rice noodles, and cook them in a boiling saucepan for a few minutes, drain them and then let the cool down. Sometimes running them under cold water does the trick, as you don’t want to be adding cold carrot and celery to hot rice noodles.
Once cooled down thrown in your celery, carrot, spring onions and cucumber to the noodles.
At this point your duck leg should be cooked so you will need to remove the duck meat from the bone and shred it. Place the salad onto a plate and then add the duck meat to the top of the salad.
No Vietnamese dish is complete without a nice dressing for the top and one of the most authentic dressings consist of hoisin sauce and soy sauce, mixed with roughly 2 tablespoons of water. That is all you need for a great dressing, and this can be drizzled evenly over the top of the duck meat and salad, ready to be served.
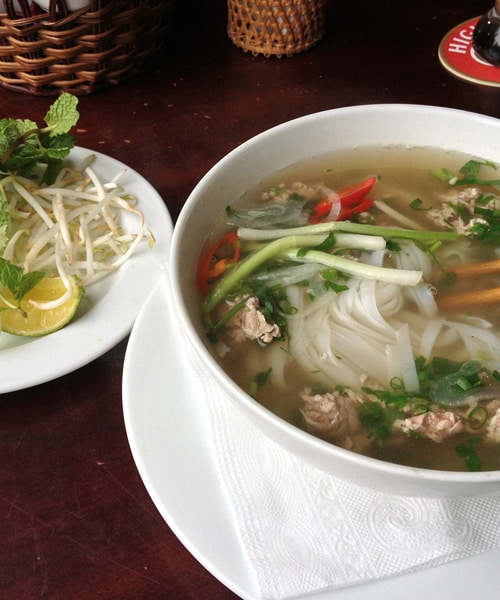
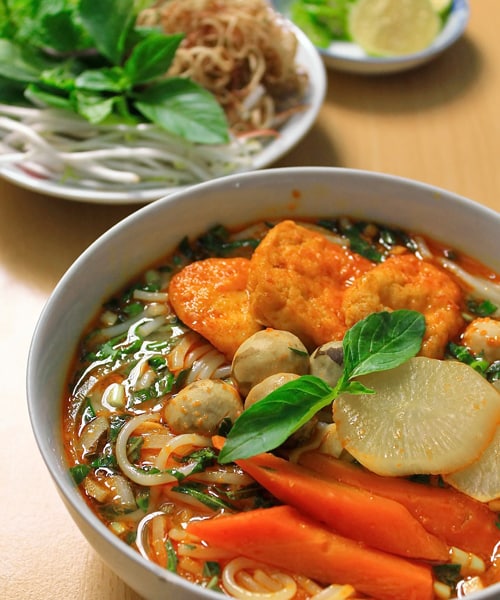
Our next dish to get your taste buds tingling is a soup that combines chillies, ginger, limes and mint into an exquisite recipe.
If you are looking for a quick lunchtime snack then this is your best bet. Take some coriander seeds and ginger and add them to a saucepan. Pour in some stock and bring the ingredients to a boil, and then let them simmer for 5 minutes before you take it off the heat and leave it to stand.
While this is left to stand cook some rice noodles in a separate saucepan for a few minutes, then drain them, but make sure you keep them warm.
Add some fish sauce, chilli and garlic to the stock saucepan and put that back onto the heat so it starts to boil. Once it hits boiling point reduce the heat and again let it simmer for a couple of minutes. Now you can add the fish to the saucepan, so place some prawns and salmon to the saucepan and let these cook until they are firm (usually takes around another 5 minutes on a gentle cook).
The final step to the soup is to add the spring onions, herbs and lime juice to the mixture which will give it that sour taste, that will combine so well with the hot chillies and garlic that we added to the saucepan earlier on.
Take the warm noodles and put them into a bowl, at the bottom, and then use a slotted spoon (with holes or slats in) to take out the prawns and salmon which you can lay across the top of the thin rice noodles. Pour the rest of the stock over the top of the bowl and then you will have these ready to serve up to your guests, or for you to eat.
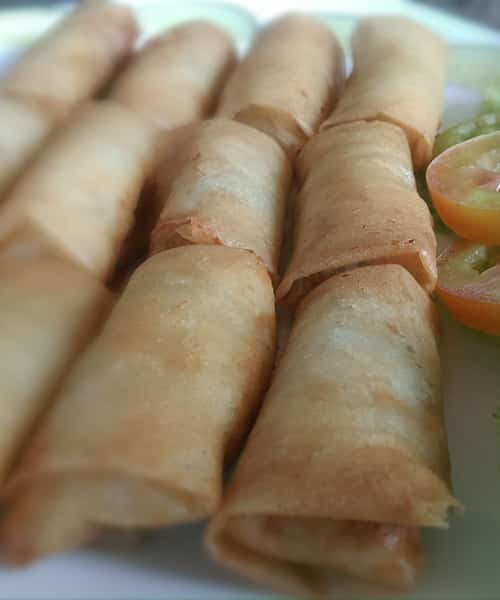
If you want to add a little something else to the dish then spring rolls are the perfect accompaniment to the hot and sour soup.

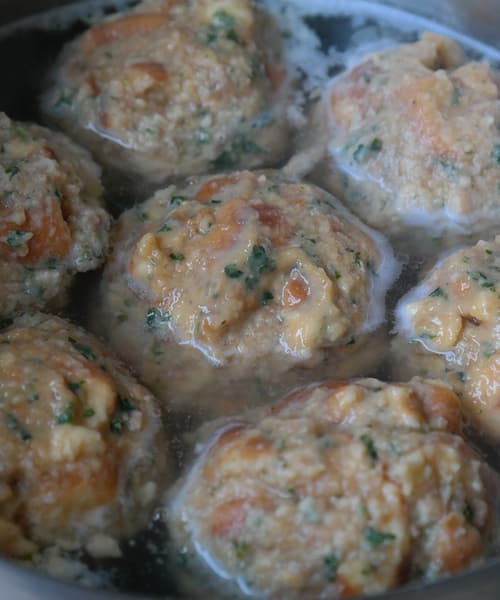
With the Winter weather starting to set in, and those dark cold nights creeping up on us, we all enjoy comfort foods to make us feel good inside. There is no better Wintery comfort food than a hot dumping stew with the meat of your choice either, and for today’s article we wanted to share our top secret beef and dumpling stew focusing on how to get the perfect dumplings.
For beginners, dumplings never really come out as expected they are either too big, too small, or they just end up crumbling into pieces as soon as they hit the moisture of the stew. There are however a few tips that we can share with you today in order to impress your dinner guests and even yourself when you come to sculpting a dumpling stew.
So get your pans at the ready and let’s get cooking!
You will need 5 main ingredients for the mixture and they are:
That really is all you need to make the perfect dumplings, it’s the process of creating them that tends to fool people, so before we begin talking about the rest of the stew let’s talk you through the dumpling stage first.
Take the 125g of plain flour, and then grab yourself a sieve as you will want to sift the flour through this into a bowl so the flour doesn’t contain any unnecessary bumps or lumps. Once you have done this at a pinch salt to the flour, along with that teaspoon of baking powder.
Take 60g of suet and add this to the mixture and just bring all those ingredients together before you add the final ingredient of water. Add the water to the mixture slowly, you don’t want to overdo it or you will ruin it. What you are looking for at this stage is enough water to make a thick dough, that’s all.
Once you are happy with the dough it’s now time to separate that big dough ball into separate small balls that will form our dumplings for the stew. To do this you need a little extra plain flour, making sure that you flour up your hands as well. Roll spoonful’s of the dough into about 8 smaller sized dough balls (or 10-12 if you want smaller dough balls).
Usually at this stage of proceedings your beef stew has been cooking for a few hours so that the meat becomes tender to the taste. You will have taken a large saucepan and added beef, garlic, vegetables, wine, stock and herbs into the mix, along with some salt, pepper, balsamic vinegar and Worcestershire sauce for a nice kick.
The next stage is to simply take each of the prepared dough balls from the above step and simply lay them on top of the stew. It’s important not to just dunk them under the broth here, you want to rest them lightly across the top and around the edges of the bowl, leaving enough space to cover the stew with a lid.
There is a tip we can offer here though, if you like golden bronzed tops to your dumplings with a slight crunch, then don’t put a lid on the stew, just return it to the oven as it is.
At this point it takes a further 20 minutes for the dumplings to cook and what you need to look out for is a few things. A cooked dumpling will firstly be tender but you will also notice that the size of the dumplings have expanded during that 20 minute cooking phase. This is why when you come to rolling out your dough balls you need to make sure that you roll them smaller because they will swell to a larger size as they cook.
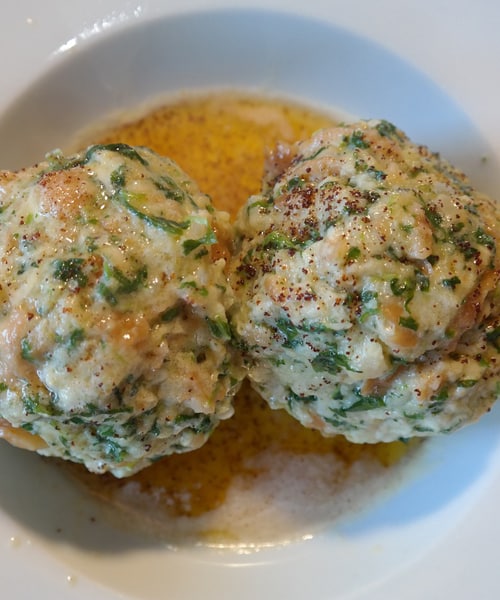
The stew and dumplings have now been cooked and the best way to serve this Wintery dish is one of two ways, you can either serve the stew and the dumplings together for your guests or you can add a side dish of light and creamy mash potato. Usually mash potato and stew dishes go hand in hand with each other, and your guests will love eating these three foods together.
To add the final touches to dish, and to really polish off the presentation of each plate you can sprinkle some finely chopped parsley across the top of the stew on each person’s plate.
There you have it, you have just cooked the perfect dumplings and you now know what they can be served with to make the perfect dinner for your guests.

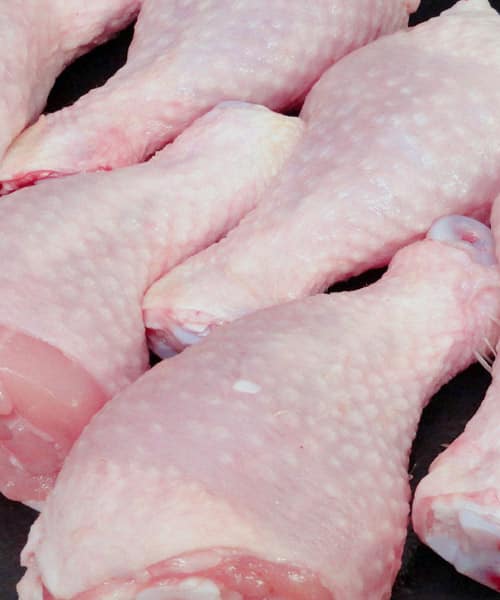
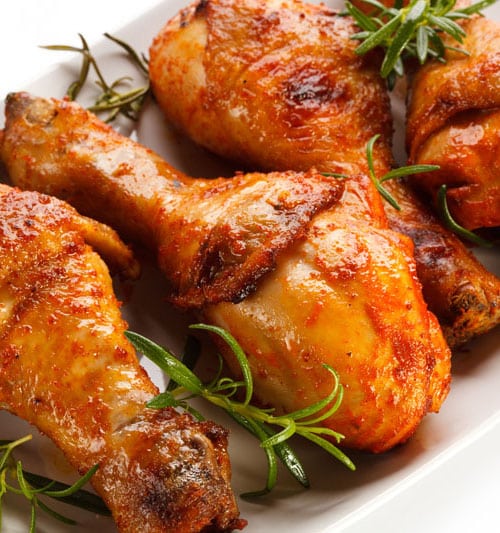
Chicken drumsticks are one of the nation’s go-to foods when looking for a quick snack because they are cheap to buy and can be used as part of many different dishes. You wouldn’t believe the amount of different ways that you can cook them and our advice is to try some of these methods out and experience new tastes that will tingle your taste buds.
One area that people struggle with is cooking times, and more often than not you will find that people overcook chicken through worry that they haven’t cooked it thoroughly. There are a few little tips to knowing when chicken has been cooked enough, and we will show you exactly what to look out for further down this article.
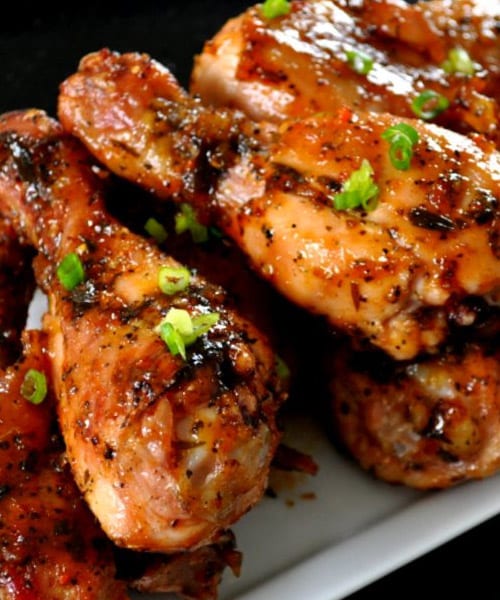
If you like spicy foods then you will love the Buffalo chicken drumstick recipe which adds some hot sauce and oil to the mix before you place them into a preheated oven.
To make these drumsticks all you need to do is add some hot sauce and oil to a small dish and then brush the mixture onto each chicken drumstick adding some black pepper over the top for that final touch.
To cook them is simple, all you need to do is add them to a wire rack and cook them on each side for about 15 minutes. As the sauce can be quite messy and sticky we suggest that you use foil underneath the rack to keep the grill area clean.
The second recipe on our menu is a slight twist to your traditional chicken drumsticks whereby we use a Cuban touch. To cook these you will want to put together your drumsticks with some chopped cilantro, olive oil, cumin, garlic, oregano, salt and some butternut squash into a pan to begin cooking.
Once they have begun cooking pour over ¼ cup of orange juice and then mix this in well so everything is covered nicely.
Put the pan into the oven for 30 minutes, rotating the ingredients after 15 minutes, and then with any leftover cilantro mixture, drizzle over before you serve.
This one happens to be the ideal party food for guests who want to treat themselves to some irresistible fried drumsticks, cooked in the oven rather than deep-fried. Just make sure your freezer is stocked up with chips to serve with these, as they are the ultimate compliment food.
To create the dish you will need to beat two large egg whites together in a dish, and add some mustard as you go. Usually honey-Dijon mustard is the preferred type to use for the best results. Mix some plain panko crumbs, ginger and garlic powder together in another separate bowl.
You should now have your egg white and mustard dish one side and the bread crumb bowl on the other side. Take each drumstick and roll them through the egg-white mixture, let the excess mixture drip off before you take the drumstick over to the crumb bowl and then coat the chicken drumstick thoroughly in this mixture to prepare it for cooking.
In a preheated oven of 475F lay the chicken drumsticks down and cook them for around 25 – 30 minutes until the crumb coating has turned a golden brown. There you have it, oven-fried chicken drumstick. Delicious!
These are a favorite whatever season you are in because of the way they are cooked. You will need to get your hands on a pound and half of red potatoes that you can place into a saucepan with enough water to cover them. Add some sea salt and then boil them up on a medium-low heat and let them simmer away for about 10-15 minutes.
Take your chicken drumsticks and brush them with 3 tablespoons of Dijonnaise, and then roll them in some bread crumbs (Panko is usually ideal if you have it).
Bake these in a preheated oven set at 450F, for half an hour, until the juices of the chicken run clear (this is when you know chicken is cooked). The breadcrumbs should have also changed to a nice crispy golden bronze colouring.
By now your potatoes will be ready so drain these and put them into a serving bowl. Add some celery, black pepper and some Dijonnaise to coat your vegetables, and go ahead and make some potato salad. The chicken can then be dipped into the potato salad mixture for a real lunchtime snack, or they are perfect for summer treats for your dinner guests.

Oven baked chicken drumsticks are usually the ideal cooking method but feel free to experiment for deep frying and even boiling as they will all provide different taste experiences that you may want to consider in the future.

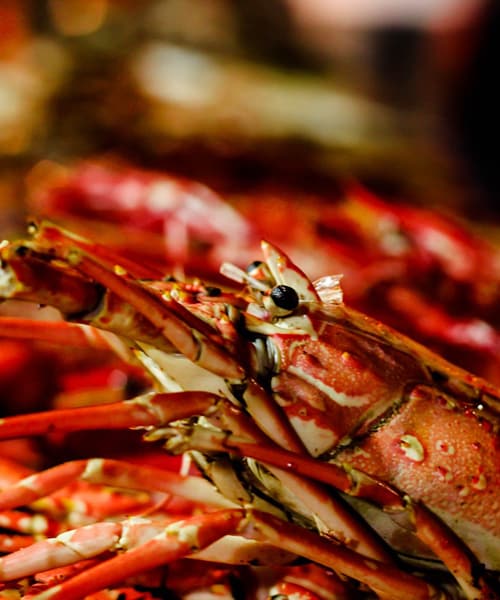
Lobster has always been referred to as a luxury delicacy across many parts of the world, and cooking them requires plenty of knowledge and skill. However, you would be surprised at just how easy cooking a lobster tail actually is, and the best part is that your guests don’t need to know any differently!
So instead of throwing away your lobster tail just take note of the following tips and ways of cooking them.
Like any type of food it’s important to prepare what your about to cook in order to get the very best results. If your lobster is still frozen then you will want to let them thaw out before you cook them. There is nothing wrong with cooking them frozen but because they are in a solid state you won’t benefit from a tender taste when they are finally cooked.
If you need to thaw them then the best method is to just transfer them from freezer to fridge and let them naturally thaw over the course of half a day to get the best results.
Now, depending on your chosen cooking method it will vary in the way that you remove the meat from the shell. For example, grilling the tails, you wjust need to cut the tail in half or you can leave it as whole. This is done because the shell will take the full intense heat protecting the meat. However for pan searing you are best to remove the meat completely from its shell casing and cook the meat on its own.
You will firstly need to preheat the grill to a medium heat, and while this starts to heat up you can prepare your lobster tails by cutting them each in half, right down the middle with a clean snap. Now you should visibly see the white meat, you now want to dress the meat with some butter (or oil it’s up to you), and then some seasoning such as pepper, salt or lemon.
Grilling lobster tails is usually very quick to do, and you only need to cook them for about 5 minutes on each side, with slightly more time spent on the shell side as it will need to penetrate through the shell to cook the meat.
You will know the tails are cooked by just looking at the meat itself, it should have changed in consistency from translucent to opaque. You can now take them off the grill and away from the heat.
Serve them up with a dressing or salad for the perfect appetiser.
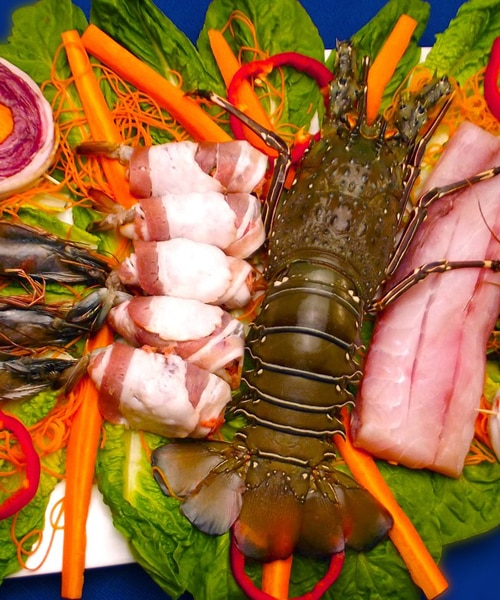
The second step is to boil your lobster which is usually the more popular option out of the ones that we are going to talk you through today. For boiling, you can leave the tails intact as they will cook better, and then you can scrape the meat out after they have cooked through. The shell is also said to maximise the flavour of the meat.
Get yourself a large saucepan and then bring some water to the boil, but add some salt first (you can add between 1 and 2 tablespoons). When the water is boiling just add the tails to the pan and then reduce the boil to a gentle simmer, and take into account that 1 ounce of tail minute equates to 1 minute of cooking time.
Many people tend to overcook lobster tails, and then the meat becomes dry and tough to eat. We are looking for tender here.
As soon as they have cooked take them out and let them cool down before you begin to crack the shells open. Just be sure you don’t break apart the lobster meat at this stage.
Pan searing is quick and adds a lot of flavour to your lobster tails, but first you need to gently remove the meat from the shell to begin cooking the meat, you can do this by cutting the tail down the middle lengthwise but make sure you don’t cut the meat in half at the same time.
Once you have done this add some butter to a pan and bring it up to a medium heat, then add the meat to the pan cooking each side for a minimum of around 3 minutes. You can add some seasoning such as coarse salt, pepper and lemon juice as it cooks away in the pan, or you can add these at the end.
Once the meat has turned opaque and it no longer in a translucent state you know that your meat is well cooked and then is ready to be served up to your dinner guests.


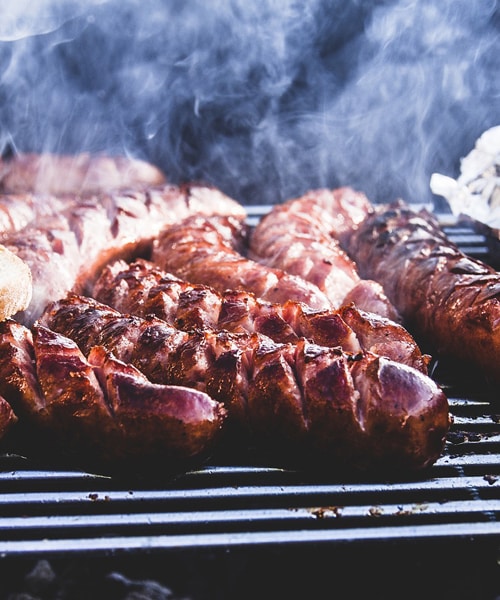
As we approach the cold months of winter there is no better comfort food on the menu than a slow-cooked beef brisket, and even for the amateur chefs amongst us this specific recipe is one of the easiest to do. Once you have finished you will also have a mouth-watering meal that even Gordon Ramsay would be proud of, so we are about to take you through the best way to cook yourself the perfect brisket to impress your dinner guests, family, or partners.
First of all you will need to have a slow cooker handy and if you don’t have one of these then I suggest you invest in one, not just for this recipe but for many others that you can do in a slow cooker. Besides, these days slow cookers are relatively cheap in the grand scheme of things.
The very first steps in creating this mouth-watering dish is getting your ingredients together. So start rooting through your cupboards now and look for the following:
Once you have these all together on your kitchen side you need to start preparing your work station, and then get a deep sauté pan on the heat. Place the heat to about a medium level and add a tablespoon of olive oil to it.
Add the onions to the pan after a few minutes of letting the oil heat up, but keep stirring the onions around until you see them caramelise. It usually takes about 20 minutes on a medium heat for onion to adopt this stage of the process.
Once done take the brisket and just pat it dry of any excess moisture on the outside of it, this will help the seasoning stick to it. Add the salt and pepper and rub it all over the brisket covering every angle of it. We aren’t going to add it to the slow cooker just yet, we want to make the crust golden brown on the outside of the meat so grab another sauté pan and set that on a medium-to-high heat and just sear the brisket until you see that golden brown colour.
Now its time to add that into the slow-cooker, so place it inside of the cooker and then add those 6 chopped up garlic cloves to the cooker as well. The onions are now ready to also join the brisket so just pour the over the top of the brisket, then begin adding the other ingredients (the sauces, and the broth).
That is literally all the hard part done now, the rest of the cooking process is left with the slow cooker, so what you will need to do now is set the heat setting on the slow cooker to low, or its lowest setting if its numbered. Let the brisket cook for around 7 hours by which time it will be tender, turn the heat off and just let it sit for 20 minutes so that the juices all redistribute around the meat making it tender to eat and moist.
The great thing about a slow-cooker is that you can also leave it on a warm setting which is ideal if you want to cook up some potatoes and veg to add to the dish before you take the brisket out and serve it up.
As the brisket is whole you will need to either slice it up or shred it, whichever method is going to work best for you. As the brisket is tender it will be much easier to cut, you can then add these slices to individual plates and then pour across the juices and the onions as a garnishing to the beef brisket.
You can also easily reheat this kind of meat up without the worry of getting ill, to do this you just need to preheat the oven to 300F and then put the brisket along with juices into a baking dish that has a lid. Keep this in the oven for about an hour and you will have brisket that is ready to serve up again. This method is usually ideal if you have a large brisket that cannot be eaten in one-sitting, you just need to make sure that the left over brisket is stored in the refrigerator before you reheat it so that the meat doesn’t start to turn off.
There you go folks! Your perfect beef brisket!