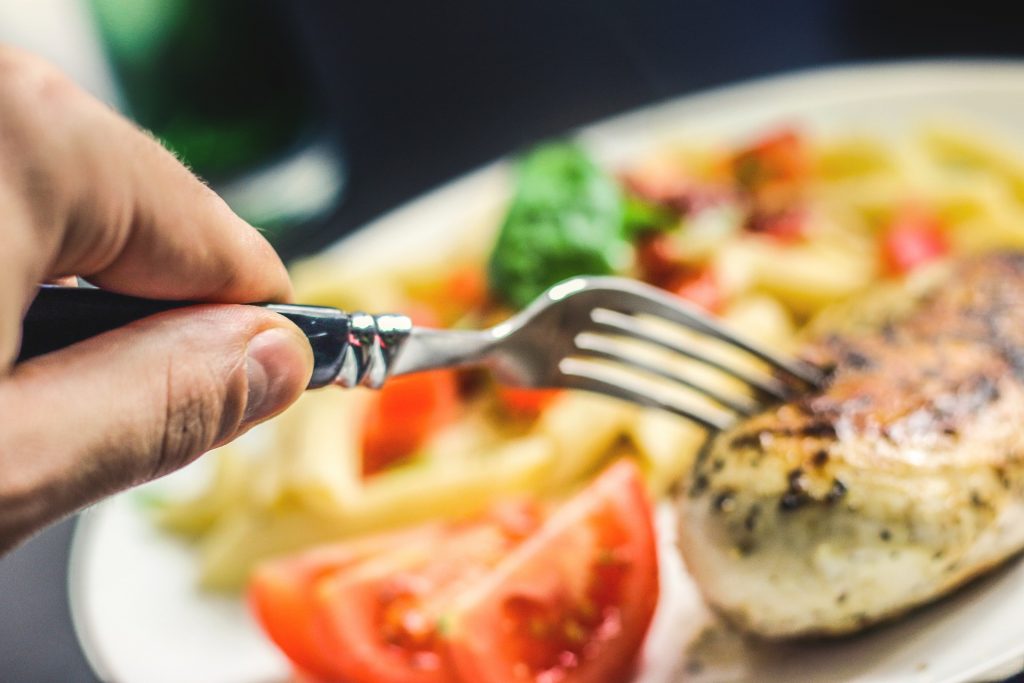
Chicken breast is the basis of many healthy recipes. Electric smoker chicken breast recipes can help elevate this healthy, yet humble, meat to greater flavor heights.
Smoked chicken can add a rustic flavor to just about any healthy dish. Using your electric smoker to smoke chicken breast is just another fantastic way to experiment with flavor. Smoking chicken is an excellent way to both cook and flavor your meat for a unique taste experience.
Electric Smoker Chicken Breast:
A Recipe For Deliciousness
Is chicken breast meat you want to smoke? Of course! It’s healthy and delicious.
But is it really worth the time and effort?
In a word: yes.
Where Can I Use Electric Smoker Chicken Breast?
While you could easily eat smoked chicken breast on its own, consider some of the other things you can make with it. The smoked chicken breast would add some great flavor to your lunchtime salad or sandwich.
Try a unique spin on chicken soup by using smoked chicken. Or how about a fusion mashup with smoked chicken tacos?
The possibilities are endless!
The Problems With Chicken Breast
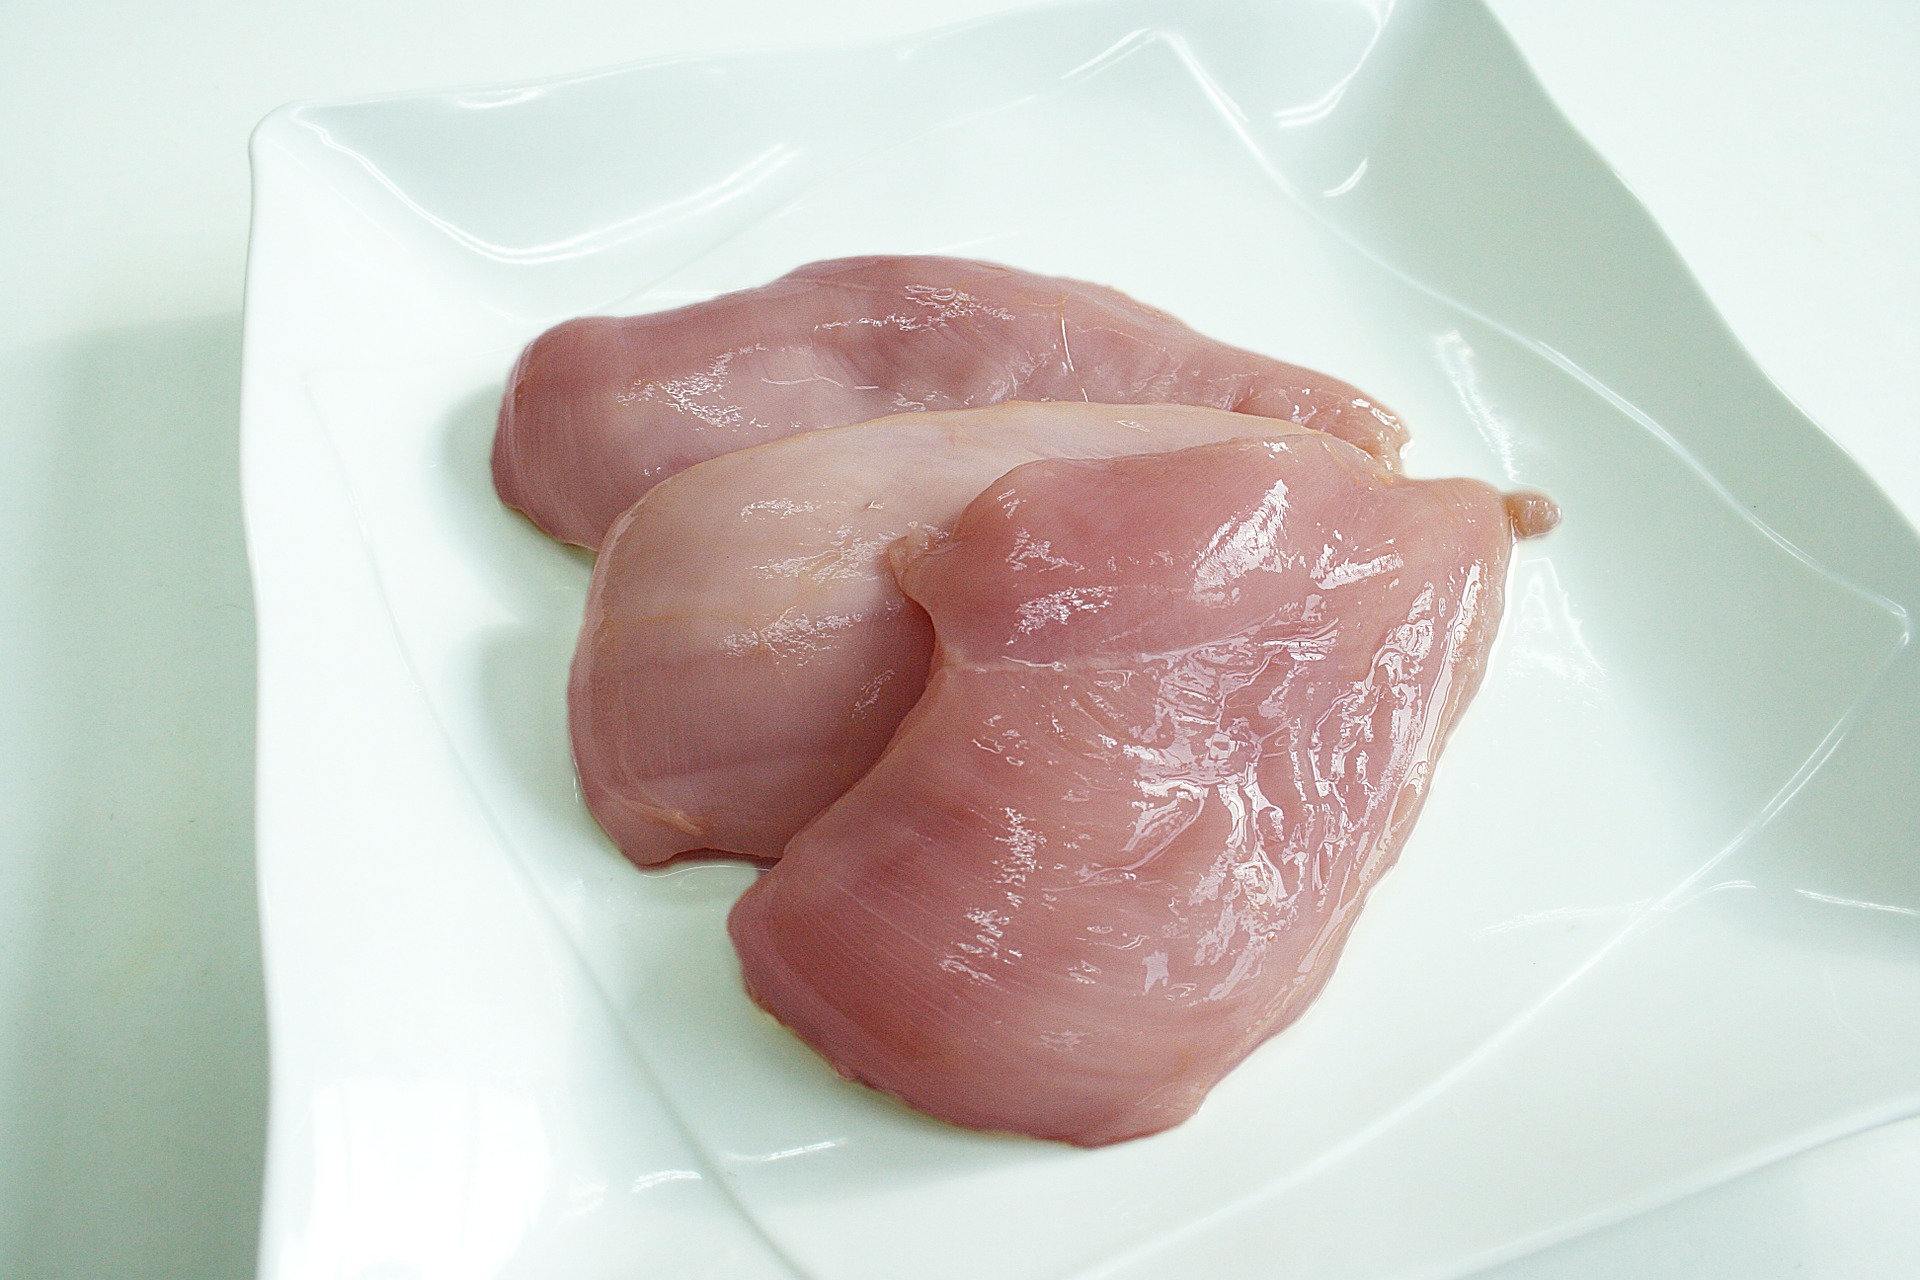
Image by pixabay
The trouble with chicken breast is that it is very easy to screw up. Chicken breast has very little to no fat. While this makes it a great source of lean protein, this leanness makes it not as flavorful as more fatty cuts of chicken.
Fat also melts to lubricate the meat while it cooks. Without fat, lean cuts like chicken breast tend to get dry when cooked.
This dry meat problem can get even worse the longer you cook your meat. To safely cook at low temperatures as you would with electric smoker chicken breast, you need hours.
Not adequately preparing your electric smoker, chicken breast can leave you with a tasteless, dry piece of meat.
Electric Smoker Chicken Breast:
Things To Consider
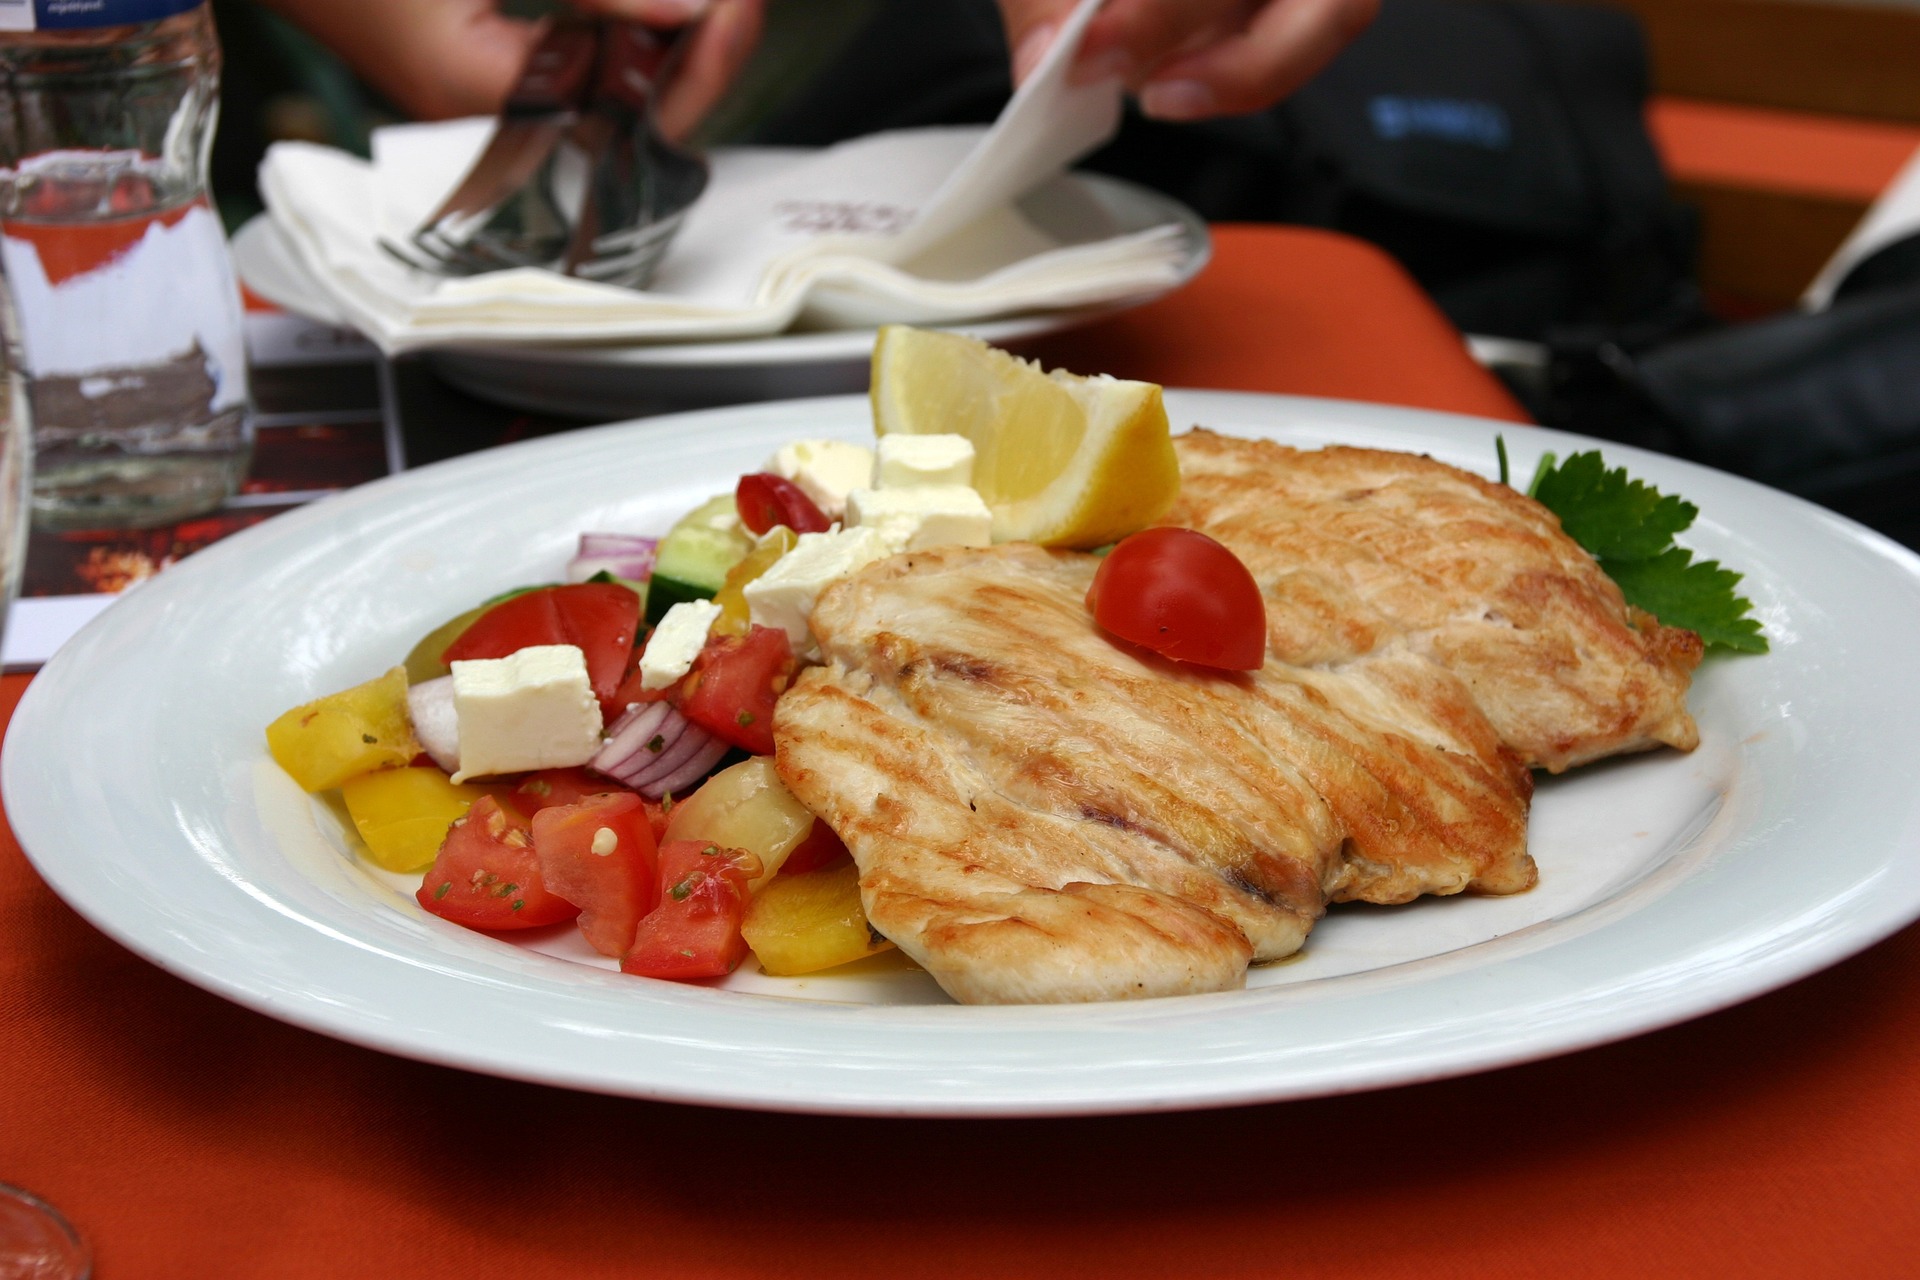
Image by pixabay
Before you start researching electric smoker chicken breast recipes, let’s go over what you need to know about smoking chicken breast in an electric smoker.
All About Chicken Breasts
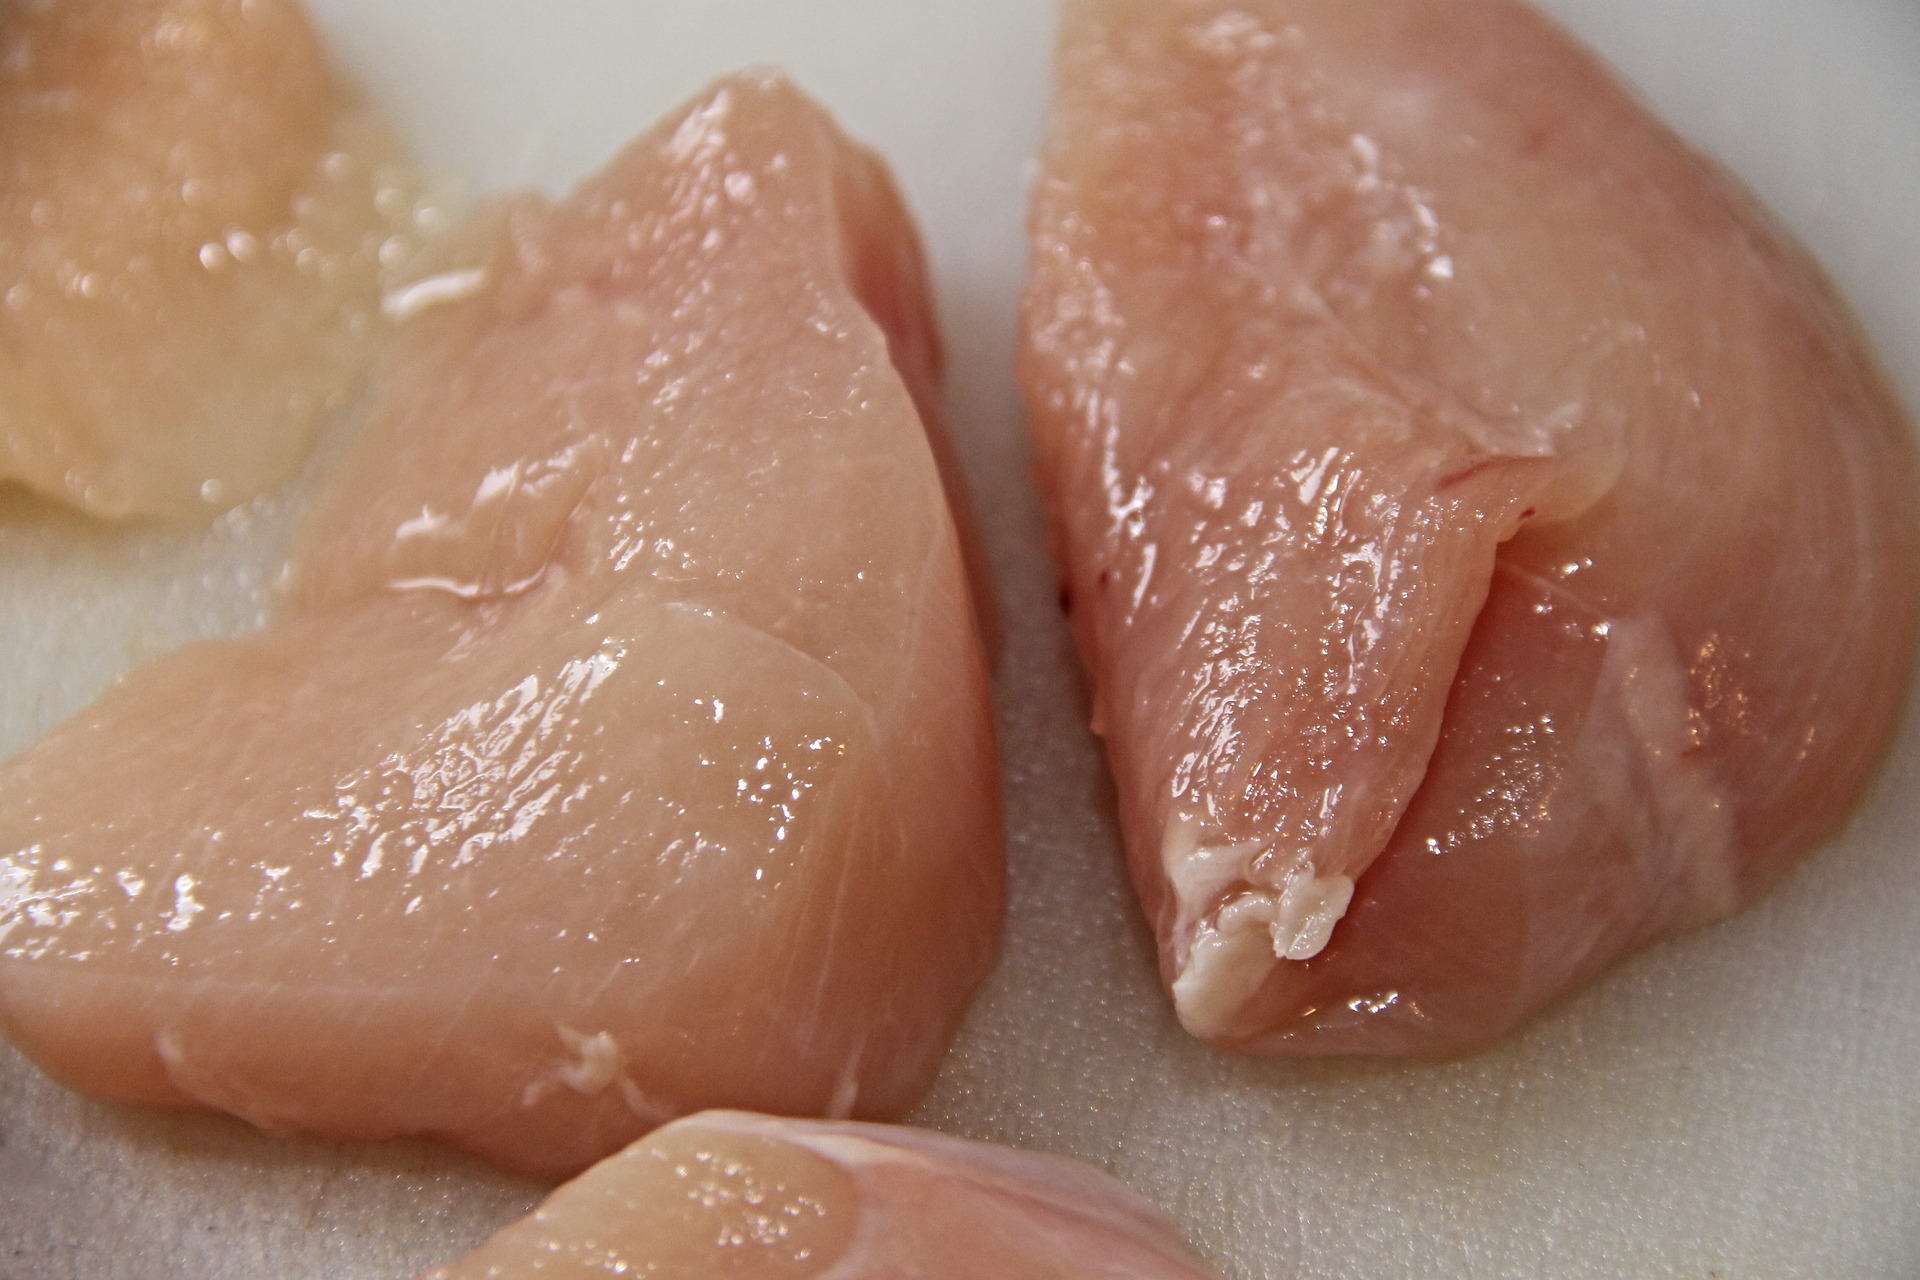
Image by pixabay
When it comes to chicken breast, you have several options to choose from. Depending on what type of chicken breast you select will help determine what kind of preparation you need for your electric smoker chicken breast.
Got A Bone To Pick
Chicken breasts typically come in two forms: bone-in or boneless. The bone-in version usually comes with the rib bones attached. The boneless version has the ribs removed.
When cooking chicken breast, the rib bones in a bone-in chicken breast act as insulation. It can help keep the chicken moister over extended periods of cooking.
However, since the boneless chicken breasts do not have this insulation, these chicken breasts are more prone to drying out.
Taste Is Skin Deep
Prepared chicken breasts at the meat counter may or may not have skin. Bone-in chicken breasts are more likely to have the skin intact. Meanwhile, boneless chicken breasts typically have the skin removed.
Just like with chicken bones, chicken skin adds a layer of protection. During cooking the fat in the skin melts, basting the meat underneath and helping to keep it moist.
The skinless chicken breast does not have this type of protection and can get tough during the cooking process, if not prepared correctly.
Beyond The Breast

Image by pexels
While we’re talking mostly about electric smoker chicken breast here, remember that most of the techniques we cover will work for just about any kind of smoked chicken recipe.
If you’re not a fan of breast meat, try smoking dark meat. Like chicken breast, you can choose to smoke dark meat either bone-in or boneless, with the skin on or off.
For a real treat, try smoking a whole chicken! You can try smoking it intact or use a technique called spatchcocking. Spatchcocking takes out the backbone to let the bird lay flat. That results in a chicken that cooks evenly with lots of skin exposed.
Brine
Brining is an integral part of preparing any meat for smoking. However, it’s even more critical for chicken breast due to how lean the meat is.
Moisture And Flavor
Brining does two important things for smoked chicken breast. The first thing it does is add moisture. With little to no fat on the meat, chicken breast can get dry during cooking.
The brining process helps the meat retain moisture during the cooking process. The salt in the brine denatures some of the protein in the meat, allowing it to hold onto more moisture. If the meat were not salted, the moisture would escape during cooking.
Of course, the salt in the brine also adds flavor. Not only can salt add its own flavor to the chicken, but it can also help deliver other flavorings in the brine.
Dry Or Wet
There are two main types of brine you can use for electric smoker chicken breast. A wet brine is a salt and other flavorings dissolved in water. A dry brine is salt with other dry seasonings, sprinkled heavily onto the chicken.
Whether you choose a wet or a dry brine is up to you. Both methods can deliver excellent results.
Wet brines typically take longer, several hours and up to a day or so, to work its magic. Conversely, dry brines are easy to put together and take only a few hours in the refrigerator to work.
Fattening It Up
Chicken breast is popular as a lean source of protein. But when you’re making electric smoker chicken breast, a little bit of fat can go a long way toward keeping your chicken breast moist and tasty.
There are two easy ways to add some fat to your electric smoker chicken breast: bard and inject.
Bacon Bard
The first is to bard, or wrap, your chicken breast in a slice of flavorful fatty meat, like bacon, as in this maple smoked bacon-wrapped chicken breast recipe.
As the chicken smokes, the fat from the bacon melts and bastes the chicken, much in the same way chicken skin would, but even tastier.
Shot Of Flavor
Another way to add fat to a chicken breast is to inject it with flavor, literally. Using a meat injector marinates the meat from the inside out.
Using a flavorful fat, like infused olive oil or even butter, can help amp up the fat and flavor in your electric smoker chicken breast recipe.
Mind Your Smoke
With an electric smoker chicken breast, smoke is also a flavoring agent as it’s a cooking method. Choosing what type of wood you use is essential when you’re making an electric smoker chicken breast.
Fruit

Image by pixabay
Fruit woods are a popular choice for using with smoked chicken as they impart a sweet, fruity flavor to the meat. Cherry and apple are two very popular kinds of wood.
Hardwoods
If you want to go beyond fruity flavors, there are other smoking woods to choose from. Maple is a sweet wood and pairs well with chicken breast. Hickory and mesquite are also popular, and pair well with Southern and Southwestern-inspired brines and marinades.
Step By Step: Electric Smoker Chicken Breast Recipe
Image by pexels
Now that we know what goes into an excellent smoked chicken breast recipe, it’s time to try our hand at it! This recipe is adapted from Fox Valley Foodie’s bacon wrapped smoked chicken breast recipe.
Gather Your Ingredients
For this recipe, you will need:
- 6 chicken breasts, boneless and skinless
- 12 thin strips of bacon
- 3 chunks of your favorite hardwood
- 4 cups water
- 1/4 cup each of kosher salt and brown sugar
- 4 crushed garlic cloves
- 1 teaspoon peppercorns
Prepare Your Brine
First, you need to brine your chicken. Prepare your brine by heating one cup of water and thoroughly dissolving the salt and sugar.
In a large bowl, add the salt and sugar mixture, as well as the remaining cups of water, garlic, and peppercorns. Leave the brine until it reaches room temperature.
Add the chicken breasts, using a plate to weight the chicken down if necessary to ensure it is properly submerged.
Alternatively, you can place the chicken and brine in a gallon sized, zip top bag. Be sure to remove all the air to ensure proper coverage.
Put the bowl in the refrigerator. Leave the chicken to rest in the brine for two hours.
Prep Your Chicken
Remove the chicken from the brine, rinsing under cold water to remove any excess salt. Pat the chicken dry.
Wrap each chicken breast in bacon, securing with toothpicks.
Prep Your Smoker
Preheat your smoker to 275-degrees Fahrenheit and add the smoking wood, per your manufacturer’s instructions.
Smoke It
Once your smoker is preheated, add your chicken breasts to your electric smoker. Smoke your chicken breasts until the chicken reaches 165-degrees Fahrenheit on an instant-read thermometer.
Remove from the smoker and let rest for about 10 minutes before eating.
Serve It Up
Image by pexels
Once rested, you can eat your electric smoker chicken breast just as you would other chicken. Try pairing it with some mashed potatoes and roasted vegetables for an awesome, healthy meal.
But that’s not all you can do!
If you love pulled pork, try using your electric smoker chicken breast in this smoked pulled chicken sandwich as a healthier alternative.
Another sandwich worth trying is this great chicken club sandwich — your electric smoker chicken breast is sure to sing as the star in this club.
For something truly one of a kind, substitute your electric smoked chicken breast for regular chicken in this southwest egg roll recipe. It’s an appetizer your guests will be sure to talk about for months to come.
Electric Smoker Chicken Breast: The Breakdown
Having an electric smoker opens the door to a wide array of different smoked foods. Smoking your own chicken breast on your electric smoker helps to add some added depth to this healthy, but sometimes bland, meat.
Whether you eat your electric smoker chicken breast straight from the smoker or add it to some of your recipes for a flavorful protein boost, this is a great meat to have in your smoking repertoire.
How do you smoke your chicken breast? And how do you eat it? Tell us about it in the comments!
Are you wondering how to smoke a brisket in an electric smoker? Who doesn’t love a good brisket? Everything from the juicy, tender meat to the flavorful bark is irresistible. It seems like something that only a professional could pull off correctly.
But that isn’t true because now you can achieve this healthy and delicious meal at home. Learning how to smoke a brisket in an electric smoker is incredibly easy. Your friends are going to think you’re a pitmaster. You’ll think so too when you taste your creation.
However, there are a few simple steps you need to take when learning how to smoke a brisket in an electric smoker. The first thing you need to do is get the right meat and a quality smoker.
You see, the right cut of meat is going to give you an extraordinary amount of flavor and you’ll hardly need any seasonings. Using an electric smoker will give you so much more freedom than basically any other smoker on the market.
Before you get started, there are a few simple steps you need to take. Before you know it, you’ll have a brisket that tastes just as good as your local barbecue.
The Perks Of An Electric Smoker

Image via Pixabay
First of all, you might be wondering, why we are specifically focusing on an electric smoker. Well, the truth is, if you’re learning how to smoke meats, it is the most straightforward machine on the market.
Even if you have been using smokers for years, you’ll be surprised at how easy they are to control in comparison to many others. That will make learning how to smoke a brisket in an electric smoker the most straightforward option out there.
Talk about convenient.
Propane and charcoal smokers have the risk of running out of fuel during the smoking process. Charcoal smokers are especially challenging to control because you need to refresh the coals frequently.
The more you open the smoker to restore the fuel, the more heat you will lose in the process. That can lead to temperature spikes and drops which will seriously affect the time it takes to make your brisket. It may even affect the quality of your final product.
Electric smokers have simple settings and will control the temperature for you. That will lead to a quicker dinner and more reliable final product.
Additionally, they are relatively energy efficient and use cleaner energy than both coal or propane. When using an electric smoker, you don’t have to worry about chemical contamination like you would with any other smoker.
Image via Pixabay
What you should know about using an electric smoker
As we mentioned before, an electric smoker is incredibly straightforward and easy to use. Most models include an on/off switch or pushbutton start.
They also include temperature controls that range from 100 to 275 degrees, although the range will depend on the model. It might not seem like a wide range in comparison to an oven, but that’s the point. It’s the ideal way to learn how to smoke a brisket in an electric smoker at a low temperature.
When smoking any meat, low and slow is the way to go. It will give you a perfectly tender and juicy meat that is to die for.
Additionally, the walls are insulated, which will maximize temperature retention. They include a side wood chip loader, removable drip tray, and adjustable dampers. All of those features will enable you to achieve a marvelous flavor.
To tell the truth, there isn’t much to the whole process. That’s the beauty behind learning how to smoke a brisket in an electric smoker.
How to Smoke a Brisket in an Electric Smoker like a Pro
When it comes to learning how to smoke a brisket in an electric smoker there are only a few things you need to keep in mind. The cut and quality of the meat are the most crucial factors of all.
Next, you will need to find the perfect flavoring method, which can be accomplished in several ways. Keep in mind that it isn’t going to take much, but the execution needs to be done flawlessly. However, you’ll be happy to know that’s easy to accomplish.
Picking and prepping your brisket
Alright, time to get to the meat of this smoking business.
Picking the right cut of meat is essential to making the perfect brisket. No matter what meat you happen to be smoking, you should pick the best on the market, whether it’s ham, sirloin, ribs, or brisket.
If you’re going to take hours upon end to make a meal, you should drop a little extra cash to get the best cut.
According to many experienced smokers, you want the “packers cut.” It’s a sizeable two-muscle cut with a generous fat cap. They typically come at about 11 pounds.
The quality is crucial as well. You need a high-grade slab of meat, which usually means getting a Waygu or Prime brisket. They have excellent marbling that will boost the flavor, moisture, and tenderness of the final product.
Image via Pixabay
Tips for flavoring your brisket
The truth is, brisket is one of the most flavorful parts of a cow. It contains plenty of fat that will provide a delicious natural flavor. Plus, cows don’t have a gamey taste, so you won’t need to add much seasoning or brine the meat.
There are a lot of people who recommend injecting your meat with beef stock, bouillon, MSG, or seasonings. However, there’s no need for any of that.
Simple seasonings on the exterior of the meat are more than enough because the meat is already rich and delicious. Coarse ground salt, pepper, and finely ground garlic powder are the most common choices.
Although if you’re interested in adding a little boost to the flavor, the right wood chips are a fabulous addition. Most experienced smokers recommend oak if you are just learning how to smoke a brisket in an electric smoker.
Texas Style Brisket Recipe
Texas style brisket is a wonderful recipe if you are learning how to smoke a brisket in an electric smoker. But strap in because it’s going to take you a whopping 15-hours in total to cook this fantastic brisket.
It might seem high maintenance when you are just learning how to smoke a brisket in an electric smoker. However, it’s going to be well worth the wait. You merely need to plan your day correctly. But you’ll have plenty of time waiting around and you can use that time to accomplish lots of other things while you wait.
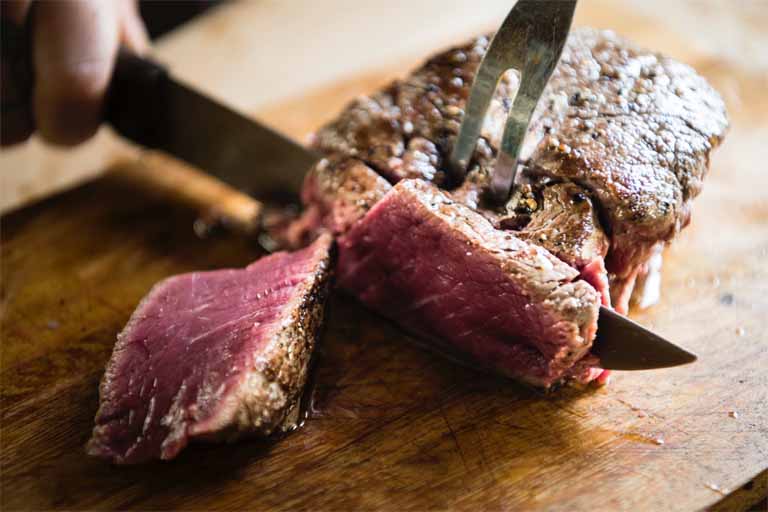
Image via Pexels
Ingredients and equipment
- An electric smoker
- Butcher paper
- Oak wood chips
- 12 to 14 pound whole packer brisket (plan for 1/2-pound per person and adjust the cooking time)
- 2 Tablespoons coarse Kosher salt
- 2 Tablespoons coarse ground black pepper
- 2 Tablespoons garlic powder
Prepping your tasty treat
- First off, you need to plan for the crowd you are serving. If it’s for a party, this recipe should feed about 24 to 28 people if you plan 1/2-pound per person. Although, leftovers are never a bad idea!
- Make sure the meat is room temperature, and the smoker is up 225-degree before getting started.
- Next, you will need to trim and season the brisket. Some people don’t bother trimming the meat because they want the additional flavor from the fat. They plan to cut away most of the fat after cooking, rather than before. But if you are planning to trim your brisket, there are some great guides to pull it off perfectly. As for the seasoning, just sprinkle it all over and rub it on so it sticks. Easy peasy.
Smoking up a storm
- Place the brisket in the smoker and add the wood chips to the appropriate pan. Allow it to smoke at 225 degrees for around 8 hours. The cooking time will depend on the size of the brisket, and this approximation is for the 12 to 14-pound brisket. The rule of thumb is, “when it’s done, it’s done.” But a more exact plan would be to shoot for 165 degrees.
- Once your brisket has reached 165 degrees, you can take it out and wrap it up like a present in butcher paper. Using butcher paper, rather than foil, will promote a deliciously caramelized bark. Just make sure you seal it up correctly and place it back into the smoker with the folded side down.
- Once you return it to the smoker, it can smoke for another 5 to 8 hours. Again, it will depend on the size of the brisket. You want the brisket to reach about 202 degrees.
Time to rest
- When it is finally done you can take it out but leave it wrapped up. Place it on a cutting board or baking pan so it can sit for at least an hour. That will allow the juices to settle and redistribute through the meat. Although, if you need it to stay hot for dinner, you can wrap your juicy package in a towel and place it in a cooler. That will keep it warm for up to six hours.
- After allowing your brisket to rest, it will be the perfect temperature slicing. You won’t lose all the tasty juices, but it will be tender enough to slice like a stick of butter.
- Slicing your brisket is a bit of a task. If you got a high-quality piece of brisket, there should be a flat portion and a point. The point will have two overlapping muscles running through the middle. Considering all of the above and the fact that you should cut against the grain for maximum tenderness, it can be tricky. Luckily, there are fantastic guides for slicing your brisket.
Smoking A Brisket Has Never Been So Tasty
Making brisket can take a bit of money and a big chunk of your time. The perk to learning how to smoke a brisket in an electric smoker is your ability to go hands-free.
All you need to do is prepare the meat and pop it in the smoker. Beyond that, there isn’t much you have to do. It’s all about cooking the brisket low and slow until it reaches the right temperature.
It will slice like butter and only requires simple seasonings to taste amazing. However, there are a few things to remember if you’re going to learn how to smoke a brisket in an electric smoker properly.
First of all, the temperature is everything.
Don’t worry about the meat when it’s in the smoker. You can check it when it gets to a certain point, but there is no need to flip the brisket continually. The more you open the smoker, the more the temperature will fluctuate. That could extend the cooking time tremendously.
Image via Pixabay
Also, remember that you can get creative. That could include experimenting with different flavors by using wood chips, seasonings, or sauces.
Although, you’d be surprised how many “purists” smoke the bare meat and roll their eyes at any other method.
However, we aren’t those people. Instead, we want to give you a delicious basic recipe while you learn to ropes. We would also love to hear any tips you have for learning how to smoke a brisket in an electric smoker in the comments!
Camping can be a lot of work, but cooking while you’re in the great outdoors doesn’t have to be. At least, not if you have a propane camping grill. I’ve been on a lot of camping trips. It’s one of the cheapest choices when you’re looking for a budget-friendly adventure. After countless trips, I know just how difficult it is to plan a real meal while you’re on the go. The choices normally come down to eating out, if that’s even an option, or rigging up a way to cook over a fire.
If you choose the latter, you will also need to bring firewood or buy some at the campground. Plus, you’re going to need to light the fire somehow, so you need to pack additional tools for that. Overall, it isn’t exactly a task that new campers look forward to. All around, it’s more trouble than it’s worth if you’re only setting up camp for the night until you continue the journey the next day. A propane camping grill is a perfect solution for cooking on the go or in the great outdoors.
And a propane grill is perfect for everything from camping to tailgating to picnics in the park. Even if you don’t plan many camping trips, you will have plenty of uses for a propane camping grill. No matter where your adventure takes you, cooking dinner on the road is going to be easier than ever before.
Picking the Perfect Propane Camping Grill
When you’re picking out a propane camping grill, there are a few things that you need to consider. It isn’t a complicated decision, and it just depends on your needs. First of all, you need to consider the group you will be cooking for on your trip. I’ve been on camping trips with just my husband or in large groups of over 30 people. In almost every situation, I have been in charge of cooking the food, at least for one meal.
Depending on the group you usually go camping with, you will need to consider the size of the cooking area. No matter what, a portable propane camping grill isn’t going to be very big. They need to be small for portability. Luckily, all of the options on this list are a great size for a family. A propane camping grill will give you all the convenience of an electric skillet, but you won’t have to rely on outlets. Therefore, you can take a propane camping grill anywhere and cook at any time.
Another thing to think about is the size of the propane bottle. Many propane camping grill models will not include a propane bottle. So when you are buying one, make sure that you get enough for the duration of your trip. If you plan to get a larger 5-pound bottle, you may also need to get a new hose to adapt it to your propane camping grill.
You should pick something with a removable drip tray, a lid lock, and preferably, a removable grill top. All of those features will make it easier to clean or pack on the go. Plus, campsites usually frown upon cleaning your dishes in a bathroom sink. So you need all the convenience you can get.
Gas vs. charcoal: The convenience showdown
You might be wondering why we are even focusing on a propane camping grill when charcoal grills are just as portable.
The thing is, charcoal grills can be more complicated to lug around. For one thing, they don’t always have a latch to keep the whole unit together.
Additionally, you’re also going to need enough charcoal to get you through your trip. You can buy it at most campgrounds or any nearby grocery store, but it’s a messy business. Furthermore, you’re going to have to light the charcoal, so you will need additional tools for that.
When it comes to a propane camping grill, you can usually start it with the push of a button. Plus, you can guarantee evenly distributed heat so that your food will cook evenly every time. When it comes to charcoal grilling, it can be difficult to ensure there won’t be a hot spot.
When it comes down to it, a propane camping grill is more convenient, but it isn’t your only option. It all comes down to personal preference.
How We Reviewed the Best Propane Camping Grill Selection
We want to make sure to give you reviews that are based on genuine customer experiences. Therefore, we made sure to base our ratings on Amazon customer reviews.
Our goal is to let you know the features of each model so that you can pick the right one for your camping needs. For that reason, we will include what Amazon customers loved most about each product.
Our overall goal is to give you a fantastic selection so that you can find the best propane camping grill for your big adventure.
Price to pay for convenience
Camping is the most affordable way to travel. It will allow you to go anywhere without having to drop a ton of money on good hotel rooms.
You certainly don’t want to save money by going to a dingy two-star motel that probably has bed bugs. Remember that you get what you pay for.
At least when you’re camping, you know who has been in your tent, unlike those stained mattresses or questionable comforters in seedy hotel rooms.
Who would have thought camping is the cleaner choice?
Anyway, cooking on your journey doesn’t have to be expensive. The price range on these propane grills is between $85 and $210.
It might seem a little pricey in the beginning, but they’re sturdy and will last for a long time. So this one-time purchase will get you through years of camping trips, as long as you take care of it and store it properly.
The Top 5 Propane Camp Grills
Cooking while you're camping will finally be simple. If you get a propane camping grill, all you have to do is press a button and make sure you have enough fuel. Honestly, it will be like cooking at home.
If you’re interested in convenient camping, these lightweight and portable camping grills are perfect. They’re easy to pack or store when you aren’t on the go.
Plus, you don’t only have to use them when you’re camping. You can use it on the back porch when you’re having a fun little barbeque or in the park for a cute picnic.
The possibilities are endless. So if you’re interested in getting a propane camping grill, take a look at these fantastic options!
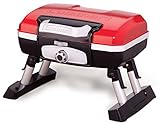
Cuisinart CGG-180T Petit Gourmet Portable Tabletop Gas Grill
The Cuisinart CGG-180T Petit Gourmet Portable Tabletop Gas Grill is incredibly convenient. It’s lightweight, with foldable legs, a lid latch, and a briefcase style carrying handle for the ultimate portability.
The 145-square inch grilling surface will give you enough space to cook food for about 8 people at a time. So it is perfect for a small group or a large family.
This propane camping grill has a stainless steel burner that evenly heats the porcelain-enameled grate. That, combined with the removable drip tray, will make it easy to clean up.
You can attach this unit to a small tank, which you will need to purchase separately. If you want to use it with a large 5-pound propane tank, you will also need to get the appropriate hose.
Coleman RoadTrip LXE Portable Gas Grill
If you’re interested in a standing model, the Coleman RoadTrip LXE Portable Gas Grill is fantastic. It has 285-square inches of grilling surface, which is double the grilling surface of the Cuisinart CGG-180T. The slide-out side tables will be convenient when you’re getting food off the grill.
The grill has a collapsible design that will fold down until it’s the size of a small rolling suitcase. It has a lid-lock, wheels, and a convenient handle.
Plus, it has double-burners and can use interchangeable cooktops. You can switch between grills, griddles, and stovetop burners, although the additional cooktops are sold separately. This model only comes with two porcelain-coated grilling grates.
You can start grilling at the touch of a button with the insta-start ignition for matchless lighting. Keep in mind that you will need to purchase the propane bottle separately.
Coleman 2000020947 Ppn Sportster Grill
Another fabulous standing model is the Coleman 2000020947 Ppn Sportster Grill. It has a fully collapsible design that will fold down to the size of a suitcase. It also has convenient wheels and a handle for portability and is an excellent size for compact storage.
Setup is simple with the lift and lock system. You’ll be able to count on your collapsible grill standing steady and secure until you’ve cleaned up and packed it away.
The Coleman 2000020947 Ppn Sportster grill has a 225-square inch porcelain-coated grilling grate. The grates and drip tray are both removable. Both removable features are the perfect combination to make grilling and cleanup more efficient than ever.
Additionally, this unit does not come with a propane bottle, so you will need to purchase it separately. However, it does include an insta-start ignition, so you will not require matches or a lighter to start up your grill.
Giantex Stainless Steel Tabletop Gas Grill
Giantex Portable Gas Grill with 2 Burner, Max. 20,000 BTU total,...
- 【Giantex Tabletop Grill】: Giantex 2-Burner stainless steel tabletop grill is built for the BBQ-grillers, Construct...
- 【Easy To Operate】: Two push-and-turn ignition burners for quick and easy start-ups. It offers 20,000 total BTUs and...
- 【Foldable Design】: Foldable legs and lockable lid for portable transport and storage. Also make it more easily...
If you are on the lookout for a highly portable propane camping grill, the Giantex Stainless Steel Tabletop Gas Grill is ideal. It has foldable legs and a lockable lid. The stainless steel design makes it durable enough for any camping trip.
This propane camping grill is built for secure storage, and the stainless steel handle will make it extremely portable. Each of the double-burners has twist-and-turn ignition knobs.
Additionally, the stainless steel grate offers plenty of cooking space for the whole family. You should keep in mind that the grate is not removable, so it might not be as easy to clean as other models. However, it does have a well-concealed grease trap that is removable and easy to wash.
One thing you should know about this grill is that there is some assembly required. But it comes with everything you need to put your propane camping grill together quickly.
Weber 50060001 Q1000 Liquid Propane Camping Grill
Weber Q1000 Liquid Propane Grill, Titanium
- One stainless steel burner produces 8500 BTU-per-hour to heat 189 square-inch total cooking area
- Porcelain-enameled cast-iron cooking grates and cast aluminum lid and body
- Fully assembled out of box. Dimensions - lid closed (inches): 14.5H x 27W x 16.5D inches
The Weber 50060001 Q1000 Liquid Propane Camping Grill is a fabulous choice for your great adventure. It has a single stainless steel burner and is incredibly small and portable.
This propane camping grill has a cast aluminum lid and body, and a porcelain-coated cast iron grilling grate. The grate gives your 189-square inches of cooking space.
It comes fully assembled and ready to go. Plus, the push-button ignition will make it easy to get started. Keep in mind that the directions recommend that you preheat the grill before you begin cooking.
Cooking in the Great Outdoors Has Never Been Easier
Cooking dinner when you’re camping doesn’t have to be hard. Although, it can feel like it if the only option is rigging something up over the fire. Packing a convenient propane camping grill will make whipping up your meals so much easier.
You won’t have to rely on hot dogs and smores on your next trip! They might be classics, but trust me, they can get old pretty quickly. It will be refreshing to make well-rounded meals, no matter where you are.
So on your next big adventure, get ready to cook breakfast, lunch, and dinner with ease. Not only will you be able to pack up the grill and toss it in the car, but cleanup will be a breeze.
If you have a favorite propane camping grill, we would love to hear all about it in the comment section below!
Featured Image via Pixabay
")
So, you want to know how to use an electric smoker, and you want to do it right the first time around? Good news! With a few easy steps, you'll be cooking up the greatest meals anybody in your family has ever had.
Is it possible to use an electric smoker the right way the first time around? Of course, it is! While you can wing it and hope for the best, a little education and some prep before you start cooking will go a long way towards a delicious smoked meal the first time out of the gate.
And because you're already researching this topic, you've got the education part covered. Let's get to it.
How to Use an Electric Smoker (the Right Way)
Before you turn on your electric smoker and slap some pork chops down on the grill, you need to understand a couple of key elements about electric smokers.
First off, electric smokers are simple to use. That's thanks to the digital control panel on the front of the smoker. Unlike gas and charcoal smokers, which require constant monitoring and fidgeting with temperatures, the electric smoker will self-regulate.
Next, you'll notice that there's a heating element, a water pan, a container for wood chips, a bunch of racks, and a drip pan. That's simple. The electric element heats up the wood chips which produce heat and smoke.
The water pan sits above the wood chips and blocks direct heat from scorching the food on the racks above. The water also adds moisture to the food and helps that delicious smoke absorb deep into it.
The wood chips
Here's where it gets interesting. Those who know how to use an electric smoker always source the best wood chips. That's because the wood determines the flavor of the food you're cooking, especially meats.
You'll never go wrong with an apple-flavored wood, but cherry, alder, and even oak add some awesome flavors to your food. We recommend FireStar Wood Chips for smokers, which offer a great assortment of wood chips that you can't go wrong with.
The seasoning
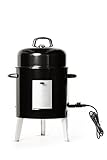
Masterbuilt 20078616 Electric Bullet Smoker, Black
- 395 sq. inches of cooking space on twoporcelain coated smoking racks
- 1,650 watt heating element for even, consistentsmoking up to 400 Degree
- Removable porcelain-coated wood chip tray,drip pan and water bowl
If you really want to know how to use an electric smoker and create great food right away, then look away from the smoker for a moment. Instead, look at the seasoning you're adding to your meat.
You want a beautiful, subtle yet flavorful seasoning that will complement the smoke flavors. You don't want to overpower the meat, nor do you want to waste money on flavorless garbage.
If you go with something like High Plains Spice Company Smokehouse Favorites, you'll hit all the right spots. These are made to compliment your smoker and create beautiful food.
Rub seasoning all over your meat and let it sit for a few hours in the fridge. Now you're ready to start cooking.
Step-by-Step Guide on How to Use an Electric Smoker
Are you ready? Because now you're going to learn how to use an electric smoker the right way. Once you do it, you'll never forget. T
hat makes you the maestro of family meals.
There are six very simple steps. Know these, and you'll know how to use an electric smoker. They are:
1
Set up the smoker2
Add wood chips and water3
Preheat the smoker4
Add food5
Monitor6
Remove food
How simple is that? Well, let's take a look and see.
1. Set up the smoker
Want to really know how to use an electric smoker? The secret is in how, and where, you set up your smoker.
You see, the great thing about electric smokers is that you can put them almost anywhere. Unlike gas or pellet smokers, they don't use an open flame, so fire risk is diminished. That's great if you live in an apartment or condo.
But even if you live in a house, you can still benefit from an electric smoker. Either way, you want to make sure that you use your smoker outdoors. Never use it indoors.
That can cause some problems during the colder months in the winter. Electric smokers are not as good at retaining heat as gas and pellet smokers, which means that in cold weather, your smoker will lose more heat. So if you use it during cold weather, keep it under some type of cover and out of the wind and snow.
The next thing you'll want to do is to "season" the smoker before you cook anything it. Do this by turning on the heat to regular (or medium) and let it sit like that for two hours. This will get rid of any fresh-from-the-factory smells that might interfere with your food.
Now you're ready for the next part.
2. Add wood chips and water
Those who know how to use an electric smoker usually add about four cups of wood chips to the wood chip pan. This will give you five to six hours of smoking.
One thing to remember is that whenever you add new woodchips to the smoker, it will bring down the internal temperature and prolong the cooking process, so make sure you fill it right the first time around.
Two gallons of water will be best if the pan is big enough to hold that much. If it's smaller than two gallons, try to fill it as much as possible, leaving an inch of space from the lip of the pan.
Don't use anything but warm water. Ignore all those blog posts about using apple juice or wine or beer. Only the water from those liquids evaporates anyway, so you're better off drinking that and using plain tap water in the water pan.
3. Preheat the smoker
This step is important.
You want to preheat your smoker to 225 degrees Fahrenheit. We don't recommend going much higher than that. Some smokers excel at 180 degrees, but those are limited to unique models like the Weber Kettle.
Don't put anything in the smoker until it has preheated. The great thing about knowing how to use an electric smoker is not having to wait long for it to preheat.
4. Add food
Now for the best part -- the food.
You're finally going to take all that meat you seasoned out of the fridge and place it on the racks in the smoker. Depending on what you're cooking, you'll need to place the food strategically.
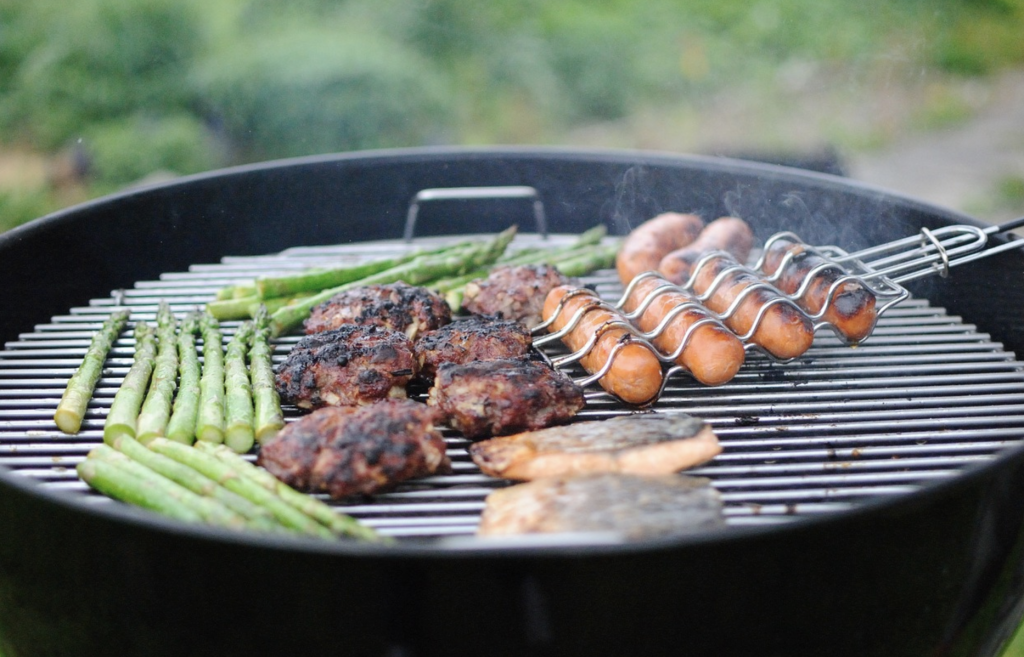
A good rule of thumb is that the bigger, or the greasier, the food, the lower it should go in the smoker. Veggies and fish will generally do fine on the upper racks. However, you'll also have to remember that all these different foods have different cooking times. Plan your placement carefully.
For instance, if you're cooking ribs and veggie skewers, leave at least one rack empty at the top of the smoker so you can place the veggies later on.
5. Monitor
Once you know how to use an electric smoker, you won't need to monitor your food so much. In fact, much like a slow cooker, you can practically start cooking in the morning, go to work, and come home to delicious supper waiting for you.
But the first time you use it, you'll want to monitor how it's going.
You can do this simply by looking at the control panel to see what the current internal temperature is, and by looking through the glass window to see the food inside. Remember that every time you open the door, you let heat and smoke escape and prolong the cooking process.
Many people buy a wireless cooking thermometer and stick it in the piece of meat. This way you can see what the internal temperature of the meat is. Just remember to stick it in the thickest, juiciest cut of meat you have.
6. Remove the food
Ah, finally! Your mouth is watering, and your neighborhood is filled with savory scents. Your food is ready!
Before you open the door, turn off the smoker. Then, open it up, and carefully remove the food. Let any meat sit in the open air for a good 10 to 15 minutes before eating. This will allow the internal temperature of the meat to stabilize. Now you're ready to eat!
Remember that you'll also want to clean your smoker once it has cooled down. It will take an hour or two to release all the heat. Once it's cool, remove the racks and the pans. Wash those in soapy water in the sink.
Take a damp cloth and wipe out any large chunks of food, then use a cloth and warm soapy water to wipe down the insides of the smoker. You can also use a bit of apple cider vinegar for cleaning, but we don't recommend using chemical cleaners.
Congrats! You now know how to use an electric smoker, and you nailed it the first time around!
We're proud of you, and your family can now enjoy the most delicious meats they've ever had.
There's nothing quite like smoking meats, and an electric smoker is one surefire way to get it right every time.
Do you have any original tips to share? Let us know in the comments!
There are over six different types of smokers that we recognize on the market, and no, we are not talking about tobacco smokers or vapers. We are referring to smokers that create flavor-filled, tasty barbecue! With so many models to choose from, the Masterbuilt 40 Electric Smoker pushed it’s a way to the top of the ranks.
You can purchase a wood smoker, charcoal smoker, gas smoker, and even a pellet smoker. And you may wonder why reviewers are saying that this electric smoker is the best. Maybe it is, perhaps it isn’t.
But what is a Masterbuilt 40 Electric Smoker?
What Is the Masterbuilt 40 Electric Smoker?
There are many things to consider when purchasing a smoker, including how it cooks the food, the cost, and even the fuel type. Electric smokers are more comfortable to use, and some models have high tech controls that allow you to monitor the food until it’s ready quickly.
But some electric smokers are notorious for losing flavor. So how does the Masterbuilt 40 Electric Smoker break that stigma?
Masterbuilt began to craft products in 1973, and since then, they’ve wanted to provide an excellent experience for customers to create awesome barbecue.
With their Masterbuilt 40 Electric Smoker, they brought something fun to try for tech-savvy, barbecue lovers. The electric smoker cut down on operational time but kept the quality of cooking in a new way for consumers to smoke their dishes.
Design
Like any other appliance, users connect the Masterbuilt 40 Electric Smoker into a power source with the plug and turn on the ignition. Then, the cook fills the aluminum plate under the grill grates with water and their herbs of choice. Semi-deep aluminum trays hold the flavor and moisture that will integrate with the food.
With any product, there are possibilities for improvements; and the electric smoker has one essential addition. The wood chip loader is usually a cylinder-shaped pullout near the bottom of the unit. With the wood chip loader, users can fill up on flavored wood chips that will add an extra touch.
Lastly, the residue tray holds importance, and some cooks will line this with aluminum foil for better usage. This tray also helps enhance the flavoring atmosphere of the box. The more you utilize good residue, the more your food rests in that goodness.
What’s inside
In the Masterbuilt 40 Electric Smoker, there are several grates to load on the pieces of food. Over time, the coated morsels will begin to smoke when the grill closes and the lock secures. Once everything is in place, the food is left alone, and users don’t need to mess with it.
For each unit, the temperature ranges from 100 degrees to 275 degrees Fahrenheit. The built-in vents adjust temperatures while cooking, so consumers aren’t entirely hands-on during cook time. Think of it as the more substantial, smokier, similar version of the crock pot; both machines cook food on their own.
Nonetheless, make sure the food inside is in the proper position before you close the door. You can control how much air comes out of the smoker, and some recipes call for more or less smoke. The smoker has a gauge, so set it and ensure no food comes out poorly done.
Top Designs and What Separates Them
While the Masterbuilt 40 Electric Smoker has a notable reputation, there are a few models from which to choose. Each model may serve a purpose that best suits a specific need. These models are both 40-inches and highly rated.
Currently, the Masterbuilt 20070512 is unavailable for purchase. According to Masterbuilt, the model eventually discontinued due to uneven heating problems. The other Masterbuilt 40 Electric Smokers display no immediate issues and are excellent quality overall.
For the other models, there are things to pay attention to concerning the different styles and features. Each one caters to cooking preferences and must-have features, and people who love their smoked barbecue distinguish which fits them best.
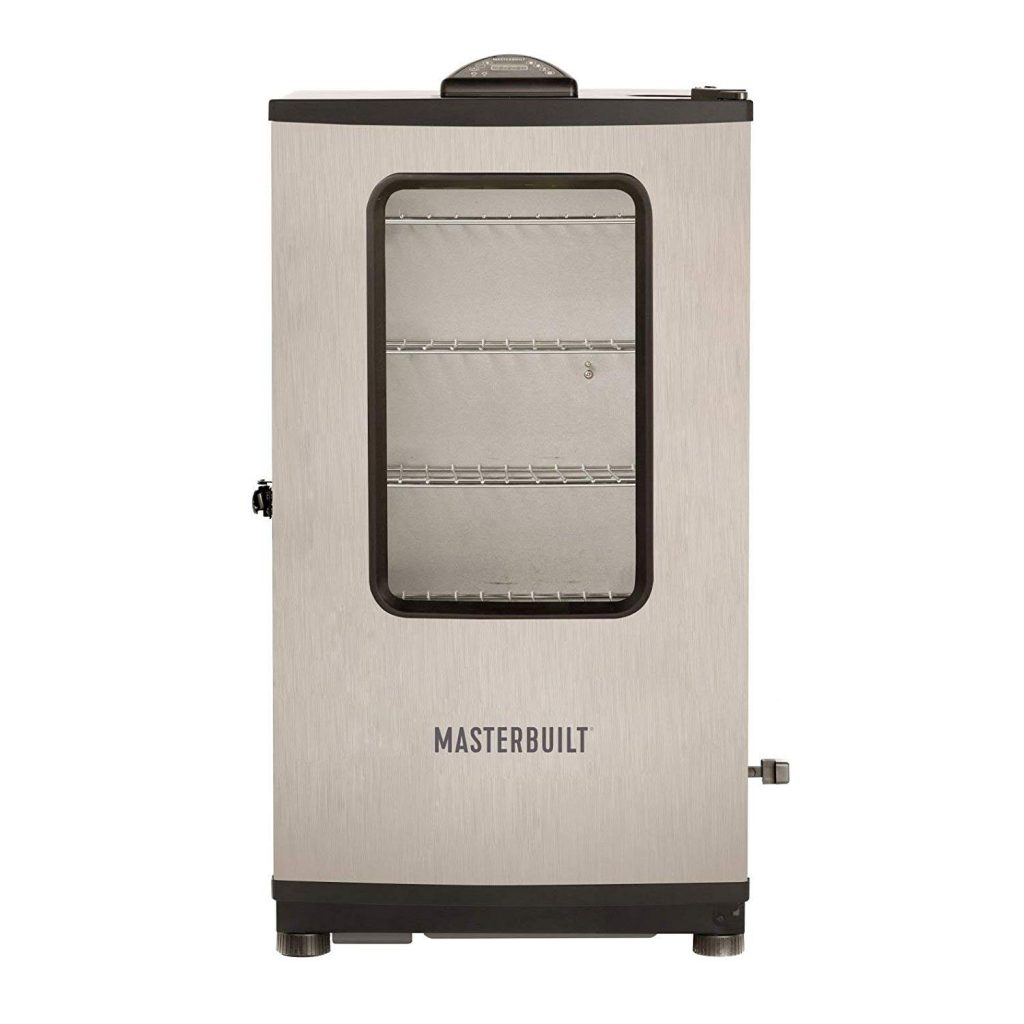
Masterbuilt 40-Inch Digital Electric Smoker with Window & Remote
If you are looking for a smoker that covers your general needs, this Masterbuilt 40 Electric Smoker gets the job done. The Masterbuilt 40-Inch Digital Electric Smoker with Window & Remote is a great size for house parties and large families. This smoker has simple requirements and essentially one task: to fill the wood tray.
Specs and features
On the exterior of the model, this Masterbuilt Digital Electric has a handle and secured wheels for mobility. On the front, the stainless steel door frames a large window. Who doesn’t want to look at their food while it’s cooking?
Inside this smoker, it has 975 square inches of cooking space and 4 chrome-coated removable racks. You can take out the water pan or drip pan to prep before cooking. While cooking, the Masterbuilt’s patented wood chip loading system allows users to continue adding chips without disrupting the process and opening the door.
Of course, the top air damper creates a controlled environment for the smoke while cooking too. However, the remote frequency controller wins people over with the ability to set temperature and time, switch the interior light on and off, and even switch the power of the smoker itself; all from 100 feet away. When all is said and done, the greasy pan mounted in the rear makes the aftermath of cooking easy to clean.
Reviews
The team at Masterbuilt surely felt proud to lead the charge and develop a patented remote control electric smoker. With this convenience, people could pay attention to other activities and conversations instead of continually monitoring the time for their food. Also, the uncomplicated process makes it easy for anyone to start barbecuing.
However, some found frustration using their Masterbuilt 40 electric smoker after some time. One found that the internal thermostat connection fried off after three years of usage. Despite frequent upkeep and care, some customers had unfortunate outcomes after using their Masterbuilt electric smoker.
Despite the critical reviews, 64 percent of customers rated the Masterbuilt Digital Electric Smoker with Window & Remote 5.0 out of 5.0 stars. The smoker has an overall Amazon rating of 4.0 out of 5.0 stars.
Many reports include photos of the mouth-watering barbecue creations that their smokers produced. Overall, the majority of cooks found this Masterbuilt 40 electric smoker accurate in temperature and easy to operate.
Masterbuilt 40-Inch Bluetooth Smart Digital Electric Smoker
An electric smoker that connects to a smart device seems super futuristic and out of our reach. Nonetheless, the Masterbuilt 40-Inch Bluetooth Smart Digital Electric Smoker makes it a reality and grabs our attention. This model confidently comes with the bells, whistles, and extra pizazz for people who want to go all out.
Specs and features
This high tech, smart Masterbuilt also includes a built-in meat thermometer and consistent cooking up to 275 degrees Fahrenheit. The exterior looks are similar to the other electric smoker model, which consists of the large stainless steel door and window. The built-in wheels and handles make moving the Masterbuilt 40 electric smoker less complicated.
On the inside, the same 4 chrome-coated racks are sitting and ready for up to 100 pounds of deliciousness. The Bluetooth Smart Digital Electric Smoker still includes the remote that controls the power, temperature, time, light, and monitors.
The flashy and impressive Bluetooth technology seems to impress and bring the wow factor. When in range, a smartphone or tablet can control your electric smoker. The role of hosting and barbecuing definitely seems less complicated with this Masterbuilt 40 electric smoker model.
Reviews
Some consumers might find relief with Bluetooth capabilities, but some might discover usage more complicated. Sometimes, connectivity and range do not work the same for everyone, and these features face a variety of differing factors. Regardless, this electric smoker has a pretty consistent rating.
Reviewers who gave this item a low rating predominantly critiqued the construction of the overall machine. The common thread dealt with a faulty smoker, dysfunctioning application for the smart device, or ambiguous instructions. Many customers gave feedback for tweaks that could improve the product.
The smoker has an Amazon rating of 3.9 out of 5.0 stars.
About 50 percent gave the Masterbuilt 40-Inch Bluetooth Smart Digital Electric Smoker 5.0 out of 5.0 stars, and 1 customer could not see how one could do any better than this smoker. Many of these buyers feel that the smoker does everything it says that it does. These happy barbecuers think that their cooking process became more accessible than ever.
Pricing Overall for the Masterbuilt 40 Electric Smoker
For new barbecues and smokers, getting into the cooking game will cost you around $355 to $445, not including shipping and tax. Many home improvement and general stores sell the Masterbuilt 40 Electric Smoker including Home Depot, Lowe’s, Walmart, and Sam’s Club. However, you can order online and get it directly from Amazon or Masterbuilt’s website itself.
Does the Masterbuilt 40 Electric Smoker Cook the Competition?
Electric smokers provide a relaxed approach for people who want tasty food with minimal effort. Electric smokers are great for beginner barbecuers too. There are simple steps in setting the right temperature and upkeep for each product.
However, there are different factors for each product that help us gauge how each electric smoker measures up. Since users don’t worry about fuel with these smokers, there are other things to consider when browsing through the market.
How we reviewed these electric smokers
When shopping for the right electric smoker, we considered the price, features, and quality of each product. These three options provide smokers that are comparable in size, usage, and controls.
Masterbuilt 30-Inch Digital Electric Smoker
This electric smoker is related to the initial two smokers and offers some significant elements. The Masterbuilt 30-Inch Digital Electric Smoker offers a smaller version of the other models. If you are looking for a no-fuss electric smoker, this option may fit your needs well.
Like the other Masterbuilt electric smokers, this option also includes power controls, temperature controls, and time controls. However, there’s a digital panel that houses these features. The integrated thermostat temperature control system carries over to this smoker too.
Overall, this model carries the same pan and wood chip accessories that the other units contain. If you do not want fancy additions and a simple aesthetic, this smoker wins 4.0 out of 5.0 stars for users on Amazon. Customers can purchase this Masterbuilt from $95 to $190, before taxes and shipping.
6-Rack Bradley Digital Smoker
With four to six racks, this electric smoker can hold more goodies inside. The 6-Rack Bradley Digital Smoker includes many of the same digital technology on a bit more significant scale, size-wise. The temperature, time, and smoke have easy-to-use controls.
Looking inside the 6-Rack Bradley Digital Smoker, polished stainless steel with four to six removable racks sit nice and ready for smoking. The ash catcher makes cleanup fast and straightforward. For the outside, a powder epoxy steel covers the body of the unit.
Comparably, users have gotten temperatures up to 350 degrees Fahrenheit. Although, certain temperatures go well with certain foods. The Bradley Digital Smoker is available for $360 to $600, and customers rate this smoker 3.5 out of 5.0 stars on Amazon.
Smoke Hollow ES230B Digital Electric Smoker
This simple, black box still packs a punch of flavor for smoking food. The Smoke Hollow ES230B Digital Electric Smoker provides a 30 to a 36-inch electric smoker. Shoppers can purchase this in black or stainless steel, and they offer a digital version of their electric smoker as well.
For the specifications of this choice, you’ll also find a digital panel that controls the power, temperature, and time. This 800-watt heating element gives even, consistent smoking with an adjustable air damper to control smoke. This option also provides the same pan accessories and removable water bowl for moisture and flavor.
The Smoke Hollow ES230B provides one of the more cost-efficient options, but it doesn’t sacrifice on quality. Customers still get bang for their buck with this electric smoker, and they rate it 4.0 out of 5.0 stars on Amazon. It’s available for purchase from $90 to $230, depending on the chosen model.
Masterbuilt 40 Electric Smoker Pros and Cons
Throughout this Masterbuilt 40 Electric Smoker review, there are details and reports of what consumers feel. Here are the highlights:
Pros
- Convenient wood chip loading system
- Digital time and temperature controls
- Removable racks, water pan, drip pan, and grease pan for easy cleaning.
- Handle and wheels provide mobility
- Window and internal light to display items cooking
- Integrated thermostat for temperature control
- Smoke control with the top air damper
- Good reviews for first-time users
Cons
- Some reviews reported poor construction quality
- The range of the remote control and Bluetooth capabilities are limited
Masterbuilt 40 Electric Smoker: Our Hot Take
With the technology available to us, smoking our foods with ease is right at our fingertips. We have a variety of different options to choose from depending on what we need for our gatherings and table settings. With the Masterbuilt 40 Electric Smoker, there are options for every person’s barbecuing style.
If people want something more advanced, then they may find excitement in using the remote and Bluetooth features. Regardless, foodies will find good endings after cooking with the Masterbuilt 40 Electric Smoker. This electric smoker changes how we do flavorful dishes.
Could you use this smoker to create your favorite barbecue dish? Tell us about your latest cookout in the comments!
There is something instinctually about humans and the smell of smoking meat.
That’s right, you know exactly what I’m talking about.
I’m drooling, just thinking about it.
via GIPHY
Maybe it harkens back to our human ancestors, as the smell let them know that cooked food that would sustain them was near.
Or, maybe it’s just the fact that smoked meat just tastes really, really good.
Personally, I think it’s both.
Whether you just want to make something delicious at home or want to try tapping into your primal instincts, smoking meat is a great way to go about it.
Smoking Meat for Tasty Treats
Since time immemorial, humanity has been smoking meat for two reasons:
- Smoking meat makes it last longer.
- Smoking makes it taste delicious!
Though refrigeration made smoking less necessary as a food preservation technique, smoked foods are ingrained in the culinary DNA of many cultures.
Smoked meats from around the world
North American Indians: Jerky and pemmicanEastern Europe: Smoked fishChina: Sichuan style smoked meatsSoutheastern United States: Whole smoked hogTexas: Smoked beef brisket
Source: Mountain America Jerky
History of Smoking Meat
No one can be entirely sure how or when humanity began smoking meats.
But it’s a good bet that our cave-dwelling, cooked-meat eating caveman ancestors laid the groundwork to do so!
Here are some examples:
BACON
Bacon is undoubtedly one of the kings of smoked meat.
It is salty, smokey, and the perfect accompaniment to fried eggs.
Mmmmmmm….
In the United States, bacon starts as a nice, fatty side of pork belly, cured and smoked to perfection.
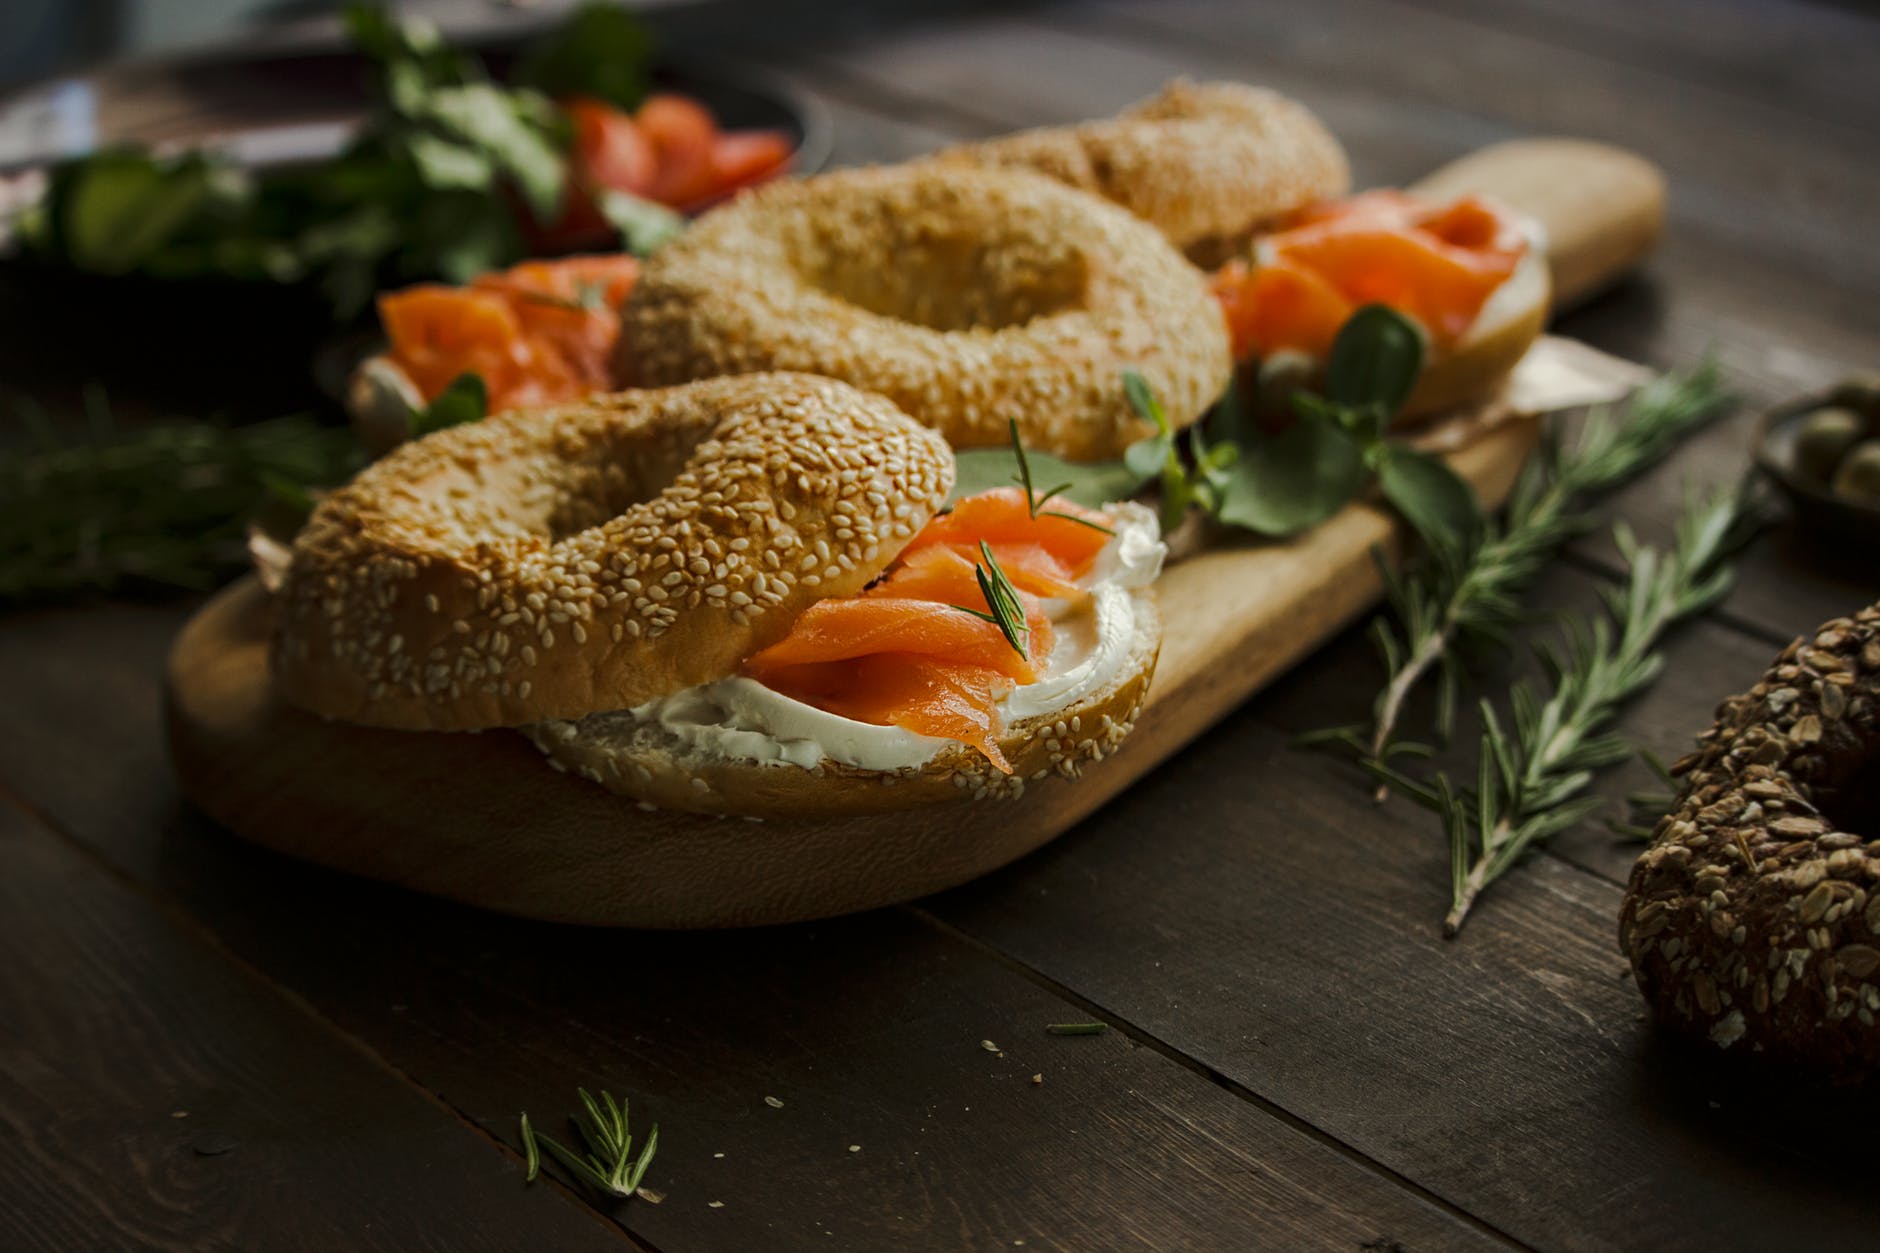
Image: CC by 2.0 by https://www.pexels.com/@postiglioni, via Pexels
Image: CC by 2.0 by Abdallah Maqboul , via Pexels
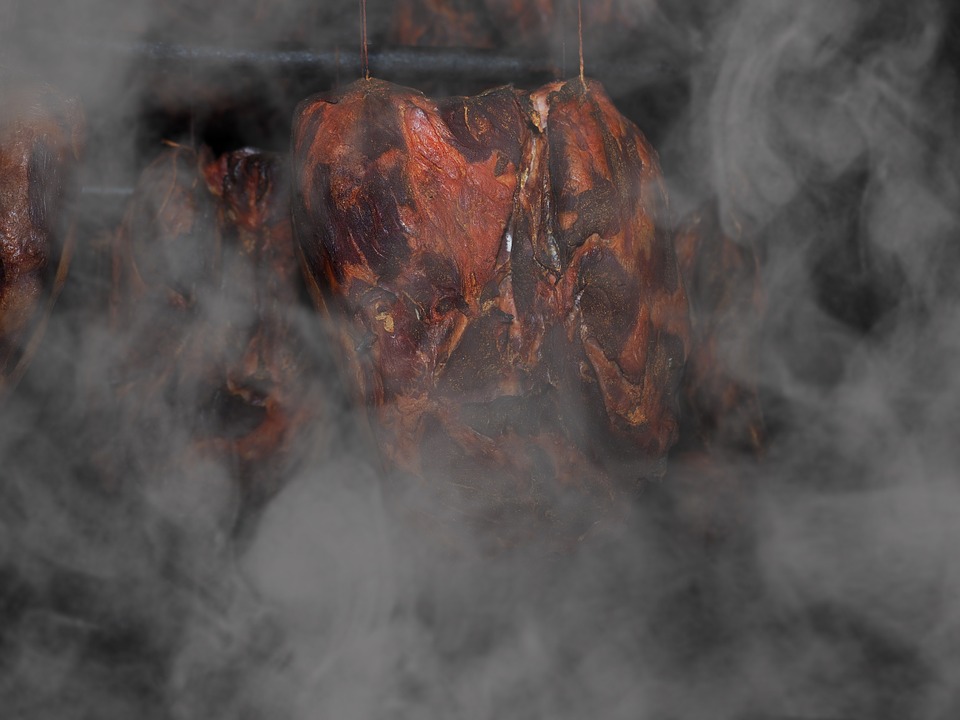
HAM
A smoked country ham is a dinner centerpiece for many families around the holidays.
The ham refers both to the cut and the meat product.
The ham cut comes from the rear leg of the pig.
CC by 2.0, by Pixabay, via Pexels
Smoked fish
Smoked fish has a long, proud history in the United States from both native and immigrant settlers.
In fact:
The indigenous peoples of the Pacific Northwest have a long-standing tradition with smoking salmon to preserve it for later consumption.
Watch the video below for more information:
Diaspora Ashkenazi Jews brought their knowlege of smoking fish from Eastern Europe. Today, smoked fish is still a staple in any good Jewish appetizing shop.
CC by 2.0 by Abdallah Maqboul , via Pexels
CHOOSE YOUR METHOD
Logic dictates that where there’s smoke, there’s fire.
So what?
Well, where’s there’s fire, there’s heat.
Of course, when you’re smoking meats, it’s not always that simple.
Cold smoke
Cold smoking flavors and preserves meat for later consumption. Cold smoked meats can be kept for months at room temperature.
So how does it work?
For cold smoking, the meat is always cured with salt and sodium nitrate.
This process smokes meat for a few hours, and up to a few days, at a relatively low temperature.
The smoke is produced in a separate firebox. The smoke is then pumped into an unheated antechamber where the meat is.
Hot smoking
Hot smoking is a cooking technique. It uses heat and smoke to make food that is ready to eat.
Most hot smoked foods are treated with brine, marinade, or dry rub. These treatments flavor and keep the meat moist during the cooking process.
Safety risks
Here’s what you should know:
While cold smoking can produce some seriously delicious meat, if you’re a newbie, listen up.
I have some bad news for you.
Cold smoking is pretty dangerous to do at home.
Modern food production techniques mean that there are lots of pathogens present in meat and other products.
To counteract this, the FDA has a lot of guidelines to help keep food safe.
One of these guidelines is cooking temperatures.
FDA Minimum Internal Temperatures for Meats
- Seafood – 145-degrees F
- Red Meat / Pork – 145-degrees F
- Ground Meat – 160-degrees F
- Ground Poultry – 165-degrees F
- Poultry – 165-degrees F
Cold smoking holds the meat at around 90-degrees Fahrenheit. This is far lower than the recommended 145-degree Fahrenheit recommendations.
So, what should you do?
While can make safe cold-smoked meat at home, it requires precise temperature control and a thorough understanding of the curing process.
In contrast, hot smoking produces temperatures between 145-degrees and 300-degrees Fahrenheit.
That is well above the FDA danger zone.
Our recommendation:
Stick with hot smoking when smoking meats at home.
Botulism
Let me tell you a little bit about Clostridium botulinum.
It makes you sick with a disease known as botulism.
That’s not all:
A common source of botulism is improperly prepared and stored processed food.
Still not convinced?
This bacteria produces some of the most lethal substances known to humanity. These toxins block nerve function.
Symptoms of botulism
- Difficulty swallowing
- Dry mouth
- Trouble breathing
- Paralysis
A botulism infection can lead to death.
Furthermore, you can’t always tell when food is tainted.
In fact: some botulinum tainted food will not taste or smell off at all!
Bottom line:
Leave cold smoking meat to the experts.
CHOOSE YOUR PROTEIN
So you might be wondering to yourself: what can I smoke?
Well, I’ve got some answers for you!
In short:
If you can cook it, you can smoke it.
Choosing your protein to smoke is less about rules and more about guidelines.
Follow these guidelines, and you will be well on your way to some delicious smoked meals.
What cut to smoke?
This is important to remember:
Smoking is a method well suited mostly for the cheaper, tougher cuts of meat.
Why?
Smoking meat is typically a long, slow cooking process. To take advantage of this, you need cuts of meat that have a lot of connective tissue and fat.
When cooked for a short amount of time, connective tissue gets tough and chewy.
But when cooked long and slow, the collagen in the tissue breaks down. This makes for a tender, juicy piece of smoked meat when done.
Here are some examples of great cuts to try:
PORK
- Pork shoulder (Boston butt)
- Pork ribs
- Pork belly
- Sausages
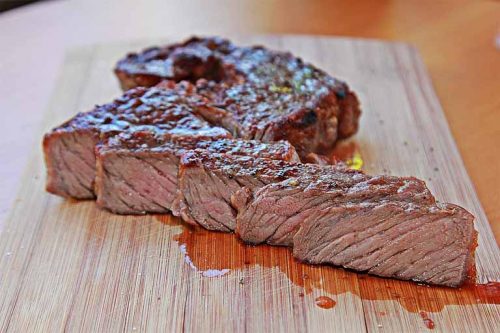
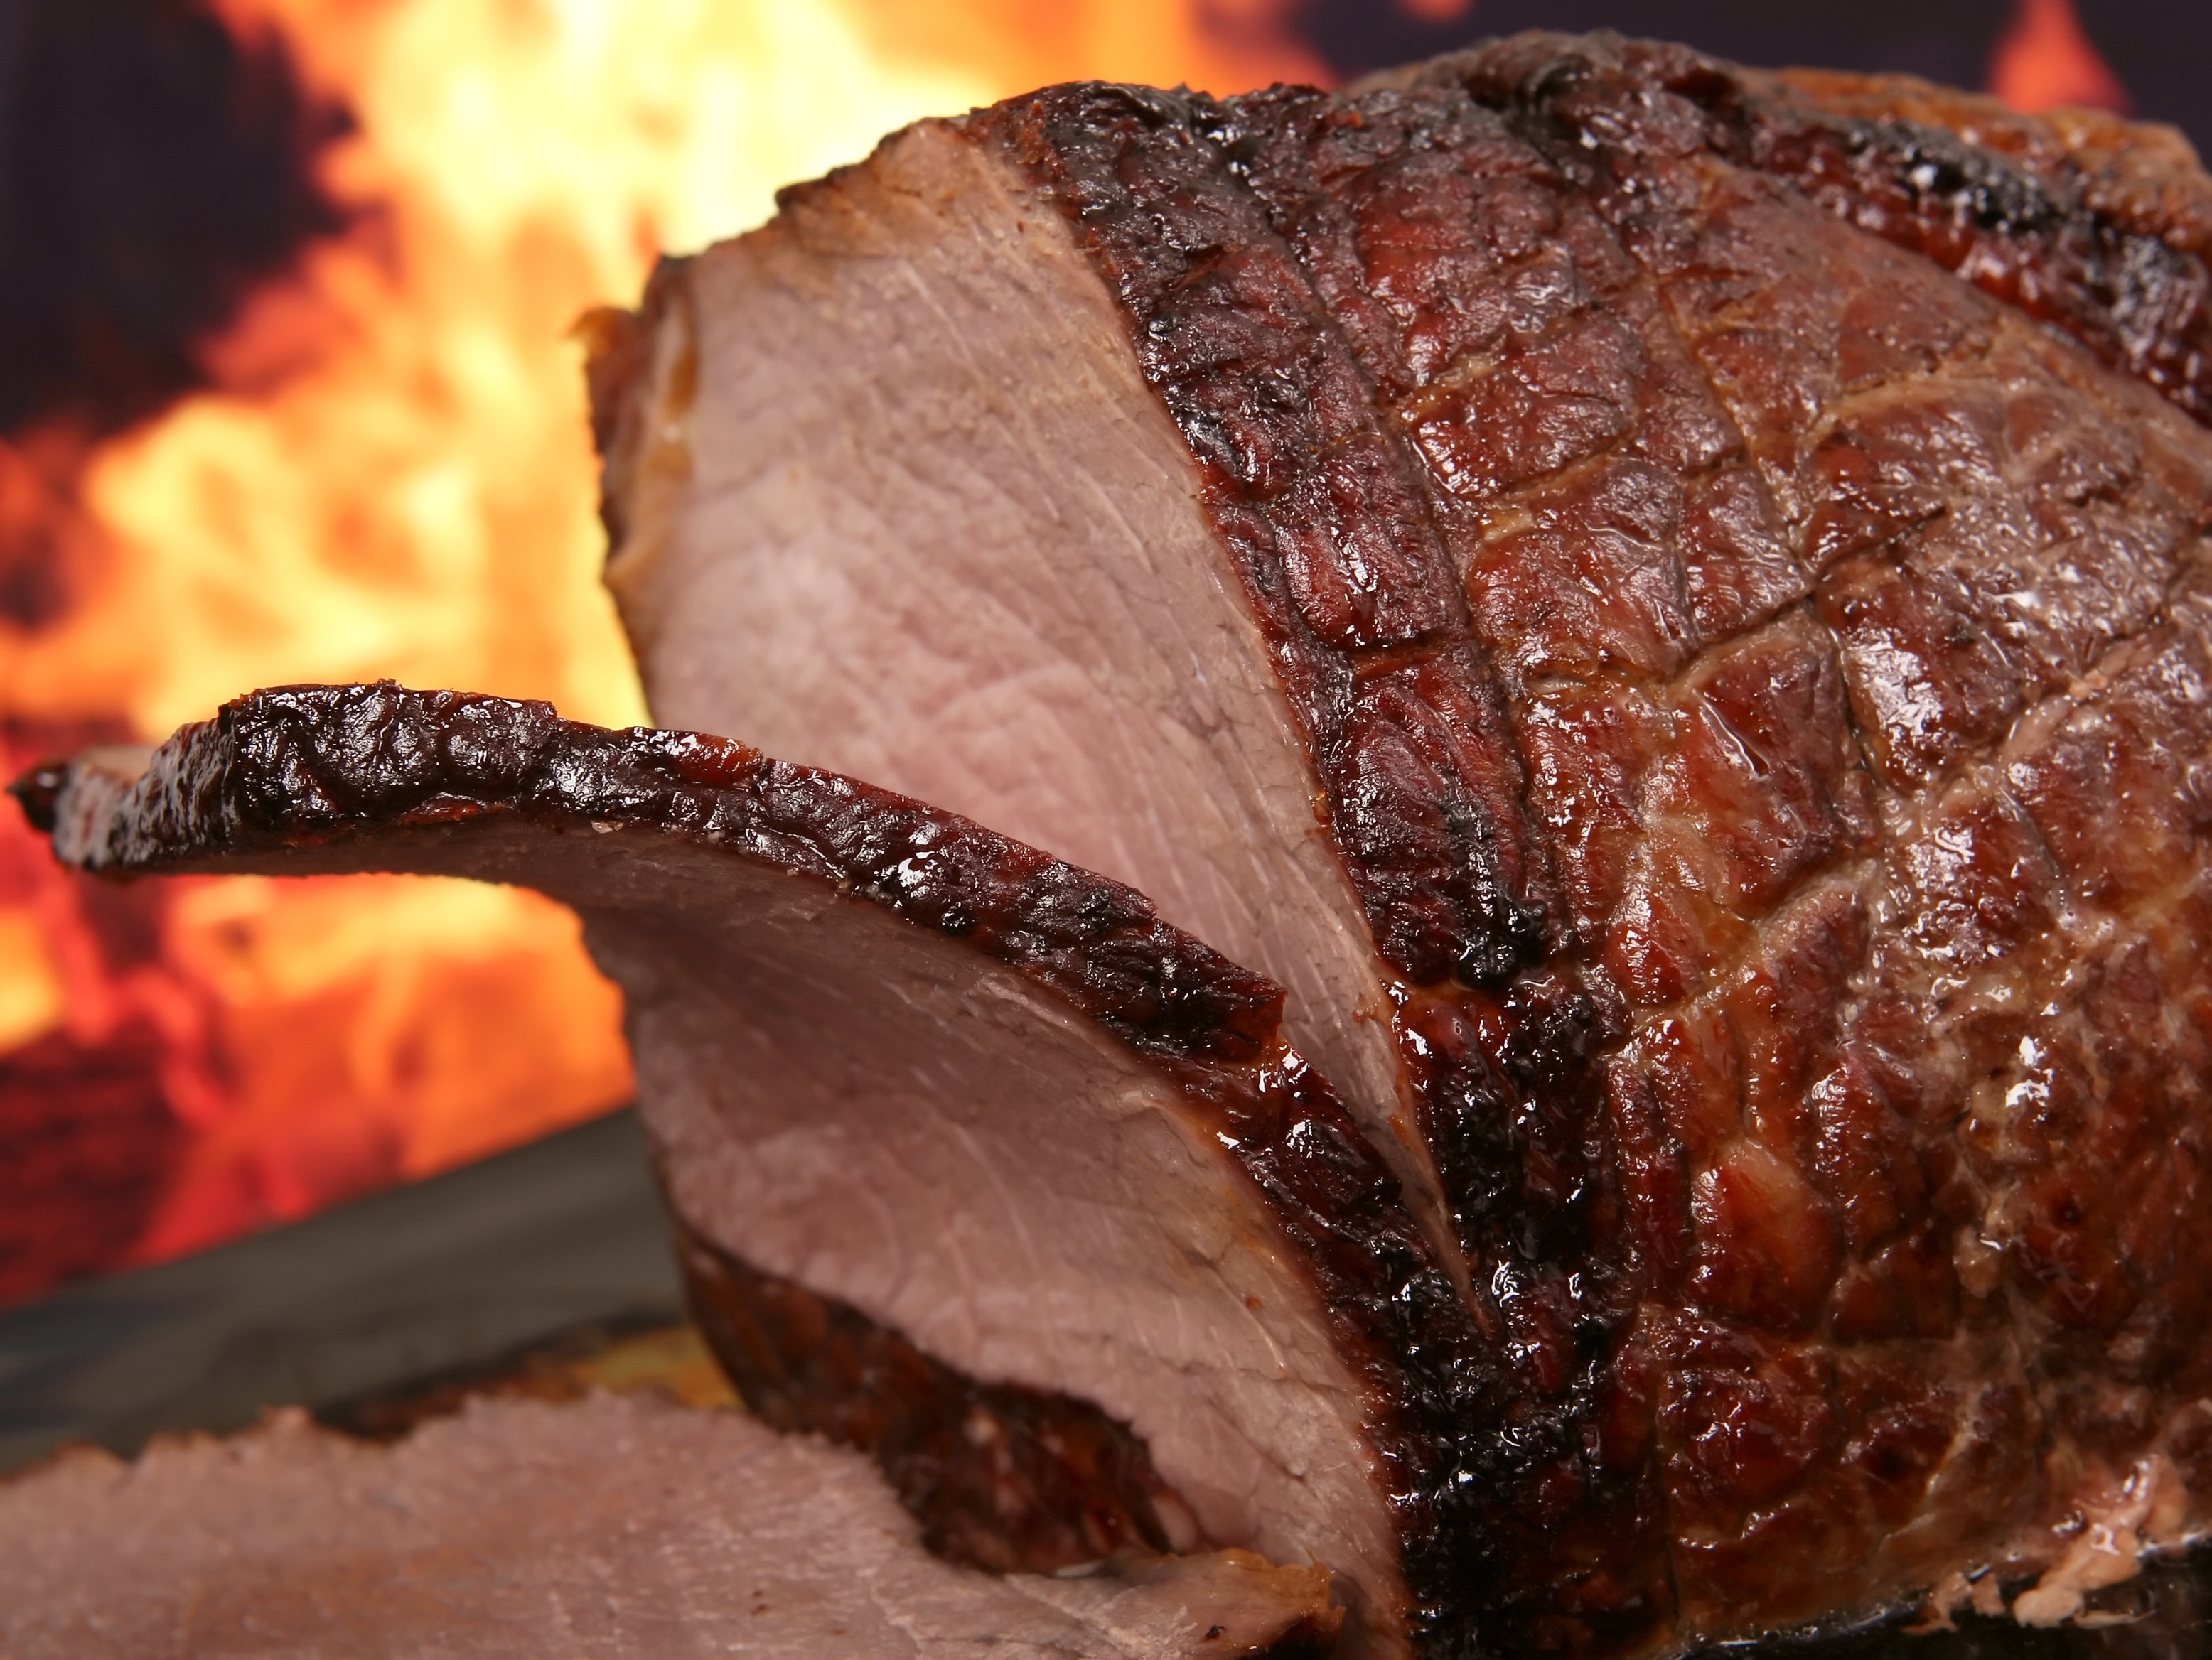
BEEF
- Beef brisket
- Beef ribs
- Oxtails
Image: CC0, by Pixabay, via Pexels
POULTRY
- Whole poultry (duck, chicken, turkey)
- Chicken wings
Image: CC 2.0, by gyanbasnet, via Pixabay
FISH
Image: CC 2.0, by wow_pho, via Pixabay
Are there meats that you shouldn’t smoke?
Super-lean cuts, like pork tenderloin, are typically ill-suited for smoking. The long, slow cooking process will yield a tough, dry, rubbery piece of meat.
Beyond just smoking meat
While smoking meats is the most popular item to smoke, you don’t have to limit yourself to just animal protein.
Yes, you can smoke more than just meat!
Try smoking some vegetarian-friendly foods! Try throwing some of your favorite vegetables and alternative proteins in the smoker. (Yum, smoked tofu!)
Feeling more adventurous? Smoke is a great flavoring, but not everything will smoke well.
To get around this, try smoking some condiments!
Smoked salt to bring just a touch of smokey goodness to your dishes.
Love hot sauce?
Try smoking Sriracha for the ultimate in smokey, spicy goodness.
But wait, there’s more!
If you want to get super adventurous, here’s something to try:Smoked. Ice. Cream.
(Oh yes, it’s a thing.)
You know what else is a thing?
Smoked chocolate chips.
Want some vegan smoked ham?
Here’s something that’s sure to blow your mind.
Share the joy of delicious smoked ham with your vegan friends and family with a smoked watermelon ham!
Wait, what?
In 2018, Ducks Eatery in New York City turned took a watermelon, brined it, and smoked it.
The result?
A smokey, fully vegetarian “ham” like dish that tastes unlike anything you have ever tried before.
Check out the video below:
Let’s face it:
When it comes to a truly unique smoked “meat,” this is as unique as they come!
The Smoke Train
to Flavor City
Smoking brings plenty of flavor to the party, but it’s by no means the only flavor to think about when you are smoking meats.
Brining
Brining is a process that uses salt to enhance the flavor, texture, and moisture content in food.
Wet brines dissolve the salt in water before the meat is placed in it to soak for some time.
Dry brines are mixtures of salt, and other flavorings, which is then rubbed directly onto the meat. The meat is then allowed to sit for a period of time before cooking.
So what kind of ingredients can you find in a brine?
The main ingredient you will find in every brine recipe is salt.
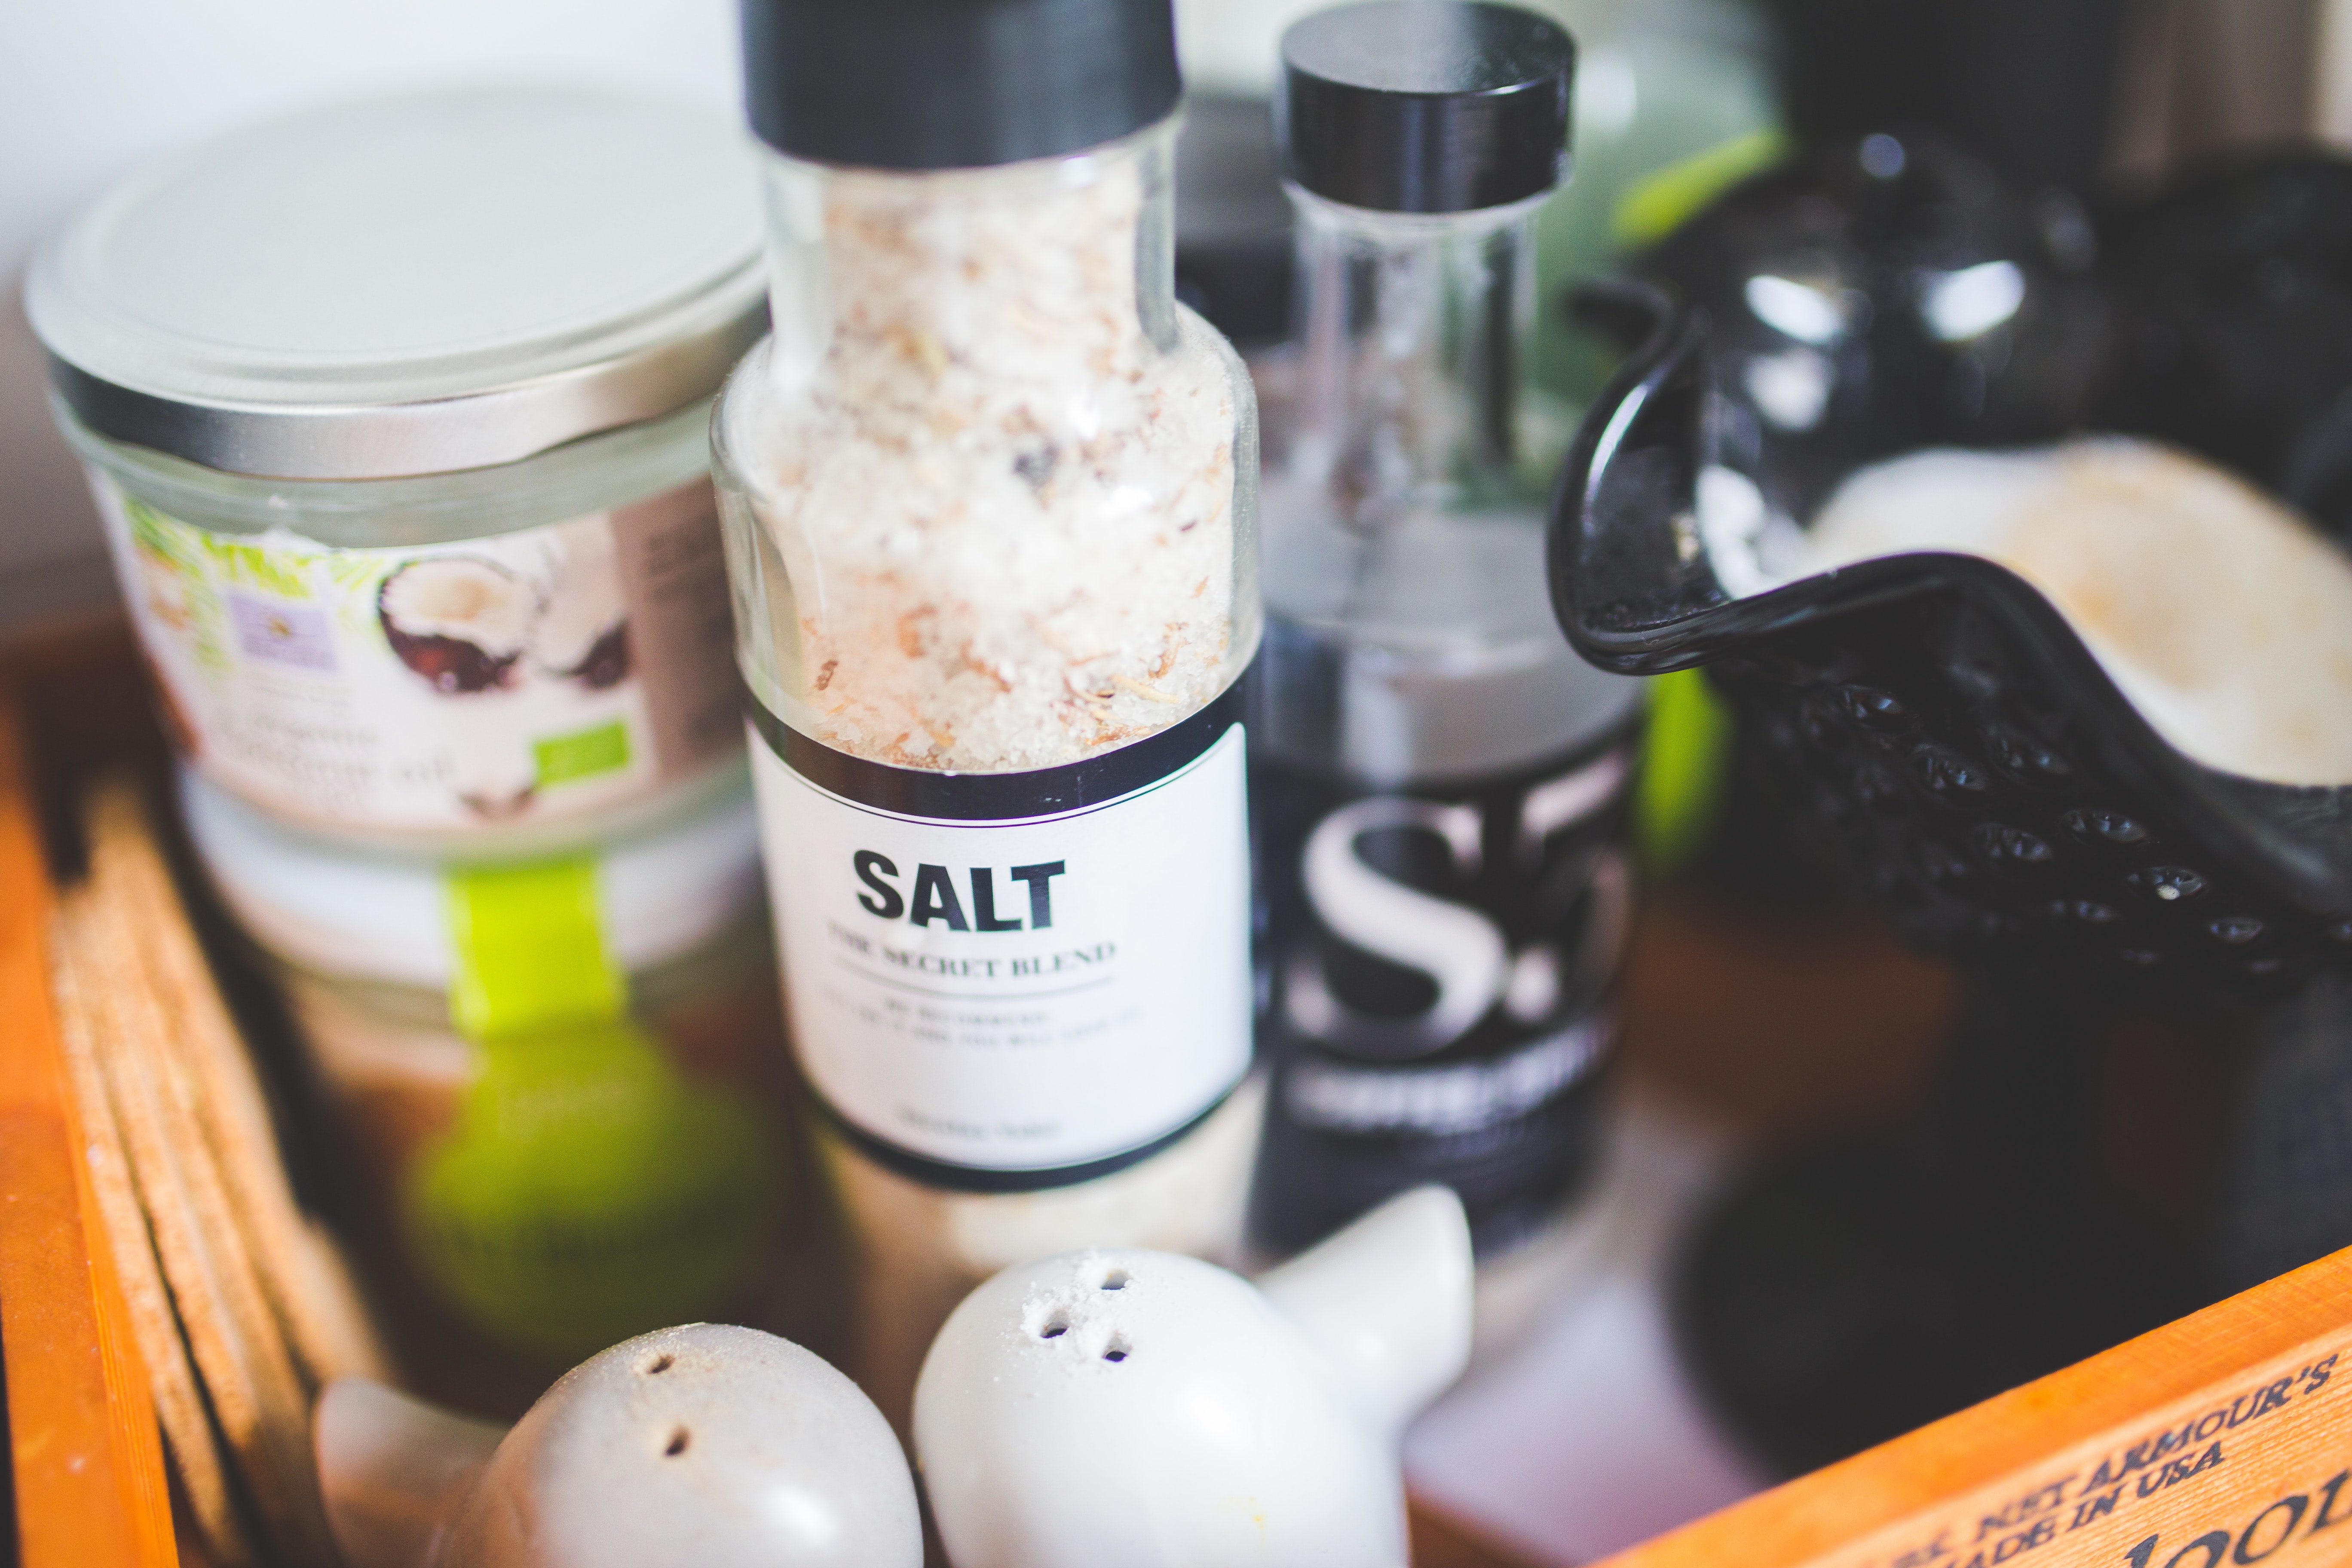
Image: CC0 ,by Kaboompics, via Pexels
In fact, in some recipes, salt may be the ONLY ingredient.
But really, you can add anything to a brine.
Smoked salmon and pork recipes may include a sweetener like brown sugar or honey to help balance the flavors.
Peppercorns, bay leaf, garlic, and onion are great additions to any brine.
Marinades
Like a wet brine, a marinade is a flavorful liquid that you soak the meat in to impart flavor and moisture. Some marinades may also help to tenderize the meat.
Is there anything you shouldn’t put in a marinade?
Pretty much any flavor combination you can imagine, you can put in a marinade for smoking meat.
For a fantastic Korean-inspired beef rib, try a soy-based marinade with some sesame oil, garlic, green onion, ginger, and sugar.
Want to go to the Mediterranean? Experiment with a marinade of lemon juice, olive oil, and herbs. You just can’t go wrong with this one!
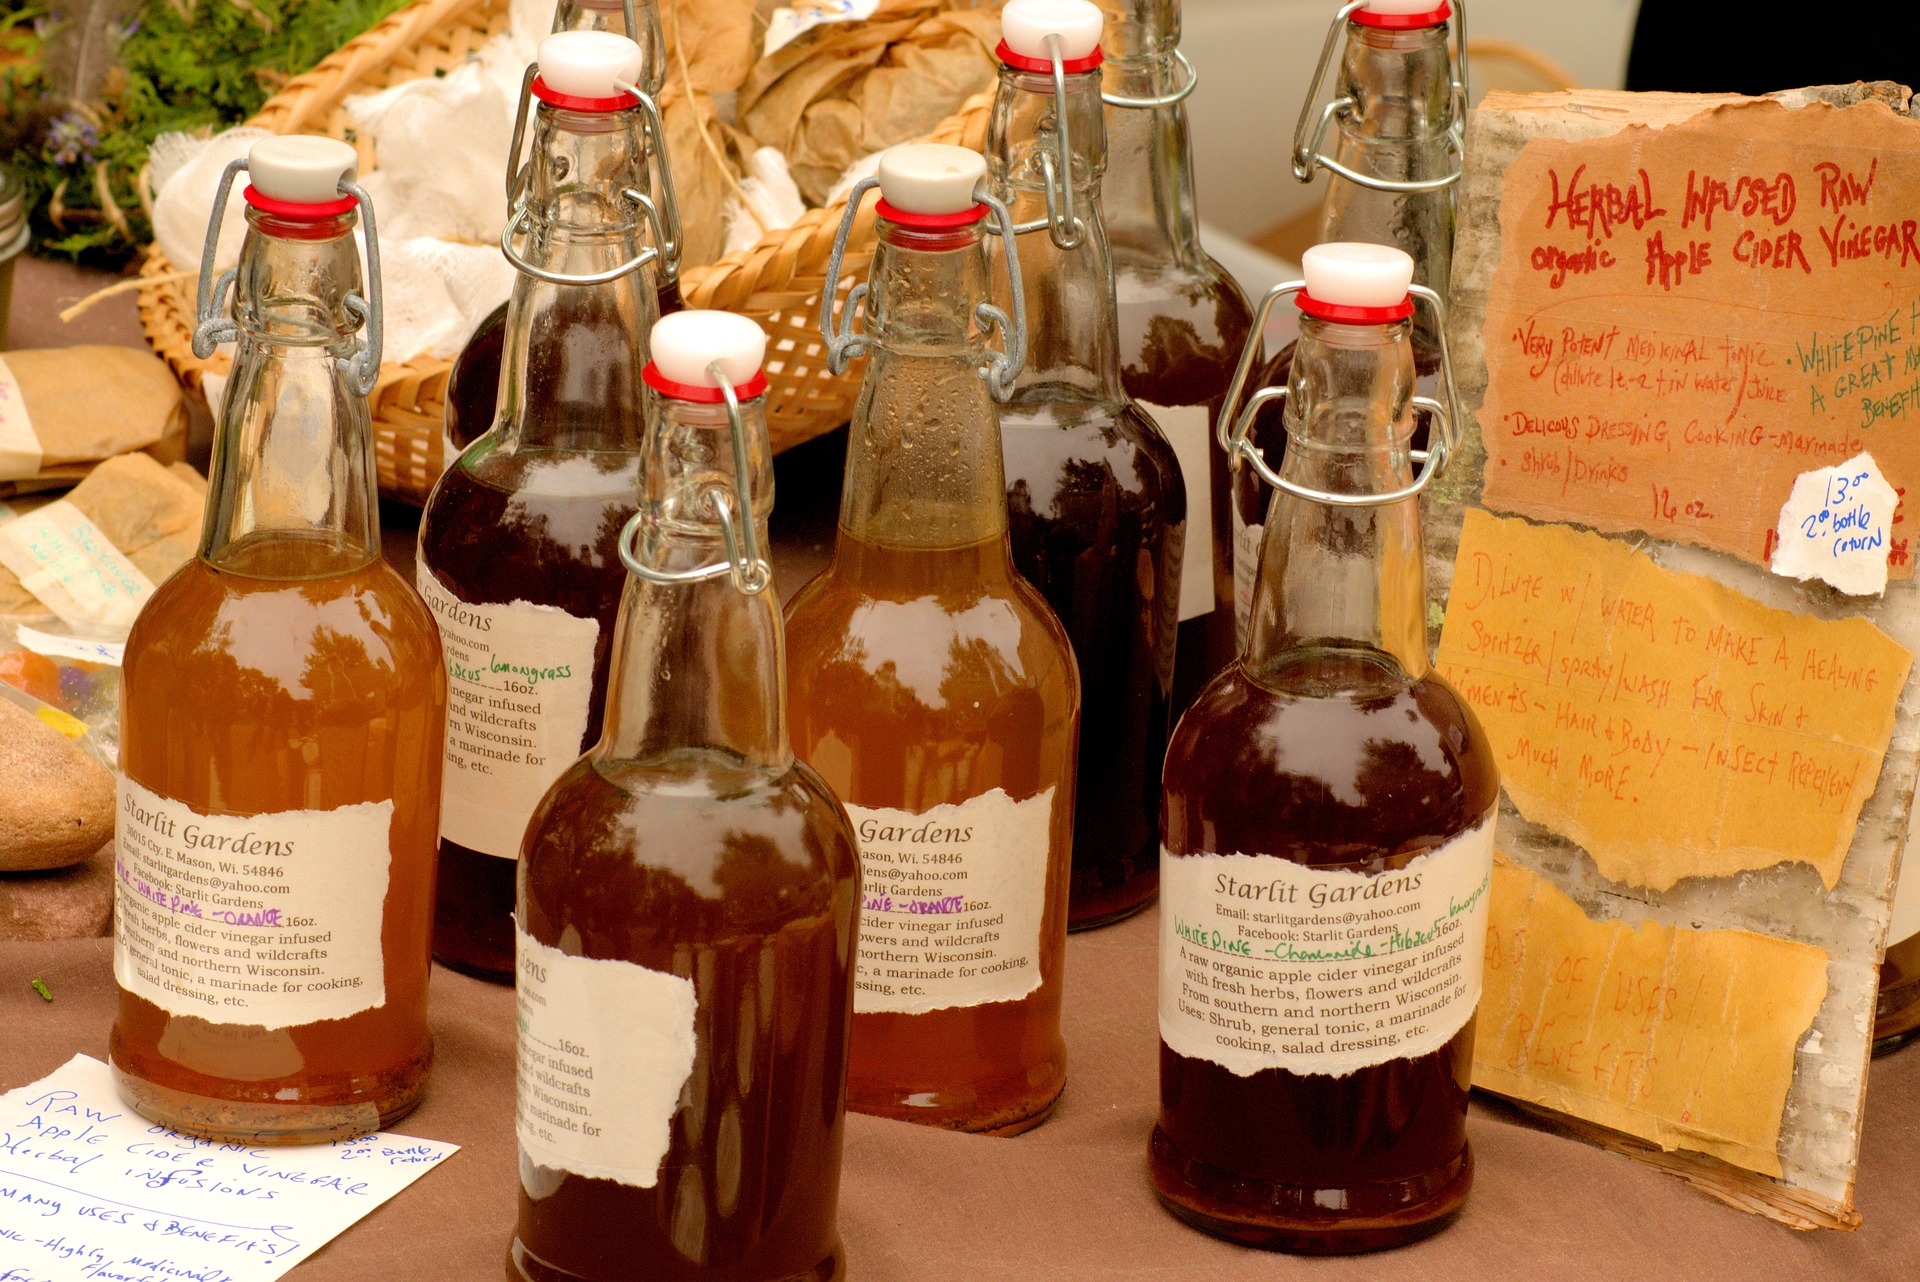
Image: CC0, by MikeGoad, via Pixabay
Dry Rubs
Like other flavoring methods, a dry rub imparts flavor. Like a dry brine, a dry rub often includes salt but can also contain other ingredients.
The main difference with a dry rub is that most, if not all, the ingredients are dry.

Image: CC0, by Pixabay via Pexels
The most basic of dry rub recipes can be just salt and pepper. Another basic dry rub is salt, pepper, paprika, garlic powder, and onion powder.
But don’t be afraid to expand on this!
For a Mexican-inspired dry rub for your ribs, try salt, powdered ancho chili, garlic powder, onion powder, and oregano.
Want to take a trip around the world with your smoker? This recipe from Bobby Flay that uses salt, turmeric, cardamom, fennel, and other common curry spices to create an out of this world smoked chicken thigh!
Choose Your Wood
The wood you use to smoke over is going to have a fundamental effect on the flavor of your food.
Remember:
Not all wood is suitable for smoking.
And more importantly:
Not all smoking wood is suitable for all foods.
Knowing what look for as well as what kinds of woods to use is essential for creating the flavor you want.
What to look for
Wood for smoking meats generally comes in a few forms:
Logs
Logs are generally large; think about the size you would use in a fireplace. These are good for large smokers that need to burn for a long time.
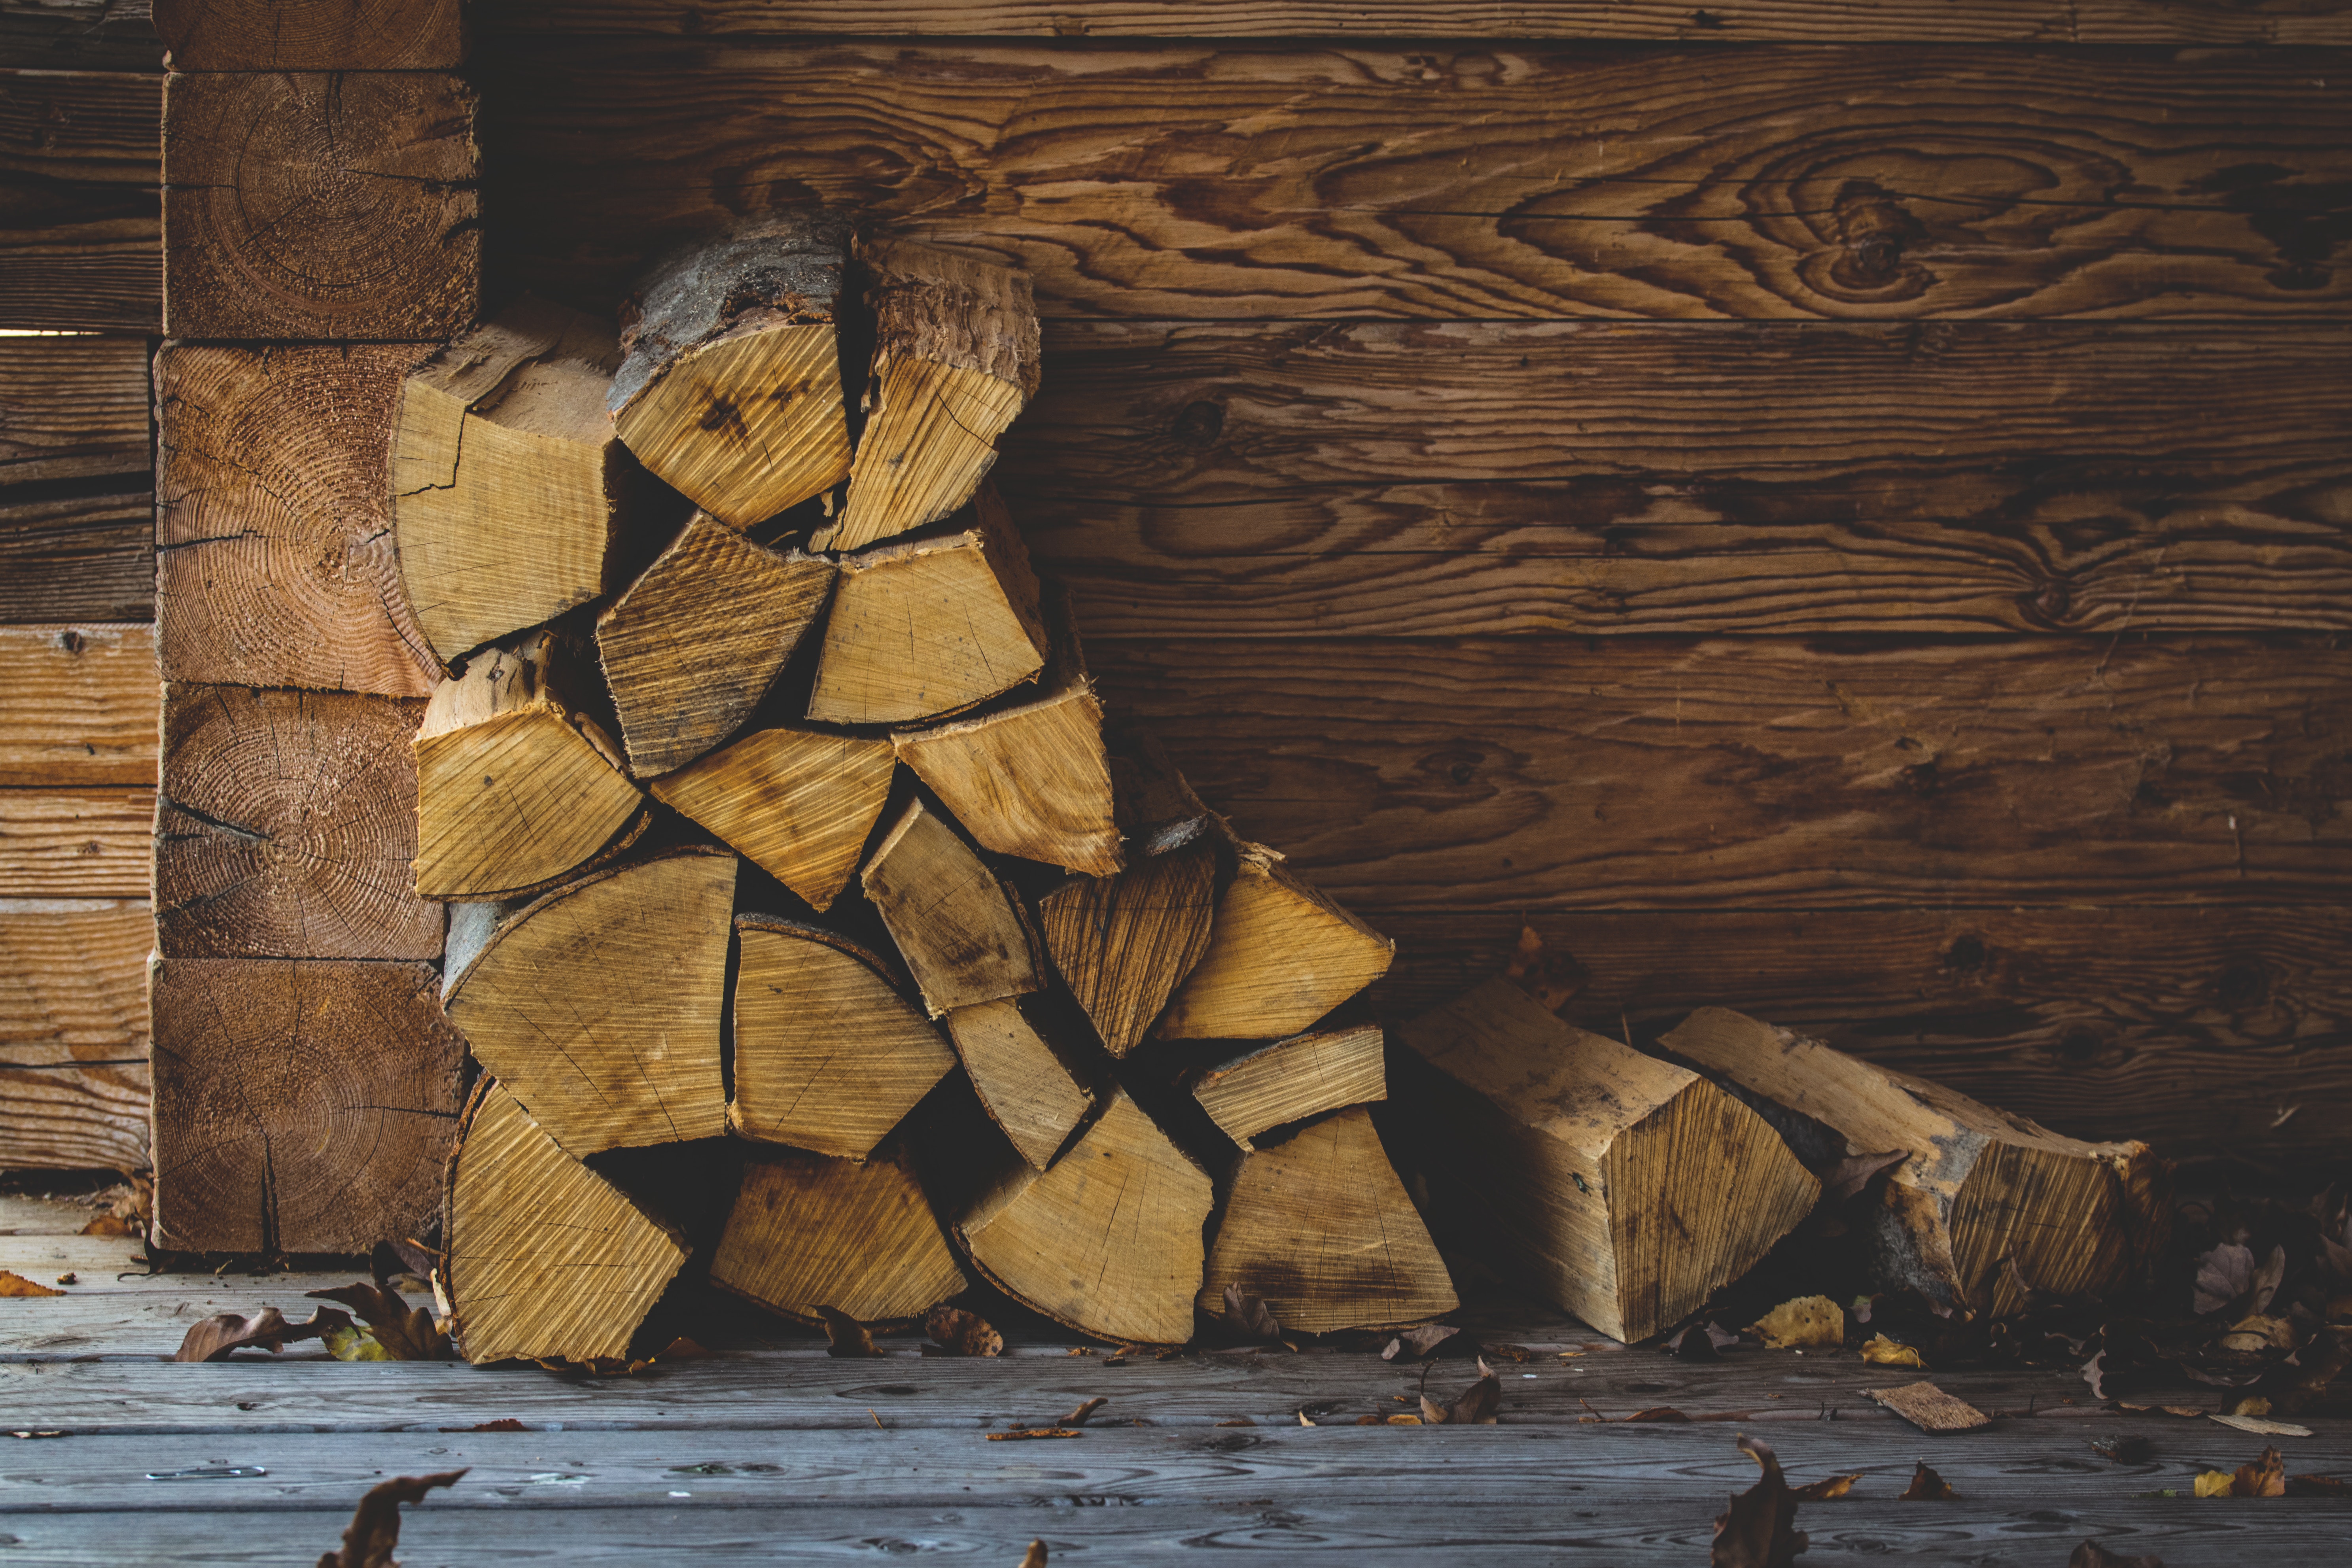
Image: CC 2.0, by LUM3N, via Pixabay
Chunks
Chunks are smaller pieces of wood, around the size of a fist. These can last for hours in a smoker.
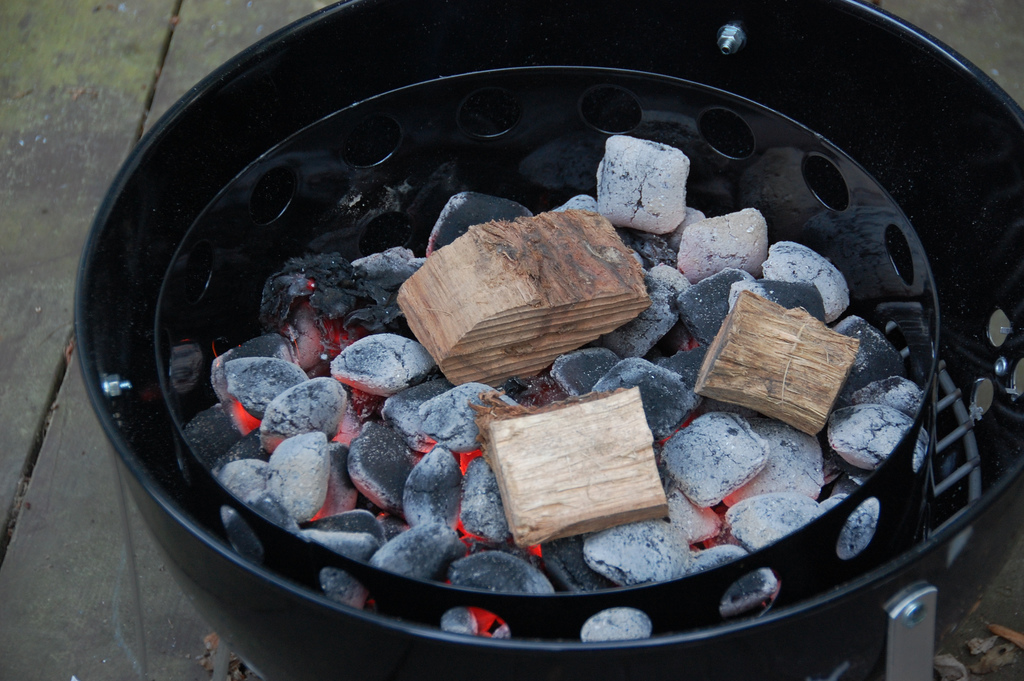
Image: CC SA 4.0, by EricKilby, via Flickr
Chips
Chips are smaller scraps of wood. They ignite easily but may burn out quickly.
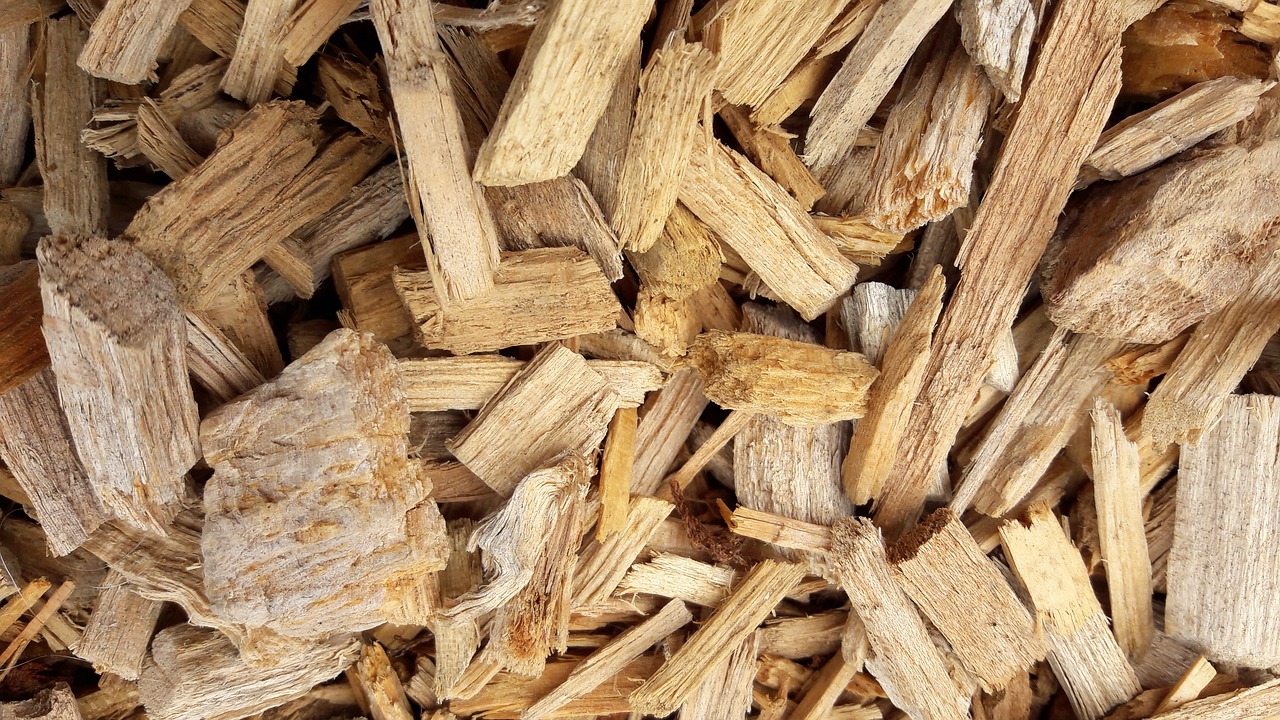
Image: CC by 2.0, by internalizer, via Pixabay
They are easy to find at your average big box store as well as specialty barbeque stores. These are good for smaller smokers or quick smoking jobs.
Popular woods for smoking meats
Woods for smoking can be broken down into three main categories:
Fruit woods are very popular to smoke with. These woods are on the mild side with sweet smoke and tend to pair well with more delicate, white meat proteins.
Medium flavored woods like hickory, maple, pecan, and oak produce a good smoke that pairs well with just about any meat.
Strong woodslike mesquite impart a lot of flavors but need to be used carefully.
Woods & Flavor Profiles
Wood
Flavor Profile
Use With
Alder
Sweet, light
Fish (Salmon)
Apple
Sweet, mild
Chicken, pork
Cherry
Sweet, mild
Pork, beef
Hickory
Strong, sweet
Ribs, bacon
Pecan
Very sweet, nutty
Roasts, ribs
Walnut
Strong, nutty
Red meat, game meat
Mesquite
Strong, unique
Red meats
Woods you should never use
Not all woods are created equal when it comes to smoking meats.
In fact:
There are some woods that you should ALWAYS stay away from when smoking meats!
Chemically treated wood and scraps
Manufacturers often chemically treat woods to make them last longer in construction or furniture.
These chemicals are toxic! You don’t want them ANYWHERE near your food!
Likewise, don’t use lumber scraps, either.
While these may be dirt cheap, you have no way of knowing what kind of wood they are from. Never use these for smoking meats!
Softwoods
Softwoods like cedar and pine contain a lot of sap. When ignited, this creates a harsh, sooty smoke that tastes bad. What’s worse? It can also be harmful!
While you can cook on cedar planks, smoking with cedar is a no go.
Choose Your Smoker
The great thing about smoking meats at home is that you have a lot of different options when it comes to equipment.
There’s a good chance that you have meat smoking equipment right now, even if you do not have a back yard.
Before you smoke
Whatever you choose to use, you do need some equipment on hand for safety: for you and your food!
Thermometer
By far the most challenging thing to do when smoking food is to control the temperature.

Image: CC0, by Skitterphoto, via Pexels
No matter what meat smoking method you decide to go with, you need to accurately control your temperature.
Here’s the most important takeaway:
Buy a good thermometer.
Digital, instant-read probe thermometers like the ThermoPop are what you are looking for. You want something easy to read that takes temperature fast and continuously.
Heat protection
To produce smoke, you need fire.
And whenever working with fire, you need to stay safe.
Always use fire-resistant gloves when dealing with your smoke set up.
Have a fire extinguisher near by just in case anything catches fire that shouldn’t.
Smoke abatement
The smoke that will eventually make your food taste incredible is still an irritant to your lungs.
Always be sure to smoke your foods in a well-ventilated area. Smoking meat outside is always recommended.
If you must smoke indoors on the stove, be sure to use your cooking vents and to open windows, as necessary.
Charcoal kettle
A mainstay of suburban backyards all across America, the charcoal kettle grill makes a great home smoker.
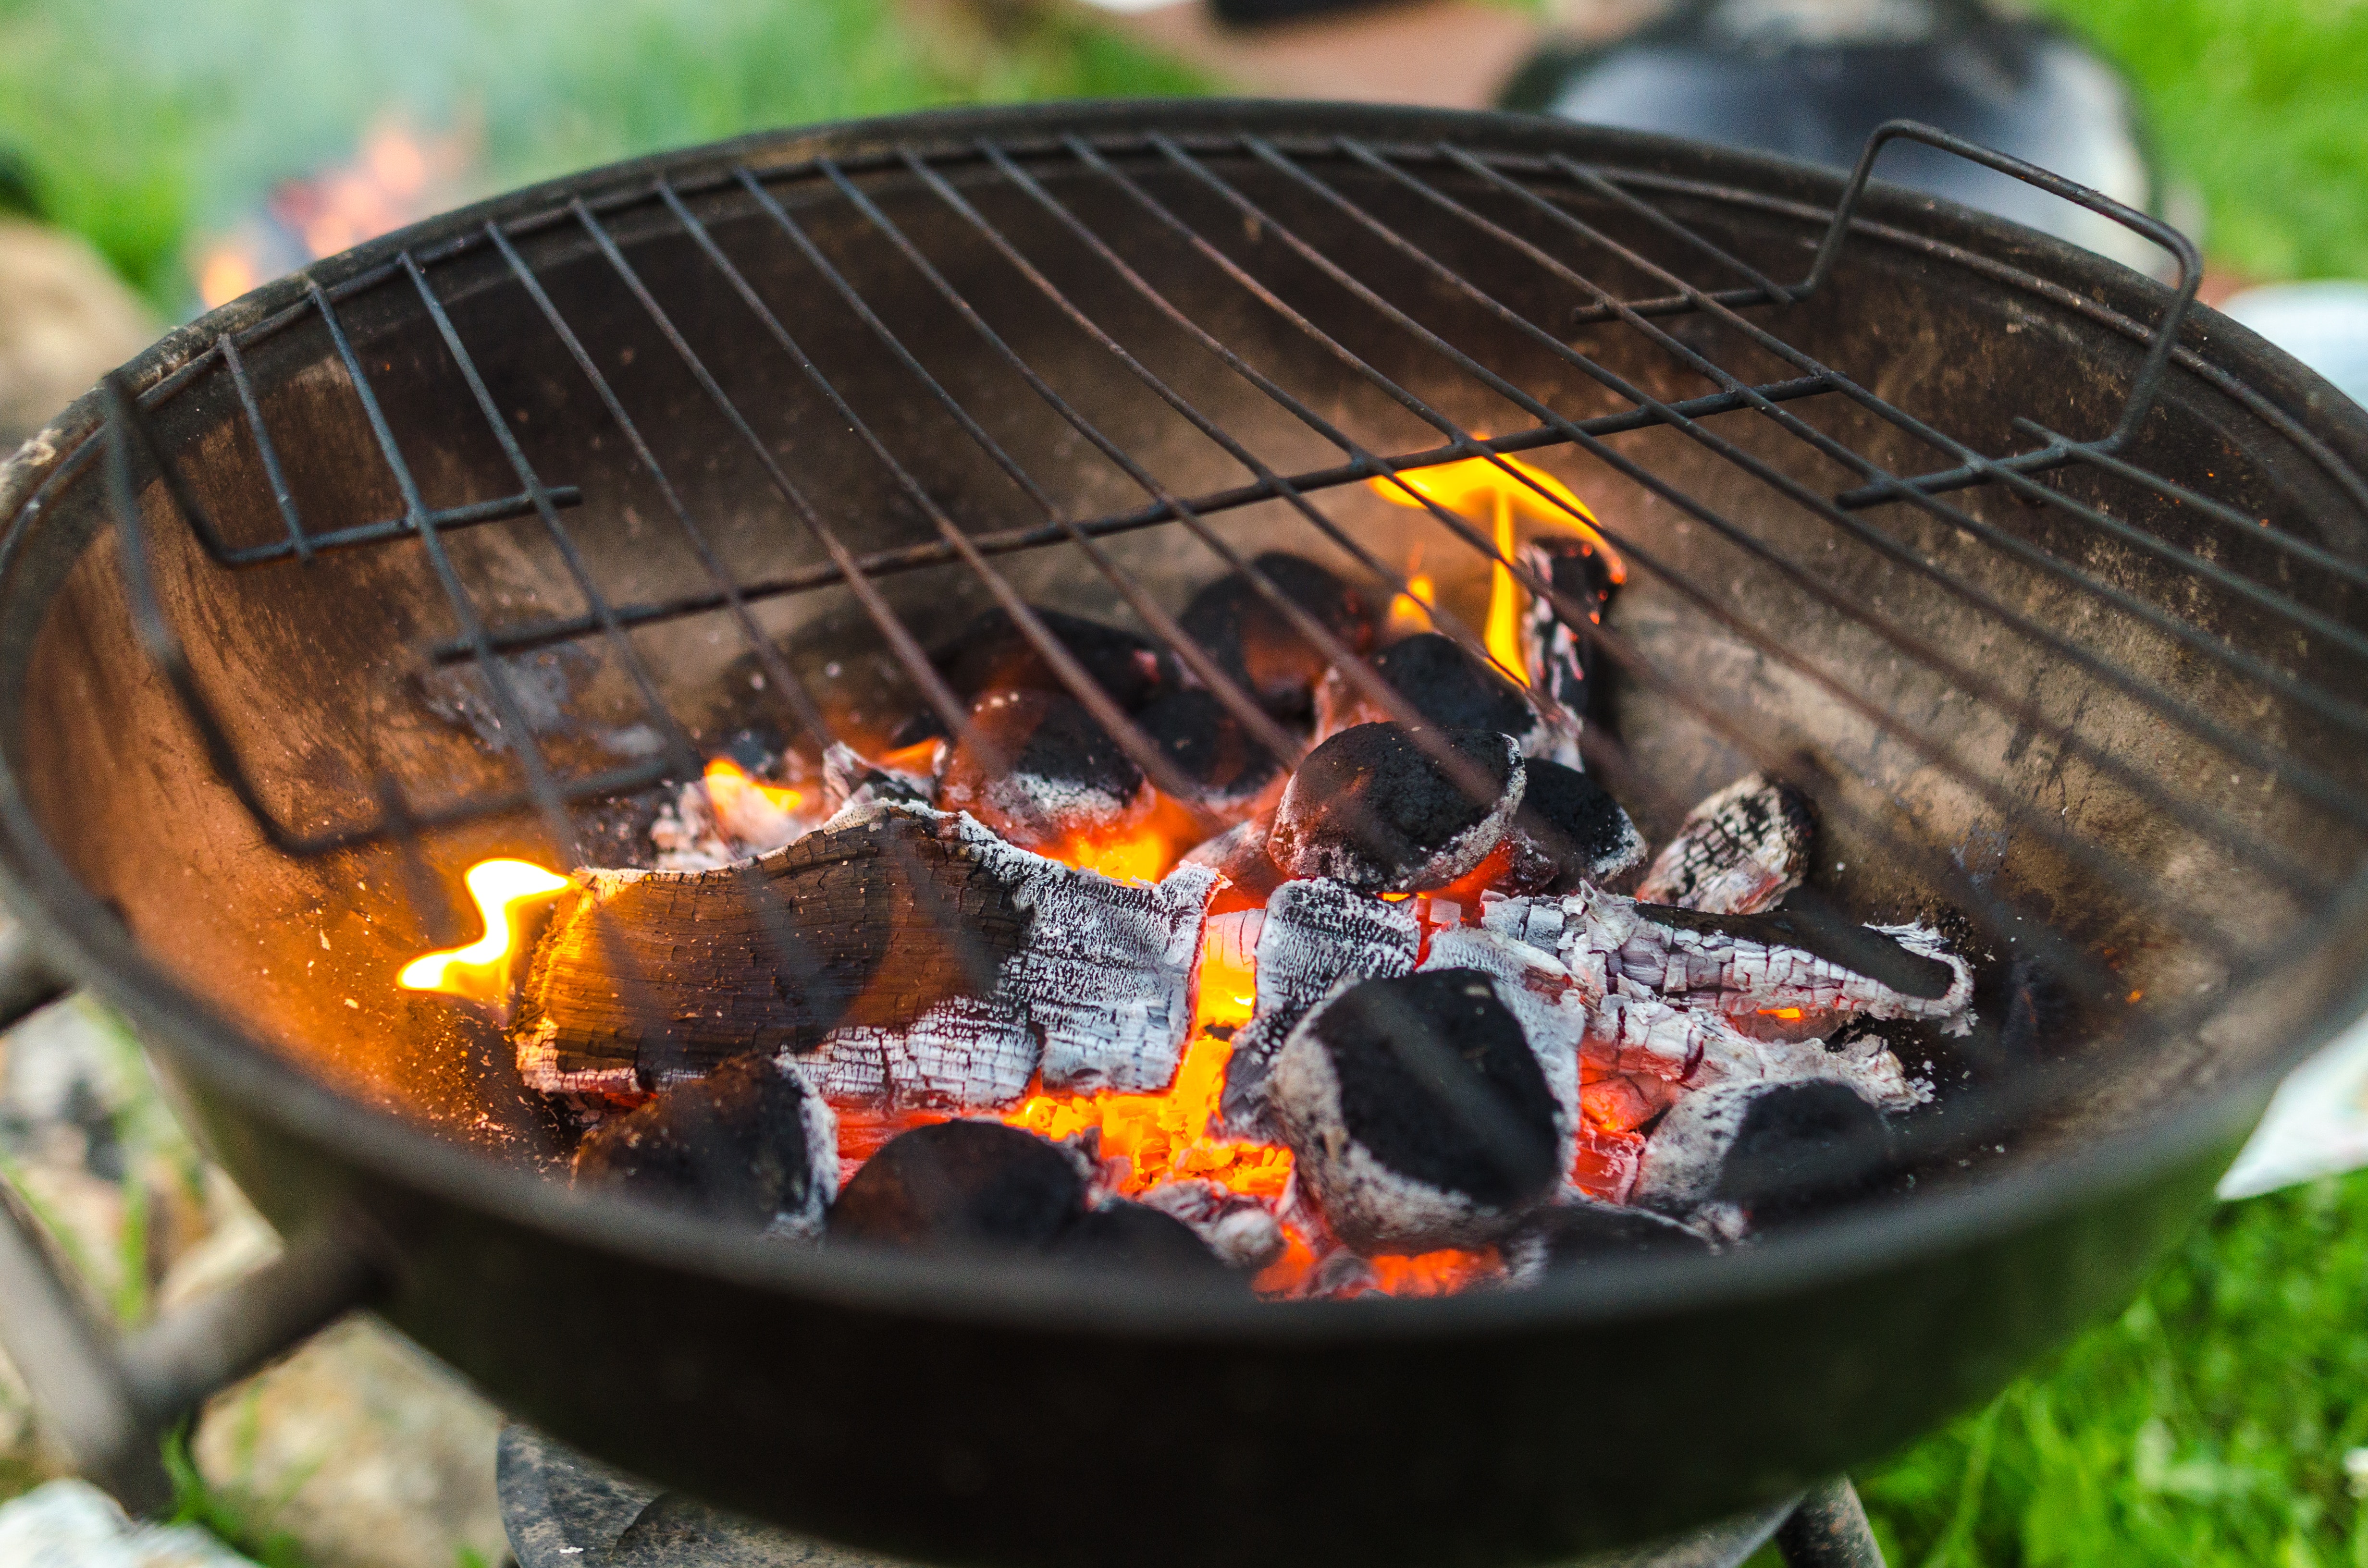
Image: CC by 2.0, by Lukas, via Pexels
To use a charcoal kettle grill for smoking, all you need to do is change how you build and maintain your heat.
When grilling with a charcoal kettle grill, you usually want to build your fire to be nice and hot.
But when you’re smoking with it, you want to build a slow burning, low fire and use wood chips or chunks for smoke.
There are many ways to do this.
If you don’t want to buy anything fancy, use a disposable pan for water in your kettle to help keep the heat low, and then lay wood chips on top of your coals.
Watch the video below:
But if you want to try some fancy smoking equipment, you can do that, too!
This video from White Thunder BBQ shows seven different methods to help you cook super low and slow on your kettle grill.
Gas grill
For would-be backyard cooks that do not want to (or cannot) use charcoal, gas grills are a popular alternative.
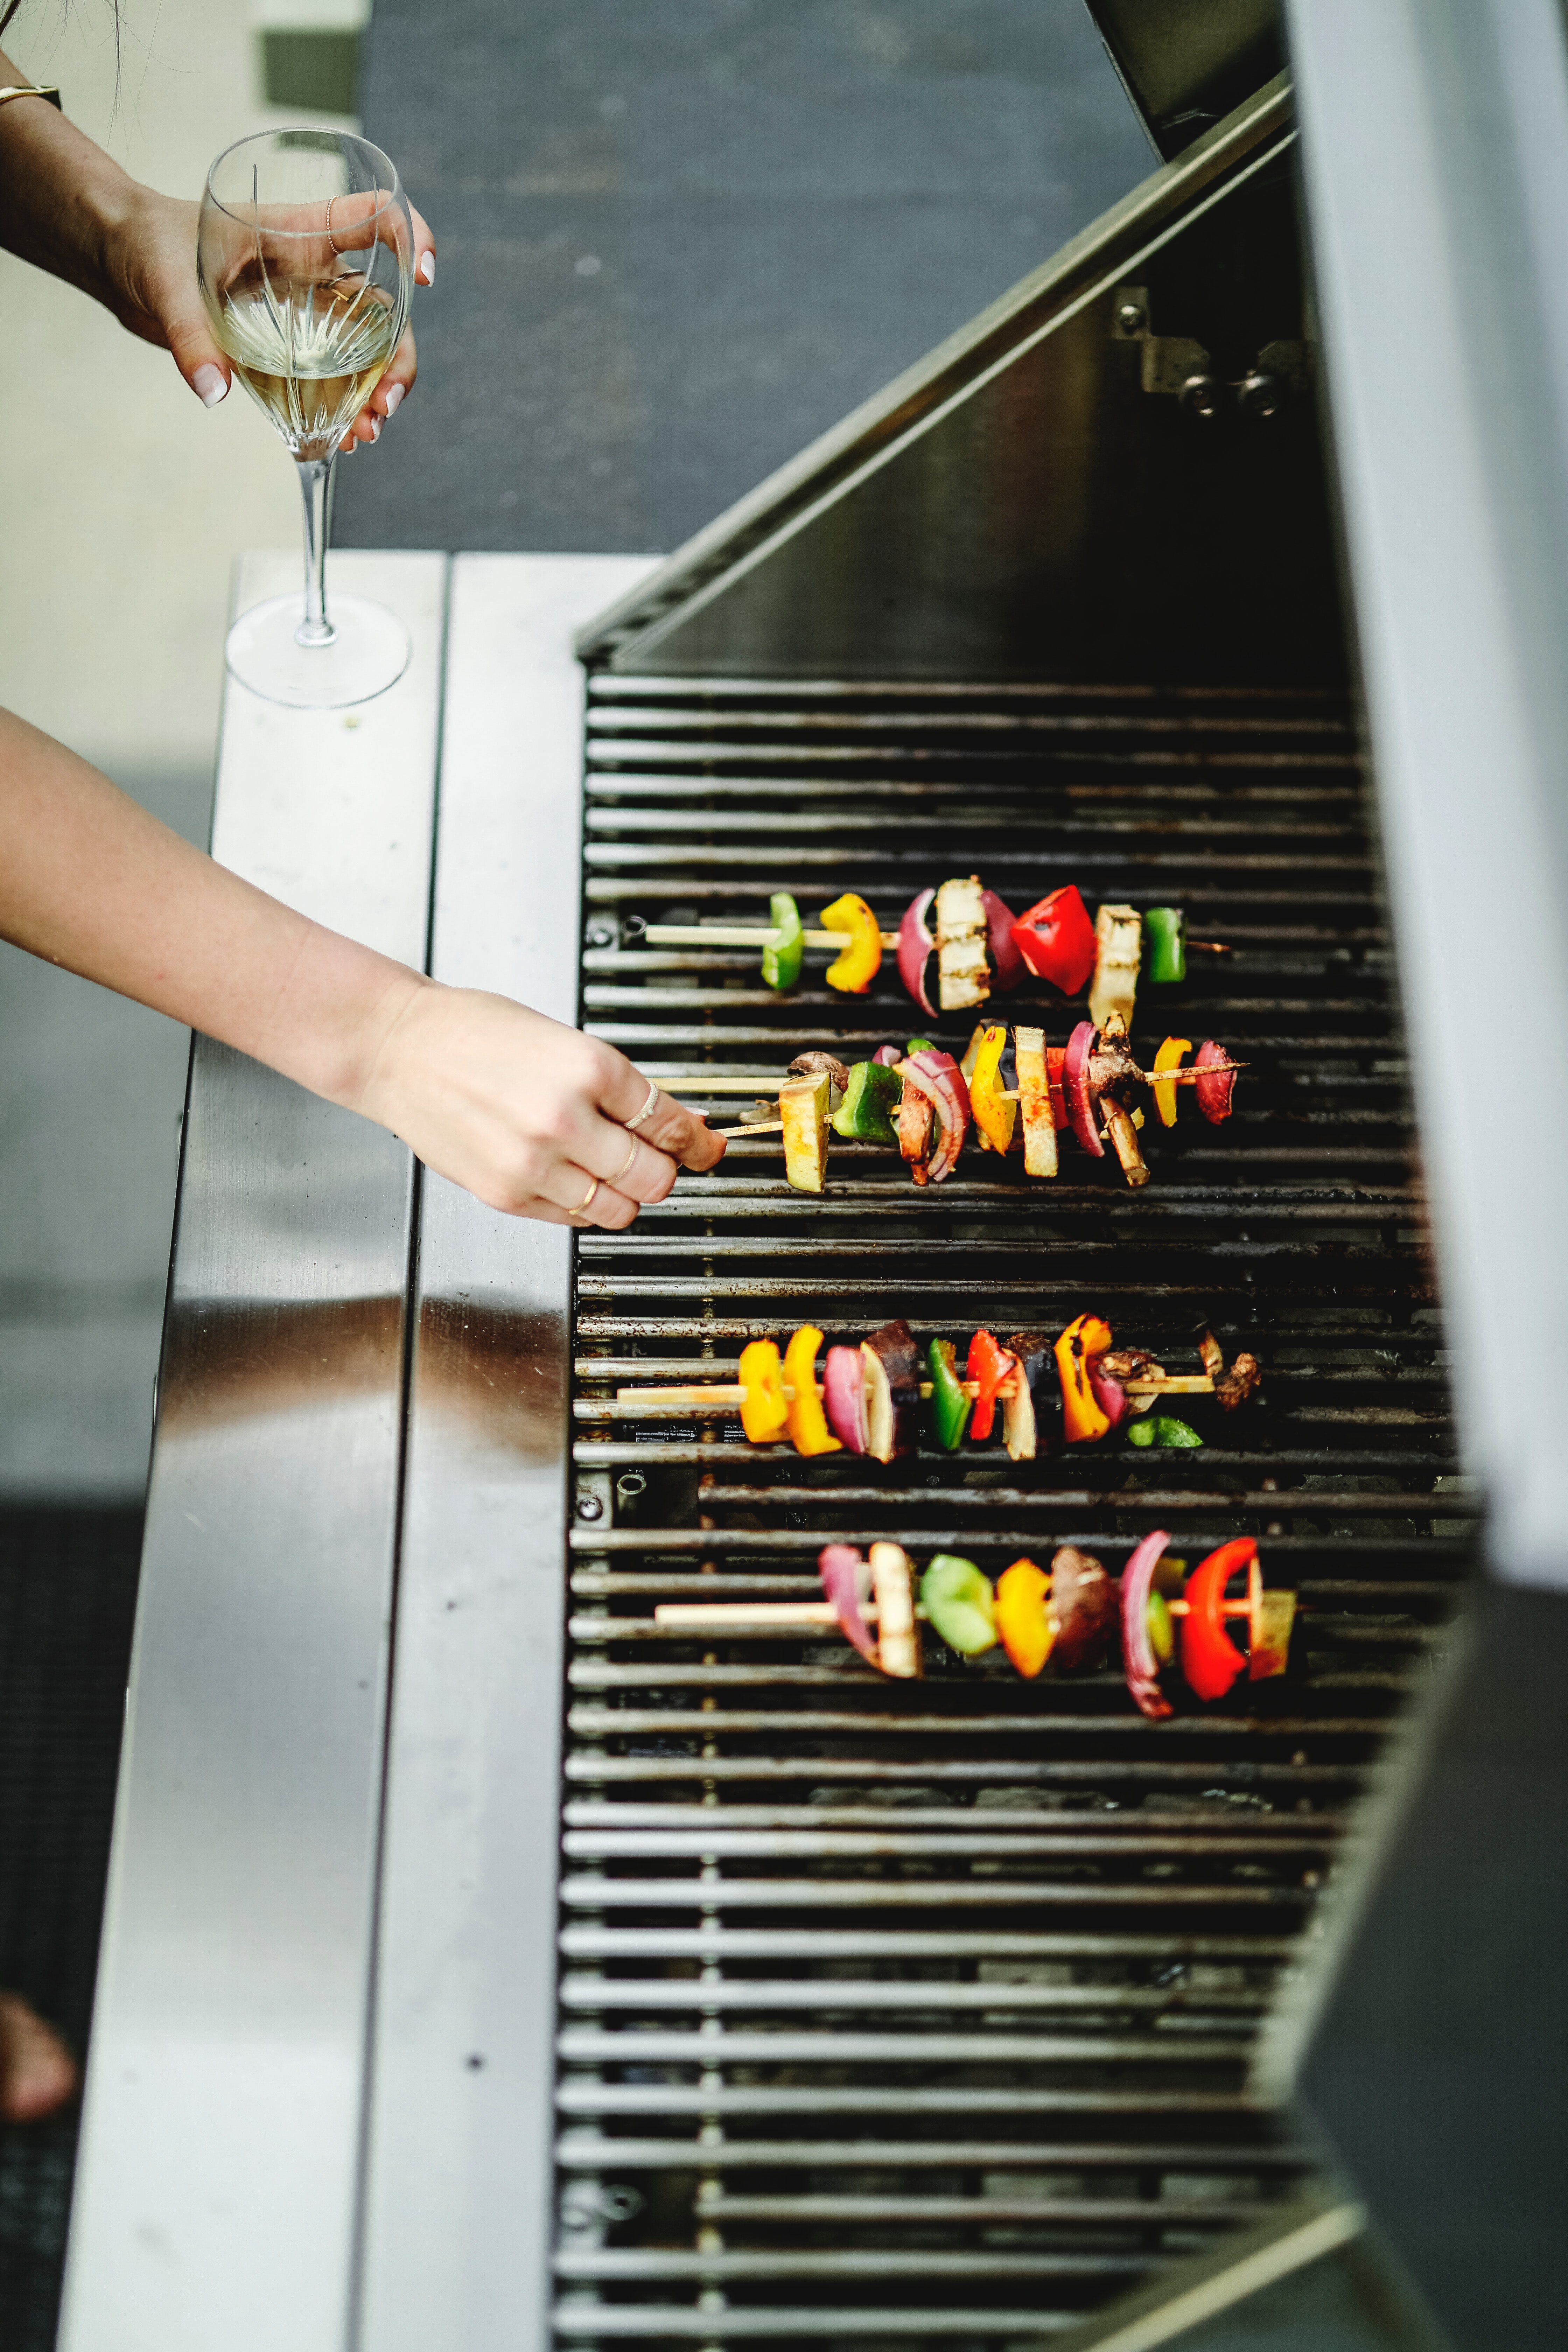
Image: CC0 by 2.0, by rawpixel.com, via Pexels
When it comes to smoking on a gas grill, it can be a little bit trickier than on a charcoal grill, but it is possible.
You can smoke meats on a gas grill without special equipment.
As Alaskagranny on YouTube points out, it’s all a matter of temperature control and knowing your grill.
If you love smoking meats, you can also invest in gas grills that have dedicated burners and equipment specifically for smoking.
Electric smoker
If you love smoking meats at home, you may want to invest in an electric smoker!
Unlike charcoal and gas grills, which are more versatile, an electric smoker is purpose-built to be a great smoker.
Most electric smokers include lots of surface area for your meat to cook and sturdy construction to keep the smoke close to your meat.
But wait, that’s not all!
Temperature control is also a lot easier with electric smokers as most have a thermostat built right in.
Overall, electric smokers take less work to set up and monitor than charcoal or gas grills.
If you love your smoked meats, an electric smoker is a worthwhile investment.
DIY smokers
If you want to smoke meat but don’t want to invest in huge smoking equipment, you still have options!
Just DIY your smokers with these simple hacks.
Ready?
Let’s get to it!
Wok
You know that wok you have laying around in the cupboard?
Put it to use by turning it into a DIY indoor smoker!
Check out the following video:
Be advised: you won’t be smoking large pieces of meat.
However, fish fillets, smaller poultry, and smaller racks of ribs will do great smoking on a wok!
(Just be sure to turn on your indoor vents!)
Cardboard box
How’s that saying go?
“Necessity is the mother of invention.”
Also:
“Where there’s a will there’s a way.”
When you want to smoke meat, and all you have is a cardboard box, you can believe you can find a way!

Image: CC by 2.0, brucemars, via Pexels
Yes, you can make a meat smoker out of a simple cardboard box!
This is the ultimate, low-cost way to try out smoking without a substantial financial commitment.
Watch:
Recipes to Try
Now that you’re armed and ready to get smoking, here are some recipes that are sure to whet your appetite!
Cherry-smoked duck
Ingredients
- 5 to 6-pound duck (giblets removed)
- 1 tablespoon sugar
- 2 teaspoons salt (kosher or sea)
- 1 teaspoon each ground cinnamon and ground cumin
- 2 teaspoons black pepper
- 1 3-inch cinnamon stick
- Olive oil
- Small shallot (halved)
- Cherry wood (chunks or chips), for smoking
Preparation
- 1To prepare the duck, dry it thoroughly.
- 2Trim any excess fat as well as the neck skin.
- 3Prick the skin with a fork, taking care not to prick the meat beneath.
- 4If you have the time, let the duck air dry for 24 hours on a wire rack in your refrigerator. This dries out the skin for crisp skin later!
- 5Mix your sugar, salt, ground spices, and pepper.
- 6Season the cavity with some of the spice rub before stuffing with the shallot and cinnamon stick.
- 7Rub the remaining spice mixture all over the duck.
- 8Rub the duck down with some olive oil and place on a rack in your smoker.
- 9Place a pan under the duck to catch the fat drippings.
- 10Smoke in your smoker, aiming for a temperature of 250-degrees Fahrenheit.
- 11Smoke until the duck reaches an internal temperature of 145-degrees Fahrenheit, about two to 2.5 hours.
- 12Raise the temperature of the smoker to 350-degrees Fahrenheit.
- 13Cook for 1.5 hours, until the internal temperature of the thigh meat registers 175-degrees Fahrenheit.
- 14Remove the duck from the smoker and let rest 5 minutes before carving and serving.
Source: Barbecue Bible
Maple Espresso Bacon
Ingredients
- 5 to 6 pounds of pork belly (skinless)
- 1/4 cup each of dark brown sugar, maple sugar, salt, espresso powder
- 2 teaspoons Insta-Cure Salt #1 (Curing Salt #1, Prague Powder #1)
- 1 1/2 tablespoons black pepper
- Water
- Hickory or applewood chunks or chips, for smoking
Directions
- 1Mix the brown sugar, maple sugar, salt, espresso powder, pepper, and curing salt, adding just enough water to make it into a paste.
- 2Spread the paste evenly on your pork belly and wrap tightly in a resealable plastic bag.
- 3Place the bag in the refrigerator for a week. Be sure to flip the bag and massage it at least once daily to ensure even distribution.
- 4After a week, remove from the refrigerator, discarding any accumulated liquid.
- 5Rinse the pork belly with fresh water and pat dry. Set up your smoking rig with applewood or hickory, aiming for 200-degrees Fahrenheit inside the smoker.
- 6Smoke the pork belly until it reaches 150-degrees internally, about 3 to 4 hours.
Source: Leite’s Culinaria
Once smoked, you can cook the bacon as desired. Wrapped tightly, this bacon will last up to one week in the refrigerator or two months in the freezer.
But let’s be honest: you’ll probably eat it WAY before then. (I know I would!)
About curing salt
Curing salt, also known as pink salt, is an essential ingredient for this dish. Be sure to use curing salt #1 as this is meant for cured meats that will be cooked.
Do not substitute another type of curing salt or other salts like Himalayan pink salt, as these are not the same.
Smoked watermelon
We couldn’t say good-bye without sharing the recipe for the mind-bending smoked watermelon ham!
If you don’t have the time to fly over to New York City to try it, don’t worry!
Intrepid Internet chefs have broken down the intricacies of this vegan “meat” for all to try.
This recipe is adapted from YouTube food channel 2 Guys & A Cooler who painstakingly recreated Ducks Eatery’s smoked watermelon ham.
Like the bacon, this recipe takes some time. Allow at least four days for bringing and drying time before smoking.
Smoked Watermelon Recipe
Ingredients
1 large watermelon
Brine Ingredients
- 2.5-percent salt (by watermelon weight)
- 1.5-percent brown sugar (by watermelon weight)
- 2 each juniper berries, cinnamon sticks
- 3 bay leaves
- 5 cloves
- Water
- 1 tablespoon oak ash (optional)
- Applewood chunks or chips (for smoking)
Directions
- 1Start by peeling your watermelon and weigh in.
- 2Take your watermelon weight to calculate the amount of salt and sugar you will need, according to the percentages given.
- 3Dissolve the salt and sugar in a cup of boiling water.
- 4Add cold water, enough to soak the watermelon, along with the other flavorings.
- 5Soak your watermelon in the cooled brine for 3 days.
- 6Remove from brine, rinse off, and then set in your refrigerator for another 12 hours to dry.
- 7Set up your smoker with applewood to smoke. Smoke for 4 hours at 130-degrees to 150-degrees Fahrenheit for approximately 4 hours.
- 8Then, raise the heat to 190-degrees Fahrenheit for another 4 hours.
- 9Remove from heat the smoker. Cut into large slices to serve.
Source: Leite’s Culinaria
Saving Some for Later
Like humanity, smoked meat has transcended its primal origins to become something far more than cave dwellers could have ever imagined.
Smoked meat can be as simple as salted meat, cooked low and slow over a dying fire. The result is a delicious, tasty piece of meat that becomes so much more than the tough muscle it once was.
But it can also be as innovative as a watermelon “ham”, brined and smoked. It becomes something completely unrecognizable and yet somehow familiar.
What are your favorite types of smoked meat?
What kind of meat do you think you want to try smoking at home?
Are you brave enough to try the smoked watermelon ham?
Let us know in the comments!
Featured Image CC0 Marcus Hendrich via Pixabay