Category Archives for Export

Brisket cut

How To Smoke A Brisket In An Electric Smoker: A Hands-Free Recipe!

Are you wondering how to smoke a brisket in an electric smoker? Who doesn’t love a good brisket? Everything from the juicy, tender meat to the flavorful bark is irresistible. It seems like something that only a professional could pull off correctly.

But that isn’t true because now you can achieve this healthy and delicious meal at home. Learning how to smoke a brisket in an electric smoker is incredibly easy. Your friends are going to think you’re a pitmaster. You’ll think so too when you taste your creation.

However, there are a few simple steps you need to take when learning how to smoke a brisket in an electric smoker. The first thing you need to do is get the right meat and a quality smoker.

You see, the right cut of meat is going to give you an extraordinary amount of flavor and you’ll hardly need any seasonings. Using an electric smoker will give you so much more freedom than basically any other smoker on the market.

Before you get started, there are a few simple steps you need to take. Before you know it, you’ll have a brisket that tastes just as good as your local barbecue.

The Perks Of An Electric Smoker

meat and sausages in an electric smoker

Image via Pixabay

First of all, you might be wondering, why we are specifically focusing on an electric smoker. Well, the truth is, if you’re learning how to smoke meats, it is the most straightforward machine on the market.

Even if you have been using smokers for years, you’ll be surprised at how easy they are to control in comparison to many others. That will make learning how to smoke a brisket in an electric smoker the most straightforward option out there.

Talk about convenient.

Propane and charcoal smokers have the risk of running out of fuel during the smoking process. Charcoal smokers are especially challenging to control because you need to refresh the coals frequently.

The more you open the smoker to restore the fuel, the more heat you will lose in the process. That can lead to temperature spikes and drops which will seriously affect the time it takes to make your brisket. It may even affect the quality of your final product.

Electric smokers have simple settings and will control the temperature for you. That will lead to a quicker dinner and more reliable final product.

Additionally, they are relatively energy efficient and use cleaner energy than both coal or propane. When using an electric smoker, you don’t have to worry about chemical contamination like you would with any other smoker.

two piece of meat in an electric smoker

Image via Pixabay

What you should know about using an electric smoker

As we mentioned before, an electric smoker is incredibly straightforward and easy to use. Most models include an on/off switch or pushbutton start.

They also include temperature controls that range from 100 to 275 degrees, although the range will depend on the model. It might not seem like a wide range in comparison to an oven, but that’s the point. It’s the ideal way to learn how to smoke a brisket in an electric smoker at a low temperature.

When smoking any meat, low and slow is the way to go. It will give you a perfectly tender and juicy meat that is to die for.

Additionally, the walls are insulated, which will maximize temperature retention. They include a side wood chip loader, removable drip tray, and adjustable dampers. All of those features will enable you to achieve a marvelous flavor.

To tell the truth, there isn’t much to the whole process. That’s the beauty behind learning how to smoke a brisket in an electric smoker.

How to Smoke a Brisket in an Electric Smoker like a Pro

When it comes to learning how to smoke a brisket in an electric smoker there are only a few things you need to keep in mind. The cut and quality of the meat are the most crucial factors of all.

Next, you will need to find the perfect flavoring method, which can be accomplished in several ways. Keep in mind that it isn’t going to take much, but the execution needs to be done flawlessly. However, you’ll be happy to know that’s easy to accomplish.

Picking and prepping your brisket

Alright, time to get to the meat of this smoking business.

Picking the right cut of meat is essential to making the perfect brisket. No matter what meat you happen to be smoking, you should pick the best on the market, whether it’s ham, sirloin, ribs, or brisket.

If you’re going to take hours upon end to make a meal, you should drop a little extra cash to get the best cut.

According to many experienced smokers, you want the “packers cut.” It’s a sizeable two-muscle cut with a generous fat cap. They typically come at about 11 pounds.

The quality is crucial as well. You need a high-grade slab of meat, which usually means getting a Waygu or Prime brisket. They have excellent marbling that will boost the flavor, moisture, and tenderness of the final product.

smoked brisket in a plate served

Image via Pixabay

Tips for flavoring your brisket

The truth is, brisket is one of the most flavorful parts of a cow. It contains plenty of fat that will provide a delicious natural flavor. Plus, cows don’t have a gamey taste, so you won’t need to add much seasoning or brine the meat.

There are a lot of people who recommend injecting your meat with beef stock, bouillon, MSG, or seasonings. However, there’s no need for any of that.

Simple seasonings on the exterior of the meat are more than enough because the meat is already rich and delicious. Coarse ground salt, pepper, and finely ground garlic powder are the most common choices.

Although if you’re interested in adding a little boost to the flavor, the right wood chips are a fabulous addition. Most experienced smokers recommend oak if you are just learning how to smoke a brisket in an electric smoker.

Texas Style Brisket Recipe

Texas style brisket is a wonderful recipe if you are learning how to smoke a brisket in an electric smoker. But strap in because it’s going to take you a whopping 15-hours in total to cook this fantastic brisket.

It might seem high maintenance when you are just learning how to smoke a brisket in an electric smoker. However, it’s going to be well worth the wait. You merely need to plan your day correctly. But you’ll have plenty of time waiting around and you can use that time to accomplish lots of other things while you wait.

smoked brisket being cut into pieces

Image via Pexels

Ingredients and equipment

  • An electric smoker
  • Butcher paper
  • Oak wood chips
  • 12 to 14 pound whole packer brisket (plan for 1/2-pound per person and adjust the cooking time)
  • 2 Tablespoons coarse Kosher salt
  • 2 Tablespoons coarse ground black pepper
  • 2 Tablespoons garlic powder

Prepping your tasty treat

  1. First off, you need to plan for the crowd you are serving. If it’s for a party, this recipe should feed about 24 to 28 people if you plan 1/2-pound per person. Although, leftovers are never a bad idea!
  2. Make sure the meat is room temperature, and the smoker is up 225-degree before getting started.
  3. Next, you will need to trim and season the brisket. Some people don’t bother trimming the meat because they want the additional flavor from the fat. They plan to cut away most of the fat after cooking, rather than before. But if you are planning to trim your brisket, there are some great guides to pull it off perfectly. As for the seasoning, just sprinkle it all over and rub it on so it sticks. Easy peasy.

Smoking up a storm

  1. Place the brisket in the smoker and add the wood chips to the appropriate pan. Allow it to smoke at 225 degrees for around 8 hours. The cooking time will depend on the size of the brisket, and this approximation is for the 12 to 14-pound brisket. The rule of thumb is, “when it’s done, it’s done.” But a more exact plan would be to shoot for 165 degrees.
  2. Once your brisket has reached 165 degrees, you can take it out and wrap it up like a present in butcher paper. Using butcher paper, rather than foil, will promote a deliciously caramelized bark. Just make sure you seal it up correctly and place it back into the smoker with the folded side down.
  3. Once you return it to the smoker, it can smoke for another 5 to 8 hours. Again, it will depend on the size of the brisket. You want the brisket to reach about 202 degrees.

Time to rest

  1. When it is finally done you can take it out but leave it wrapped up. Place it on a cutting board or baking pan so it can sit for at least an hour. That will allow the juices to settle and redistribute through the meat. Although, if you need it to stay hot for dinner, you can wrap your juicy package in a towel and place it in a cooler. That will keep it warm for up to six hours.
  2. After allowing your brisket to rest, it will be the perfect temperature slicing. You won’t lose all the tasty juices, but it will be tender enough to slice like a stick of butter.
  3. Slicing your brisket is a bit of a task. If you got a high-quality piece of brisket, there should be a flat portion and a point. The point will have two overlapping muscles running through the middle. Considering all of the above and the fact that you should cut against the grain for maximum tenderness, it can be tricky. Luckily, there are fantastic guides for slicing your brisket.

Smoking A Brisket Has Never Been So Tasty

Making brisket can take a bit of money and a big chunk of your time. The perk to learning how to smoke a brisket in an electric smoker is your ability to go hands-free.

All you need to do is prepare the meat and pop it in the smoker. Beyond that, there isn’t much you have to do. It’s all about cooking the brisket low and slow until it reaches the right temperature.

It will slice like butter and only requires simple seasonings to taste amazing. However, there are a few things to remember if you’re going to learn how to smoke a brisket in an electric smoker properly.

First of all, the temperature is everything.

Don’t worry about the meat when it’s in the smoker. You can check it when it gets to a certain point, but there is no need to flip the brisket continually. The more you open the smoker, the more the temperature will fluctuate. That could extend the cooking time tremendously.

smoked brisket on plate with tomato side

Image via Pixabay

Also, remember that you can get creative. That could include experimenting with different flavors by using wood chips, seasonings, or sauces.

Although, you’d be surprised how many “purists” smoke the bare meat and roll their eyes at any other method.

However, we aren’t those people. Instead, we want to give you a delicious basic recipe while you learn to ropes. We would also love to hear any tips you have for learning how to smoke a brisket in an electric smoker in the comments!

grilling meat and vegetables

Propane Camping Grill: Make Cooking in the Great Outdoors Simple

Camping can be a lot of work, but cooking while you’re in the great outdoors doesn’t have to be. At least, not if you have a propane camping grill. I’ve been on a lot of camping trips. It’s one of the cheapest choices when you’re looking for a budget-friendly adventure. After countless trips, I know just how difficult it is to plan a real meal while you’re on the go. The choices normally come down to eating out, if that’s even an option, or rigging up a way to cook over a fire.

grilling sausages

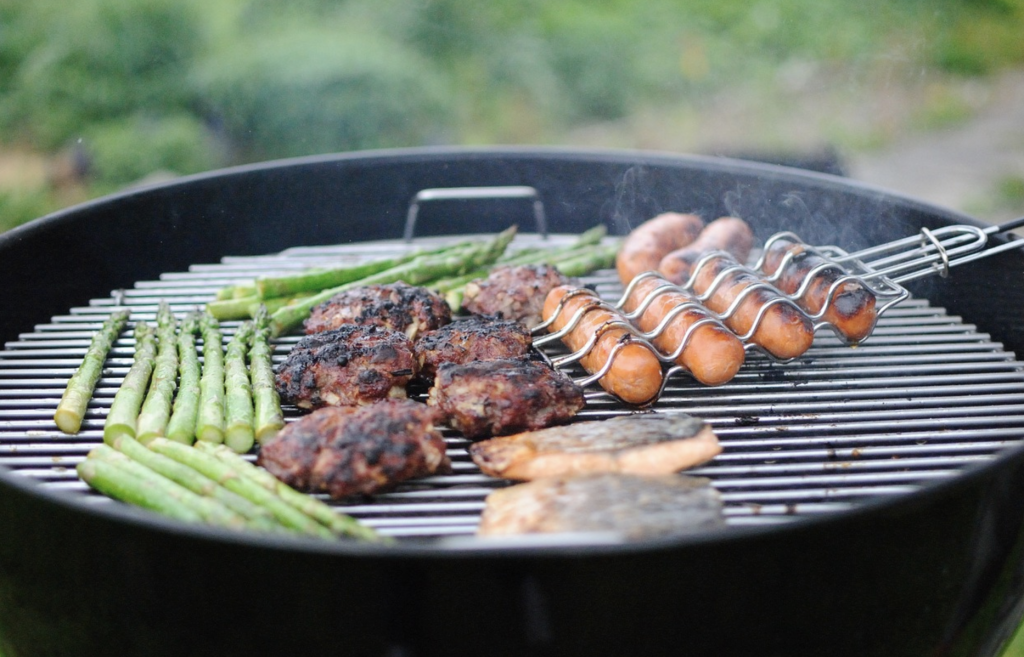
Image source: Pixabay.com

If you choose the latter, you will also need to bring firewood or buy some at the campground. Plus, you’re going to need to light the fire somehow, so you need to pack additional tools for that. Overall, it isn’t exactly a task that new campers look forward to. All around, it’s more trouble than it’s worth if you’re only setting up camp for the night until you continue the journey the next day. A propane camping grill is a perfect solution for cooking on the go or in the great outdoors.

And a propane grill is perfect for everything from camping to tailgating to picnics in the park. Even if you don’t plan many camping trips, you will have plenty of uses for a propane camping grill. No matter where your adventure takes you, cooking dinner on the road is going to be easier than ever before.

Picking the Perfect Propane Camping Grill

When you’re picking out a propane camping grill, there are a few things that you need to consider. It isn’t a complicated decision, and it just depends on your needs. First of all, you need to consider the group you will be cooking for on your trip. I’ve been on camping trips with just my husband or in large groups of over 30 people. In almost every situation, I have been in charge of cooking the food, at least for one meal.

Depending on the group you usually go camping with, you will need to consider the size of the cooking area. No matter what, a portable propane camping grill isn’t going to be very big. They need to be small for portability. Luckily, all of the options on this list are a great size for a family. A propane camping grill will give you all the convenience of an electric skillet, but you won’t have to rely on outlets. Therefore, you can take a propane camping grill anywhere and cook at any time.

Another thing to think about is the size of the propane bottle. Many propane camping grill models will not include a propane bottle. So when you are buying one, make sure that you get enough for the duration of your trip. If you plan to get a larger 5-pound bottle, you may also need to get a new hose to adapt it to your propane camping grill.

You should pick something with a removable drip tray, a lid lock, and preferably, a removable grill top. All of those features will make it easier to clean or pack on the go. Plus, campsites usually frown upon cleaning your dishes in a bathroom sink. So you need all the convenience you can get.

Gas vs. charcoal: The convenience showdown

You might be wondering why we are even focusing on a propane camping grill when charcoal grills are just as portable.

The thing is, charcoal grills can be more complicated to lug around. For one thing, they don’t always have a latch to keep the whole unit together.

Additionally, you’re also going to need enough charcoal to get you through your trip. You can buy it at most campgrounds or any nearby grocery store, but it’s a messy business. Furthermore, you’re going to have to light the charcoal, so you will need additional tools for that.

When it comes to a propane camping grill, you can usually start it with the push of a button. Plus, you can guarantee evenly distributed heat so that your food will cook evenly every time. When it comes to charcoal grilling, it can be difficult to ensure there won’t be a hot spot.

When it comes down to it, a propane camping grill is more convenient, but it isn’t your only option. It all comes down to personal preference.

How We Reviewed the Best Propane Camping Grill Selection

We want to make sure to give you reviews that are based on genuine customer experiences. Therefore, we made sure to base our ratings on Amazon customer reviews.

Our goal is to let you know the features of each model so that you can pick the right one for your camping needs. For that reason, we will include what Amazon customers loved most about each product.

Our overall goal is to give you a fantastic selection so that you can find the best propane camping grill for your big adventure.

Price to pay for convenience

Camping is the most affordable way to travel. It will allow you to go anywhere without having to drop a ton of money on good hotel rooms.

You certainly don’t want to save money by going to a dingy two-star motel that probably has bed bugs. Remember that you get what you pay for.

At least when you’re camping, you know who has been in your tent, unlike those stained mattresses or questionable comforters in seedy hotel rooms.

Who would have thought camping is the cleaner choice?

Anyway, cooking on your journey doesn’t have to be expensive. The price range on these propane grills is between $85 and $210.

It might seem a little pricey in the beginning, but they’re sturdy and will last for a long time. So this one-time purchase will get you through years of camping trips, as long as you take care of it and store it properly.

The Top 5 Propane Camp Grills

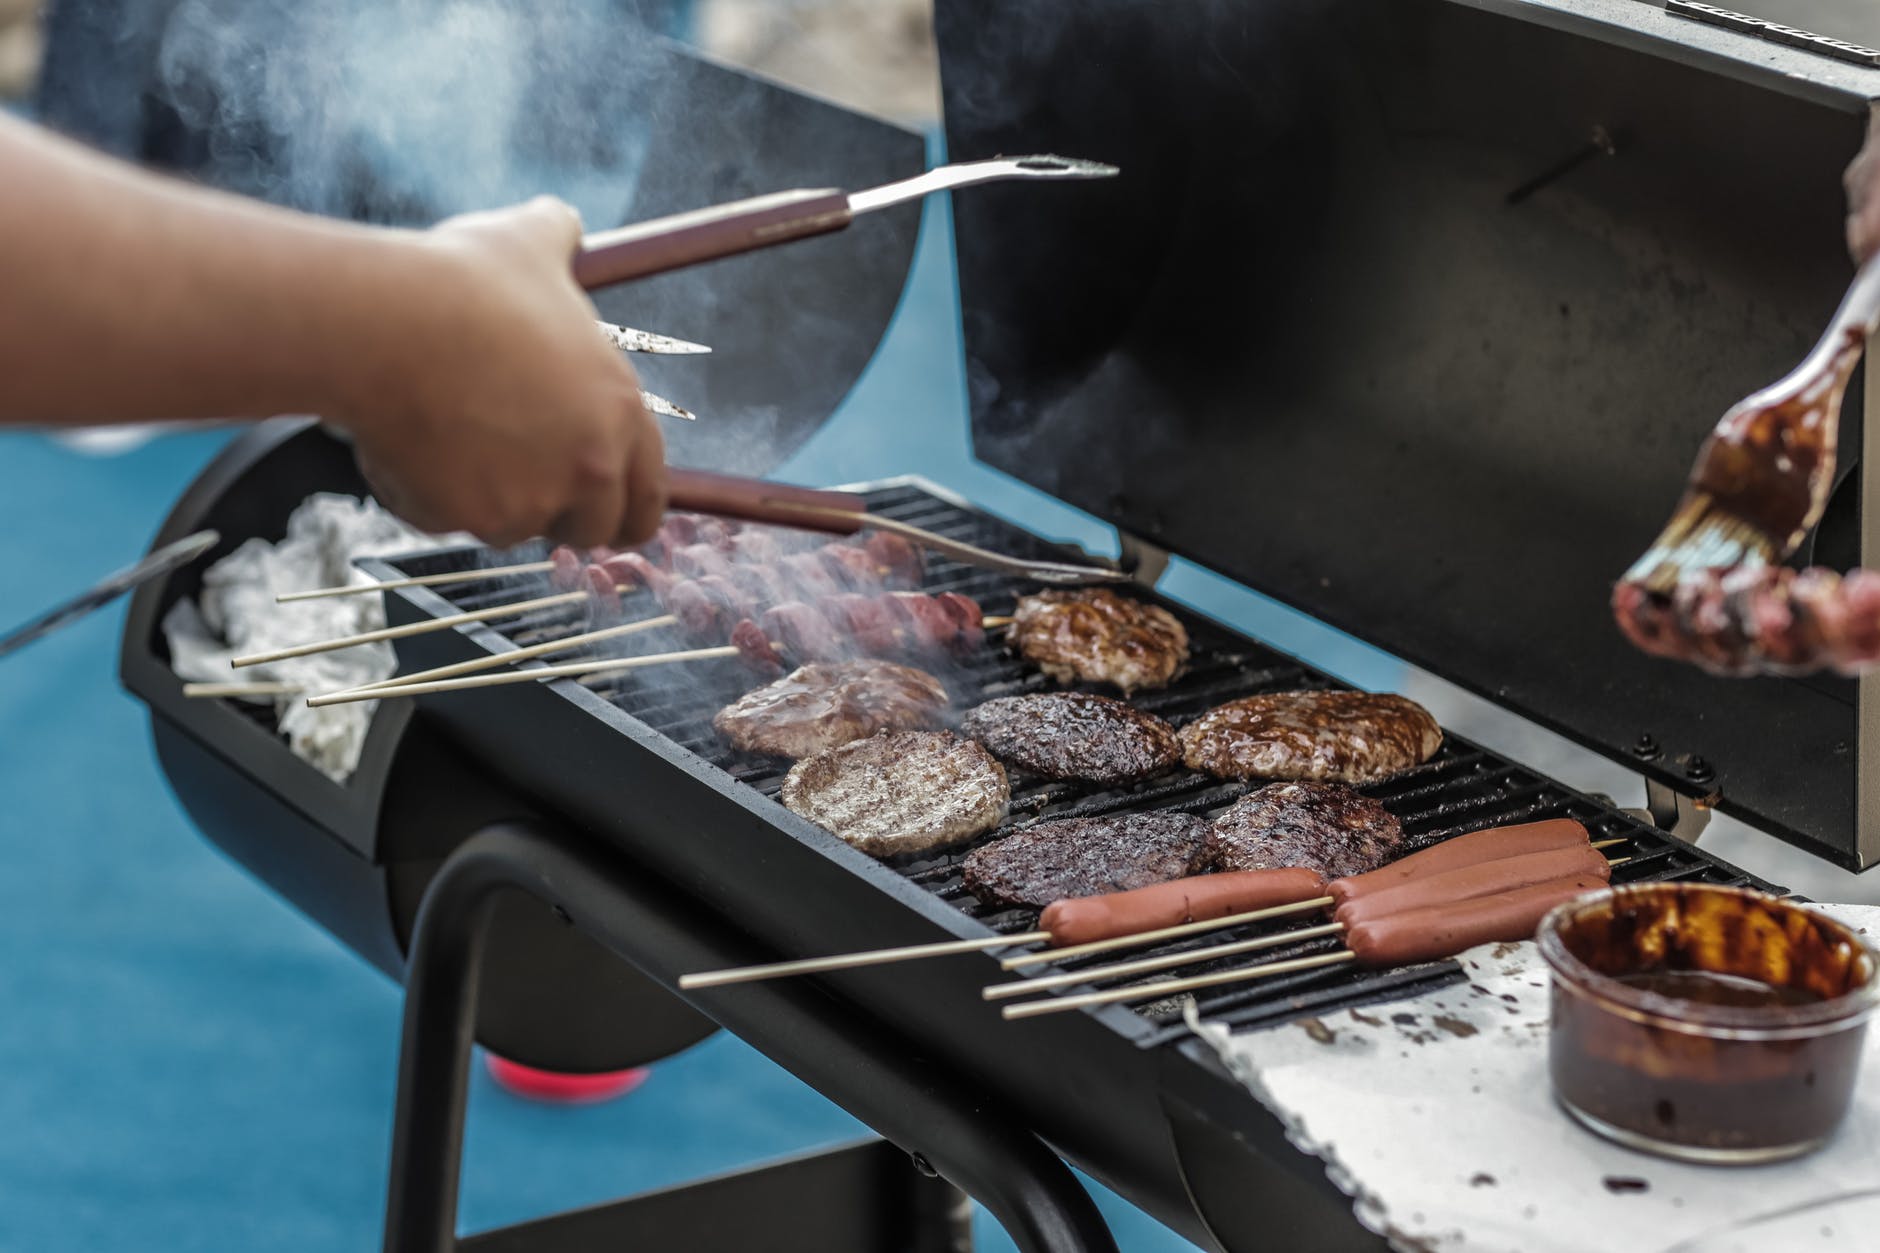
Cooking while you're camping will finally be simple. If you get a propane camping grill, all you have to do is press a button and make sure you have enough fuel. Honestly, it will be like cooking at home.

If you’re interested in convenient camping, these lightweight and portable camping grills are perfect. They’re easy to pack or store when you aren’t on the go.

Plus, you don’t only have to use them when you’re camping. You can use it on the back porch when you’re having a fun little barbeque or in the park for a cute picnic.

The possibilities are endless. So if you’re interested in getting a propane camping grill, take a look at these fantastic options!

Cuisinart CGG-180T Petit Gourmet Portable Tabletop Gas Grill


Cuisinart CGG-180T Petit Gourmet Portable Tabletop Propane Gas Grill,...
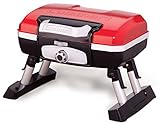
  • Portable gas grill with 145-square-inch grilling area and foldaway legs.
  • Cooks 8 burgers, 8 steaks, 6 to 10 chicken breasts, or 4 pounds of fish.
  • Powerful 5,500 BTU stainless-steel burner and even-heating porcelain-enameled grate.

The Cuisinart CGG-180T Petit Gourmet Portable Tabletop Gas Grill is incredibly convenient. It’s lightweight, with foldable legs, a lid latch, and a briefcase style carrying handle for the ultimate portability.

The 145-square inch grilling surface will give you enough space to cook food for about 8 people at a time. So it is perfect for a small group or a large family.

This propane camping grill has a stainless steel burner that evenly heats the porcelain-enameled grate. That, combined with the removable drip tray, will make it easy to clean up.

You can attach this unit to a small tank, which you will need to purchase separately. If you want to use it with a large 5-pound propane tank, you will also need to get the appropriate hose.

Coleman RoadTrip LXE Portable Gas Grill


No products found.

If you’re interested in a standing model, the Coleman RoadTrip LXE Portable Gas Grill is fantastic. It has 285-square inches of grilling surface, which is double the grilling surface of the Cuisinart CGG-180T. The slide-out side tables will be convenient when you’re getting food off the grill.

The grill has a collapsible design that will fold down until it’s the size of a small rolling suitcase. It has a lid-lock, wheels, and a convenient handle.

Plus, it has double-burners and can use interchangeable cooktops. You can switch between grills, griddles, and stovetop burners, although the additional cooktops are sold separately. This model only comes with two porcelain-coated grilling grates.

You can start grilling at the touch of a button with the insta-start ignition for matchless lighting. Keep in mind that you will need to purchase the propane bottle separately.

Coleman 2000020947 Ppn Sportster Grill


Coleman Gas Grill | Portable Propane Grill | Sportster Grill
  • COOKING POWER: Up to 11,000 total BTUs
  • LARGE GRILLING AREA: 225 sq. in.
  • PUSH-BUTTON IGNITION: For matchless lighting

Another fabulous standing model is the Coleman 2000020947 Ppn Sportster Grill. It has a fully collapsible design that will fold down to the size of a suitcase. It also has convenient wheels and a handle for portability and is an excellent size for compact storage.

Setup is simple with the lift and lock system. You’ll be able to count on your collapsible grill standing steady and secure until you’ve cleaned up and packed it away.

The Coleman 2000020947 Ppn Sportster grill has a 225-square inch porcelain-coated grilling grate. The grates and drip tray are both removable. Both removable features are the perfect combination to make grilling and cleanup more efficient than ever.

Additionally, this unit does not come with a propane bottle, so you will need to purchase it separately. However, it does include an insta-start ignition, so you will not require matches or a lighter to start up your grill.

Giantex Stainless Steel Tabletop Gas Grill


Giantex Portable Gas Grill with 2 Burner, Max. 20,000 BTU total,...
  • 【Giantex Tabletop Grill】: Giantex 2-Burner stainless steel tabletop grill is built for the BBQ-grillers, Construct...
  • 【Easy To Operate】: Two push-and-turn ignition burners for quick and easy start-ups. It offers 20,000 total BTUs and...
  • 【Foldable Design】: Foldable legs and lockable lid for portable transport and storage. Also make it more easily...

If you are on the lookout for a highly portable propane camping grill, the Giantex Stainless Steel Tabletop Gas Grill is ideal. It has foldable legs and a lockable lid. The stainless steel design makes it durable enough for any camping trip.

This propane camping grill is built for secure storage, and the stainless steel handle will make it extremely portable. Each of the double-burners has twist-and-turn ignition knobs.

Additionally, the stainless steel grate offers plenty of cooking space for the whole family. You should keep in mind that the grate is not removable, so it might not be as easy to clean as other models. However, it does have a well-concealed grease trap that is removable and easy to wash.

One thing you should know about this grill is that there is some assembly required. But it comes with everything you need to put your propane camping grill together quickly.

Weber 50060001 Q1000 Liquid Propane Camping Grill


Weber Q1000 Liquid Propane Grill, Titanium
  • One stainless steel burner produces 8500 BTU-per-hour to heat 189 square-inch total cooking area
  • Porcelain-enameled cast-iron cooking grates and cast aluminum lid and body
  • Fully assembled out of box. Dimensions - lid closed (inches): 14.5H x 27W x 16.5D inches

The Weber 50060001 Q1000 Liquid Propane Camping Grill is a fabulous choice for your great adventure. It has a single stainless steel burner and is incredibly small and portable.

This propane camping grill has a cast aluminum lid and body, and a porcelain-coated cast iron grilling grate. The grate gives your 189-square inches of cooking space.

It comes fully assembled and ready to go. Plus, the push-button ignition will make it easy to get started. Keep in mind that the directions recommend that you preheat the grill before you begin cooking.

Cooking in the Great Outdoors Has Never Been Easier

Cooking dinner when you’re camping doesn’t have to be hard. Although, it can feel like it if the only option is rigging something up over the fire. Packing a convenient propane camping grill will make whipping up your meals so much easier.

You won’t have to rely on hot dogs and smores on your next trip! They might be classics, but trust me, they can get old pretty quickly. It will be refreshing to make well-rounded meals, no matter where you are.

So on your next big adventure, get ready to cook breakfast, lunch, and dinner with ease. Not only will you be able to pack up the grill and toss it in the car, but cleanup will be a breeze.

If you have a favorite propane camping grill, we would love to hear all about it in the comment section below!

Featured Image via Pixabay

how to use an electric smoker

How to Use an Electric Smoker the Right Way

So, you want to know how to use an electric smoker, and you want to do it right the first time around? Good news! With a few easy steps, you'll be cooking up the greatest meals anybody in your family has ever had.

Is it possible to use an electric smoker the right way the first time around? Of course, it is! While you can wing it and hope for the best, a little education and some prep before you start cooking will go a long way towards a delicious smoked meal the first time out of the gate.

And because you're already researching this topic, you've got the education part covered. Let's get to it.

How to Use an Electric Smoker (the Right Way)

grilled meat

Image Source: Pixabay

Before you turn on your electric smoker and slap some pork chops down on the grill, you need to understand a couple of key elements about electric smokers.


First off, electric smokers are simple to use. That's thanks to the digital control panel on the front of the smoker. Unlike gas and charcoal smokers, which require constant monitoring and fidgeting with temperatures, the electric smoker will self-regulate.


Next, you'll notice that there's a heating element, a water pan, a container for wood chips, a bunch of racks, and a drip pan. That's simple. The electric element heats up the wood chips which produce heat and smoke.


The water pan sits above the wood chips and blocks direct heat from scorching the food on the racks above. The water also adds moisture to the food and helps that delicious smoke absorb deep into it.


The wood chips


Here's where it gets interesting. Those who know how to use an electric smoker always source the best wood chips. That's because the wood determines the flavor of the food you're cooking, especially meats.


You'll never go wrong with an apple-flavored wood, but cherry, alder, and even oak add some awesome flavors to your food. We recommend FireStar Wood Chips for smokers, which offer a great assortment of wood chips that you can't go wrong with.


The seasoning


Masterbuilt 20078616 Electric Bullet Smoker, Black
  • 395 sq. inches of cooking space on twoporcelain coated smoking racks
  • 1,650 watt heating element for even, consistentsmoking up to 400 Degree
  • Removable porcelain-coated wood chip tray,drip pan and water bowl

If you really want to know how to use an electric smoker and create great food right away, then look away from the smoker for a moment. Instead, look at the seasoning you're adding to your meat.


You want a beautiful, subtle yet flavorful seasoning that will complement the smoke flavors. You don't want to overpower the meat, nor do you want to waste money on flavorless garbage.

If you go with something like High Plains Spice Company Smokehouse Favorites, you'll hit all the right spots. These are made to compliment your smoker and create beautiful food.


Rub seasoning all over your meat and let it sit for a few hours in the fridge. Now you're ready to start cooking.

Step-by-Step Guide on How to Use an Electric Smoker

Person grilling sausage and meat

Image Source: Pexels

Are you ready? Because now you're going to learn how to use an electric smoker the right way. Once you do it, you'll never forget. T

hat makes you the maestro of family meals.

There are six very simple steps. Know these, and you'll know how to use an electric smoker. They are:

  1. 1
    Set up the smoker
  2. 2
    Add wood chips and water
  3. 3
    Preheat the smoker
  4. 4
    Add food
  5. 5
    Monitor
  6. 6
    Remove food

How simple is that? Well, let's take a look and see.


1. Set up the smoker

Want to really know how to use an electric smoker? The secret is in how, and where, you set up your smoker.


You see, the great thing about electric smokers is that you can put them almost anywhere. Unlike gas or pellet smokers, they don't use an open flame, so fire risk is diminished. That's great if you live in an apartment or condo.


But even if you live in a house, you can still benefit from an electric smoker. Either way, you want to make sure that you use your smoker outdoors. Never use it indoors.


That can cause some problems during the colder months in the winter. Electric smokers are not as good at retaining heat as gas and pellet smokers, which means that in cold weather, your smoker will lose more heat. So if you use it during cold weather, keep it under some type of cover and out of the wind and snow.


The next thing you'll want to do is to "season" the smoker before you cook anything it. Do this by turning on the heat to regular (or medium) and let it sit like that for two hours. This will get rid of any fresh-from-the-factory smells that might interfere with your food.


Now you're ready for the next part.


2. Add wood chips and water


Those who know how to use an electric smoker usually add about four cups of wood chips to the wood chip pan. This will give you five to six hours of smoking.


One thing to remember is that whenever you add new woodchips to the smoker, it will bring down the internal temperature and prolong the cooking process, so make sure you fill it right the first time around.


Two gallons of water will be best if the pan is big enough to hold that much. If it's smaller than two gallons, try to fill it as much as possible, leaving an inch of space from the lip of the pan.


Don't use anything but warm water. Ignore all those blog posts about using apple juice or wine or beer. Only the water from those liquids evaporates anyway, so you're better off drinking that and using plain tap water in the water pan.


3. Preheat the smoker


This step is important.


You want to preheat your smoker to 225 degrees Fahrenheit. We don't recommend going much higher than that. Some smokers excel at 180 degrees, but those are limited to unique models like the Weber Kettle.


Don't put anything in the smoker until it has preheated. The great thing about knowing how to use an electric smoker is not having to wait long for it to preheat.


4. Add food


Now for the best part -- the food.


You're finally going to take all that meat you seasoned out of the fridge and place it on the racks in the smoker. Depending on what you're cooking, you'll need to place the food strategically.


A good rule of thumb is that the bigger, or the greasier, the food, the lower it should go in the smoker. Veggies and fish will generally do fine on the upper racks. However, you'll also have to remember that all these different foods have different cooking times. Plan your placement carefully.


For instance, if you're cooking ribs and veggie skewers, leave at least one rack empty at the top of the smoker so you can place the veggies later on.


5. Monitor


Once you know how to use an electric smoker, you won't need to monitor your food so much. In fact, much like a slow cooker, you can practically start cooking in the morning, go to work, and come home to delicious supper waiting for you.


But the first time you use it, you'll want to monitor how it's going.


You can do this simply by looking at the control panel to see what the current internal temperature is, and by looking through the glass window to see the food inside. Remember that every time you open the door, you let heat and smoke escape and prolong the cooking process.

No products found.


Many people buy a wireless cooking thermometer and stick it in the piece of meat. This way you can see what the internal temperature of the meat is. Just remember to stick it in the thickest, juiciest cut of meat you have.


6. Remove the food


Ah, finally! Your mouth is watering, and your neighborhood is filled with savory scents. Your food is ready!


Before you open the door, turn off the smoker. Then, open it up, and carefully remove the food. Let any meat sit in the open air for a good 10 to 15 minutes before eating. This will allow the internal temperature of the meat to stabilize. Now you're ready to eat!


Remember that you'll also want to clean your smoker once it has cooled down. It will take an hour or two to release all the heat. Once it's cool, remove the racks and the pans. Wash those in soapy water in the sink.


Take a damp cloth and wipe out any large chunks of food, then use a cloth and warm soapy water to wipe down the insides of the smoker. You can also use a bit of apple cider vinegar for cleaning, but we don't recommend using chemical cleaners.

Eat and Enjoy!

Congrats! You now know how to use an electric smoker, and you nailed it the first time around!


We're proud of you, and your family can now enjoy the most delicious meats they've ever had.


There's nothing quite like smoking meats, and an electric smoker is one surefire way to get it right every time.


Do you have any original tips to share? Let us know in the comments!

/**/