Beans of any variety are packed full of healthy benefits and can complement everything from stews, to casseroles, to rice dishes and pasta dishes. They can even make up a substantial part of a fresh salad, but many people get put off cooking them because they don’t really know how to, or when they are cooked properly. The truth to cooking beans is that they are incredibly easy to cook and just like many foods it takes a couple of tips for you to master the art of cooking them and providing a new dish to add to your growing cookery arsenal.
Black beans in particular can be eaten on their own, and it’s not rocket science in cooking a creamy tender bowl of these fantastic beans. The biggest issue for many is that beans aren’t fast foods, they take hours to cook so if you are looking for quick meals then the 3 hour cooking time of black beans may put you off, but believe us when we say you have tasted nothing like the tender black beans we are going to show you how to cook today.
Preparing The Black Beans Ready to Cook
To get the perfect tenderness all the way through its key that you soak the beans prior to cooking them, this will give you a much better chance of having a more evenly cooked and tender bean dish. Plus, it can take some time off that 3 hour cooking time.
Right, so now we are ready to begin the cooking process so the first thing we need to do is get our equipment and ingredients together. Luckily there isn’t a lot to think about here, you just need a pound of dried black beans, some salt, a bay leaf, a couple of cloves of garlic, a chopped carrot, half a white onion, and some water to fill your saucepan.
Most of those ingredients above are simply to add to the aromatics of the liquid that surrounds the beans when it starts to evolve into a creamy dish.
Cooking to Perfection: Bringing The Black Beans to Boil
After you have soaked your beans (usually overnight) you will want to drain them, and its at this point where if you have the time you can pick out any odd looking beans, dried beans or other impurities that you don’t want to make it across to the saucepan for cooking.
Add your water to the saucepan and then shuck in all your aromatic ingredients that we mentioned above as these will help infuse the beans with delicate and captivating tastes when you come to eating them later on. All you need is a little bit of water as well so don’t go filling the entire pan, you want to cover the beans by about an inch and then set the temperature to a medium-high heat and then let them get to a boiling state.
Once you have hit boiling point reduce the heat down to a low temperature so that the beans are just simmering away. If you are looking to add the beans to soups or creamy dishes then adding a lid at this point will improve the tenderness of the black beans. If you leave the lid off the beans will be more crunchy and less tender, so you should only leave the lid off if you are looking to add the beans to salads or pasta dishes.
Leave the beans on a simmer for about an hour and then come back to just check them at that point. You want to make sure that the beans are still submerged in water so you may be required to add some more water at this point. Cover up the beans and then leave them for another hour or so.
Just before the end of the cooking process add a pinch or two of salt to add to the taste, as the black beans should now be tender.
Storing The Black Beans
Once cooked you should have a nice creamy black bean soup dish now with all those aromatics, but the best thing with black beans is that you can keep them refrigerated for 7 days, or frozen for up to 3 months so its always an idea to cook a good batch of them up if you are going to be spending hours cooking them, that way you add them to individual containers and add them to different dishes throughout the months before the need to cook any more.
Even if you aren’t fussed about the liquid, you should still keep it as it makes a great staple for sauces and soups, and because you have all that flavour and goodness packed into it, it really can add to other dishes you may cook so just pop it into a container and keep it stored in the fridge.
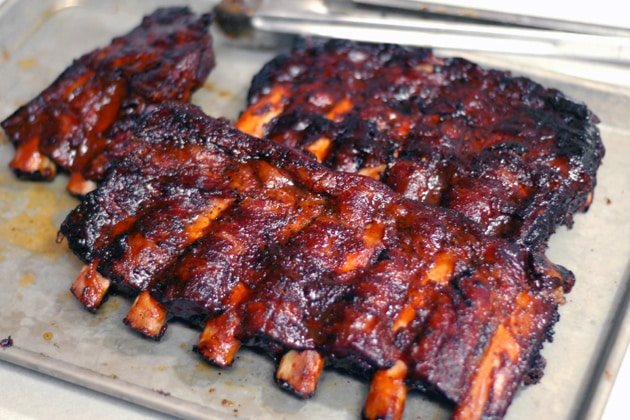
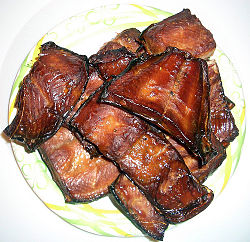
Beef really is the ultimate comfort food, whether it’s a perfectly slow cooked beef brisket or a set of beef ribs coated in your ideal marinade. In today’s guide we are bringing you one of the best comfort foods and showing you exactly how to cook them to perfection.
Firstly, let’s not get ahead of ourselves because cooking beef ribs isn’t easy if you don’t know what you are doing, it does take time, patience and knowing what seasonings and cooking methods work the best to bring out those beautiful and textures that we have all come to love about this meat.
The very first port-of-call for you is to head to a local butcher because this is where you are not only going to save money on your ribs but you are going to get the finest cuts of beef ribs. They will be fresh, meaty and give you the perfect head start to creating an amazing dish for yourself, your loved one or dinner guests that you may have over for the evening.
Preparing The Beef Ribs Ready to Cook
We always stress at home important preparing the meat is and we aren’t going to avoid it in this guide because this step of the process is a fundamental part of getting that end result spot on. With beef ribs you will notice that there is quite a thick membrane that runs along the back, this needs to be removed as it can spil the taste and experience of beef ribs because the membrane once cooked becomes very chewy and tough. Not pleasant at all.
Luckily o remove it, it’s simple. Just use your fingers to work the membrane loose, or take a knife and just slowly prize it away from the rest of the meat. If you are heading to a butcher to buy your meat then you can also ask the butcher to remove it for you before you come away.
Choices, Choices, Choices!
When it comes to your seasoning or marinade we all have our own preferences and specific tastes. With beef ribs you can use almost anything on top of it, and whilst most of us always head straight to barbecue sauce marinades some other seasonings and rubs are proving to become more popular in cooking this meat.
Chilli powder, black pepper, salt, cayenne pepper, smoked paprika, garlic powder and dried thyme is just one rub mix that gives your ribs a nice kick, and probably the biggest advantage is that you can eat them without getting yourself into a complete mess…which can’t be said for barbecue sauce marinades.
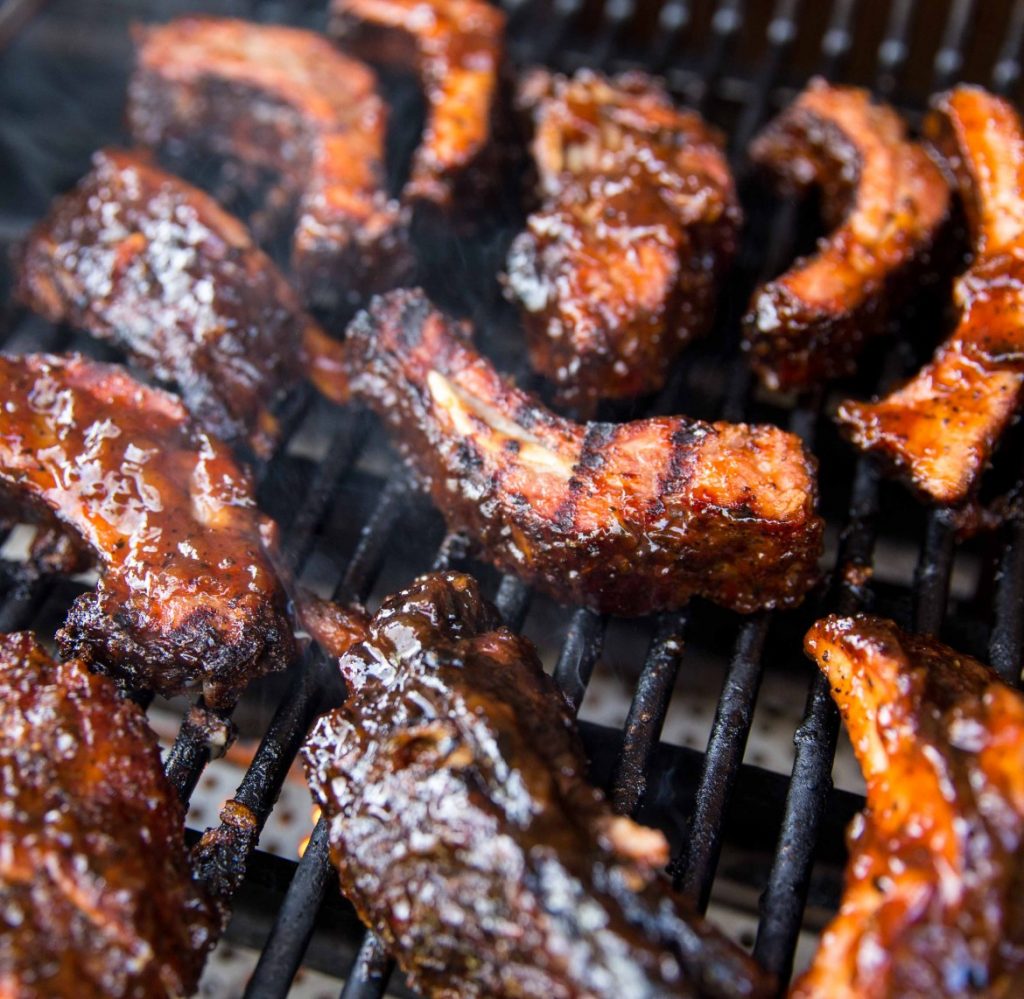
Cooking the Ribs
For the best results you should always oven cook your beef ribs as this will help the meat become tender, to the extent it just falls off the bone into your mouth with little effort. Also the moisture, tastes and juices will be noticeable with an oven cooked rack of ribs, so for the purpose of this we are going to be using the oven.
If you have chosen to barbecue marinade your ribs, that process is fairly simple and once you have coated your beef ribs with the sauce you will need to wrap the ribs up in some kitchen foil. We recommend using a good couple of sheets of foil so you lock in all the juices and steam which will add to the textures and tastes once cooked.
Place the ribs into a preheated oven, in a baking tin, with the meat facing down. You want the temperature to be around the 225C mark and it will take around 3 hours for a standard size rack of ribs to cook through thoroughly. Avoid checking the meat or opening the oven door as you want the heat to remain consistent and you don’t want to expel any juices or steam by unnecessarily opening the foil up.
Once the cooking time has come to an end take the ribs out, uncover them and leave them for a period of between abut 10-20 minutes so that the juices redistribute throughout the ribs, helping it become tender and moist to the bite.
Serving up Your Beef Ribs
Beef ribs can go with many other foods to make a great dish, so think about potatoes and vegetables as one choice, or perhaps you would like to make a gorgeous potato salad or fresh green salad to accompany the beef ribs for summer time treat. For the Winter periods adding some basmati rice with a squeeze of lemon juice over the top can really make for a hearty dinner time meal, or you could just cut the ribs up and then eat them on their own.
The choice is yours, but do experiment with what foods go with the beef ribs to make the most out of them.

If you have no idea what Ahi Tuna is then you may have also heard this type of Tuna steak known as Yellowfin Tuna. There is without no doubt that this type of fish boasts one of the most delicious tastes, and if you are a fan of chunky, steak-like, hearty and wholesome fish then this protein booster is going to be your go-to choice of food.
Like most fish, it’s a brain food and poses many health benefits to your heart, circulation and general complexion. It really is a meaty fish that when cooked properly can be on the most amazing taste sensations you will have ever experienced.
The best thing though; you don’t need to be a Michelin starred chef in order to pull this one off as its one of the easiest foods you are ever likely to cook. Even this dish makes beans on toast look complicated!
Getting the ingredients and Preparing Your Ahi Tuna
All you need in terms of ingredients for your Yellowfin or Ahi Tuna is some seasonings or a marinade (which we will come to soon), some peanut oil or vegetable oil, and the actual tuna steaks themselves.
Preparing the steaks should be the part where you take the longest amount of time on, this should be the section of the preparation process that really brings together the tastes at the end result so time and effort is key and essential at this point.
Firstly, have you got fresh or frozen tuna steaks at hand?
If frozen then you are best thawing it out thoroughly before you begin cooking to get the maximum results. To do this you want to leave it in the fridge until it thaws. If it’s fresh then we can crack on with the seasoning and marinade.
One of the most complimenting mixtures that you can add to an Ahi tuna steak is a spice mixture, because it’s often these spicy flavours that really complement the meaty flavours of the steak.
Creating a mix is quite easy as well; all you need it half a teaspoon of salt, a quarter teaspoon of black pepper, red pepper flakes, garlic powder, dried basil, and dried oregano. Mix those all together with a fork or whisk and then coat your steak all over. Now, just leave the tuna for a few minutes to absorb those flavours before we introduce them to the heat.
You can also swap the spices with a more citrus rich marinade such as a Tuna Tartare which consists of cilantro, jalapeno, ginger, wasabi and lemon juice. Usually this kind of mix is best suited to oven baking methods because of the consistency of the marinade.
Getting to Grips With Cooking the Tuna
The next steps in the process of creating a perfect Ahi tuna is to make sure that the pan you are using is heated up to it’s fullest before you place the tuna in. You want the fish to cook evenly across the pan so this is an essential requirement.
Generally Ahi Tuna is served rare because the texture and taste is much better than a cooked piece of Ahi Tuna which struggles to keep in moisture. However, some people do enjoy the tuna seared, so if this is you then you can add the tuna steaks to the pan for a couple of minutes on each side to just give it that golden look on the outside.
If rare isn’t your thing there is nothing wrong with fully cooking the tuna steaks, and all you need to do is keep the tuna on the heat longer until you are satisfied with the texture and consistency.
Serving the Ahi Tuna Steaks
The wonderful thing about tuna is how you can serve it, and whether it’s rare or fully cooked you can bring together many colours and appealing sights onto a plate quite easily. If you have chosen to rub spices onto your tuna then you can cut the steak up into portions and present them in a domino effect on a plate, or you can cut them into cubes if you added no marinade, and then simply season them at the very end.
Or, if you have used a tartare sauce like we mentioned earlier on in this guide you can simply leave the steaks as a whole piece and then serve them up with a slice of lemon and some fluffy basmati rice.
Either way, tuna steaks can really develop your creative skills in the kitchen and have you thinking outside the box on experimental presentations. One thing we can safely put our money on is that your guests will love this Ahi tuna whether its rare, seared, fully cooked, part of a starter or as a full blown main meal.
So what are you waiting for? Get some fresh Ahi Tuna and wow your guests!
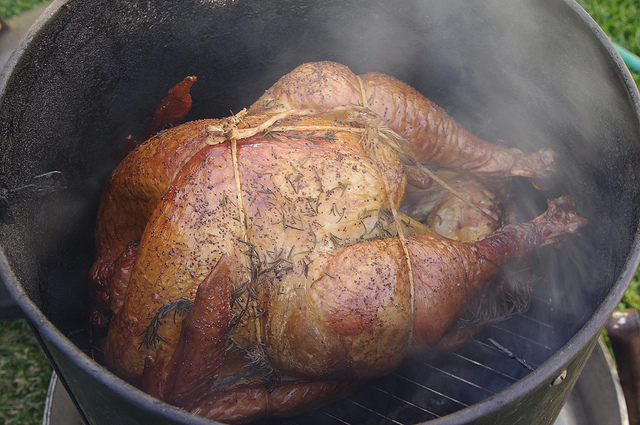
It’s grilling season. And you’re tired of making the same old thing every time you crank up the flames. Something new is needed. Something delicious is demanded. And trying duck is definitely an option. With this how-to, you’ll find that smoking a duck is easy, fast, and results in one of the most delicious meals you’ve had in a while.
Tips and Tricks for Smoking a Duck
Before you get started with smoking that delicious fowl, here are a few thoughts to keep in mind.
1
Smoking a whole duck is actually a little easier than smoking a chicken or turkey. A duck is entirely dark meat, meaning that you don’t have to balance the doneness of the duck, whereas you would with other fowl.2
Dark meat may still look pink even when it’s fully cooked. Because of this, it’s important to take the temperature and determine readiness by this instead of appearance.3
Duck fat is amazing for other things, like roasted potatoes. If you prepare the pan properly, you can catch the duck fat and use it for other meal preparations after your duck is done smoking.
How to Smoke a Duck
1. Give Yourself 24-Hour Lead Time
To best prepare your duck for smoking, you’ll want to get the duck into the refrigerator about 24 hours before you start the smoking process. Leave the duck uncovered, though, as this will help to dry the skin properly, while not allowing the meat to spoil.
If you don’t have an extra 24 hours, you can use a blow dryer on the duck to completely dry it before getting started.
2. Gather Your Supplies
You’ll need to get together the following items before you get started.
- 3 or 4 garlic cloves – crushed
- 2 shallots – quartered
- 2 sticks of lemongrass – sliced into small pieces
- 1 lime
- Salt
- Pepper
- A whole duck
- Cutting board
- Knives
- Grill/smoker
- Fuel for smoker
- Cherry wood
- Water
- Pan with wire rack
- Thermometer
3. Prepare the Ingredients
Once you’ve gathered and prepared the fresh ingredients, you’ll roll the lime around on the cutting board to help release the juices. You’ll also cut a couple of holes into the sides of the lime.
Now, you’ll need to prepare the duck by removing it from the fridge. If the skin isn’t totally dry, engage a blow dryer and get the skin dry.
To help release the fat in the duck, you’re going to poke some holes into the skin.
4. Stuff the Duck
Put half of the shallots, garlic, and lemongrass into the cavity of the duck.
Next, put the lime in as a mid-point within the duck.
Now, put the rest of the fresh ingredients into the duck cavity.
5. Prepare the Pan
Now that the duck is stuffed, you’re ready to get the pan and grill or smoker set.
Fill the bottom of the pan with water, close to, but not over the wire rack. This water will help to keep the duck from drying out while you smoke the meat. It will also prevent the duck fat from burning.
Once the pan is full of water, you’ll place the duck on the wire rack.
Once the duck is placed into the pan, you can add salt and pepper to lightly flavor the skin.
6. Prepare the Smoker
Light your chimney of charcoal or other fuel source. Prepare the grill or smoker for indirect cooking.
Add in your cherry wood for that delicious sweet smoke.
Get the temperature up to about 325 degree Fahrenheit. This is higher than usual smoking temperatures. Duck needs this higher temperature to render the fat properly.
Cuisinart CPG-4000 Wood Pellet BBQ Grill & Smoker
- Free weather resistant grill cover included in purchase. This cover is the perfect combination of durability and...
- Product Dimensions: 39.4" L x 18.1" W x 22.8" H | Weight: 103.6 lb
- Enjoy the wood pellet BBQ grill & smoker's large 450 Square inch cooking area and 15 pounds of hopper capacity
Then, you’ll put the duck opposite the charcoal. Position the duck in the pan as far away from the direct heat as possible. You may need to rearrange the pan altogether.
7. Cook for 1 Hour 20 Minutes
Leave the duck on the smoker or grill for about one hour and 20 minutes. This will enable the duck to cook thoroughly.
Once the internal temperature of the duck hits 165 degrees Fahrenheit, the duck is done and ready to eat.
8. Make Some Barbecue Sauce
As your duck smokes on the grill, we’d highly recommend making one of these amazing barbecue sauce recipes to try out. They’re delicious, fairly simple, and perfect for your new favorite dinner fowl.
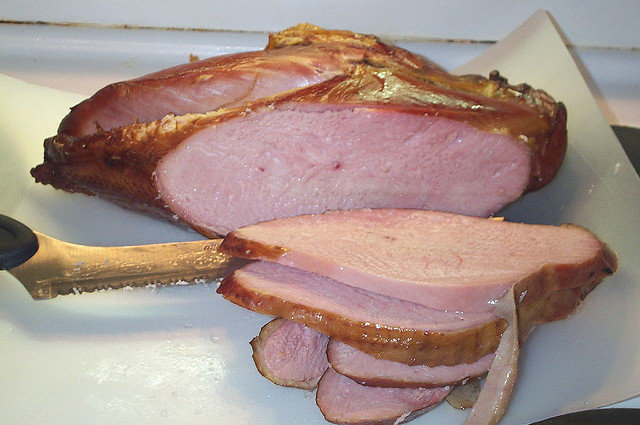
9. Carve and Serve
Let the duck sit for about 20 minutes before you carve and serve.
Something New, Something Delicious
For the best smoked fowl this summer, try making duck, then slathering it with one of these amazing barbecue sauces. You won’t regret trying something new, and neither will your family.

It seems that the only time of the year that we eat brussel sprouts is during the festive holidays, and these small cabbage like vegetables are certainly an acquired taste much like marmite is. You either love sprouts or you don’t. Perhaps the biggest off-putting part of a sprout is the fact that when they are just boiled they become quite bitter, and if you overcook them, well, then you really do have an unpleasant tasting vegetable on your hands.
The truth is, brussel sprouts are a Christmas tradition in many parts of the world and supermarkets noticeably see a steep incline in the sales of fresh and frozen sprouts in the lead up to Christmas. However, these vegetables are very good food you, and they contain plenty of nutrients that can help you keep a healthy mind and body. Whether it’s the antioxidants, the plethora of vitamin C and K or the detox qualities it has, they really are an all-year round vegetable.
Bringing Out Different Flavours
Sprouts can be cooked using many different methods of cooking but perhaps the main way is to boil them, usually because you are boiling other vegetables at the same time. The important part is not to overcook them as the taste qualities and textures tend to start becoming unpleasant. Strong bitter tastes and mushy textures aren’t something you really want to serve to your guests whether it’s Christmas time or Easter time.
Method 1: Taking Your Brussels to The Boil
To boil your sprouts you need only a few ingredients and they are your sprouts, some salt, some pepper and some butter for serving. Firstly you need to bring a pot of water to boil and then add a pinch of salt. You want to get the water boiling before you add the sprouts for the best texture and taste as the end result.
Before introducing the sprouts you want to make sure you prepare them by washing them under some cold water, all this does is removes any impurities, and you may also want to remove any off-colour leaves (usually yellow ones). Once you have completed this step you can now add the sprouts to that boiling pan and then cook them for around 10-15 minutes, checking them in that last 5 minute period to make sure you don’t overcook or undercook them.
Drain them, pepper them up and then add a knob of butter on to the top of them ready for serving to your dinner guests.
Method 2: Sautee Your Sprouts!
Not many people have tried this method but if you aren’t too keen on the flavour of a boiled sprout then you may want to look at the sauté option which tends to offer more in terms of tastes and textures.
With each sprout you want to cook it’s always best when sautéing is to cut them into halves. It can be time consuming if you have a lot of sprouts to get through but trust us; you are going to get much better results in the long-term.
The preparation steps are the same as the boiling method, so rinse them under cool running water and remove any dead leaves from the sprouts, but this time instead of preparing a saucepan with hot water and salt you will instead want to get a frying pan ready with a few tablespoons of olive oil.
Put the heat up to a medium-high temperature and once the oil has heated up you can begin to individually introduce each sprout to the pan (making sure you lay each sprout down, flat-side on the base of the pan). As they begin to cook sprinkle some pepper and salt over the top of them to season them and leave the cook for around 5 minutes until you flip them over onto their backs.
You should see visible signs that they are cooking, and a golden brown colour should become apparent.
The final step, and trick to the sauté process is to pour in about a third of a cup of water, this cup will cover the bottom of the pan and boil them slightly until the water has evaporated. This is an important step that you shouldn’t forget and usually it takes about 5 minutes for the water to evaporate and for the sprouts to be fully cooked.
So that’s a total of 5 minutes on each side, and then 5 minutes after the addition of the water.
To serve up the sprouts you can use a knob of butter on top of them to melt down into the vegetables, or you could even try squeezing some lemon juice across them for an alternative but complimenting flavour that will tickle your taste buds.
Either way, this proves sprouts aren’t just for Christmas.

As we approach the festive holidays our minds are firmly fixed upon cooking arrangements, and if you are the one in the household that has been left in charge of such a task then the pressure is almost certainly on you. Not down to the fact that you have guests coming from all locations across the country, or even the world in some instances, but the whole of Christmas Day dinner lies firmly in your hands.
A well cooked beef brisket can literally be one of the most amazing things you will ever taste in your life, if cooked correctly. One of the main things that separates a n excellent brisket from a poor one if how you go about cooking it, what you add to it in terms of seasoning and how much time you take preparing it.
Food like this should never be rushes, and that is exactly why cooking it in a slow cooker far outweighs the method of oven cooking. So if you haven’t got a slow cooker then we suggest that you go out and buy one as they are very cheap but they offer more cooking opportunities to you, from casseroles, stews and beautifully slow cooked curry mixes.
The Ingredients You Are Going to Need
Firstly, before we even begin getting to work on the piece of beef we need to look closer at the ingredients we are going to be using. As these are all going to be introduced into the slow cooker you will get an idea of the wonderful tastes, flavours and smells that this dish is going to produce and the one thing we can tell you is that anyone in a sniff away is going to be eager to taste this comfort food.
Grab yourself some olive oil, a couple of red and yellow onions, some salt and pepper, 2 cups of beef broth, a couple of tablespoons of Worcestershire sauce, a tablespoon of soy sauce, and finally 6 cloves of garlic which we will crush into the mix.
In terms of the beef brisket you ideally want something that weighs about 3 to 3.5lbs, and as beef is one of the more inexpensive meats this shouldn’t break the bank.
Beginning Your Preparation Work
The key to most successful dishes is in the preparation work you put in, and to begin the cooking process off you will want to begin cooking some of your ingredients outside of the slow cooker. First we want to fry up the onions with some olive oil until they have caramelised, and while these cook away slowly on a medium-low heat you will want to begin patting the beef brisket dry to get rid of any excess moisture that is visible on the outside.
Once you are happy we can now season the brisket with some salt and pepper, rubbing it into the meat all over the outside.
By now you can remove the onions from the heat and take the brisket to a large skillet to sear it. All we are doing here is making the crust or fatty parts of the meat golden brown in appearance and slightly crunchy. You only need to keep the brisket in the pan for a few minutes and then we can put it into the slow cooker with that fatty side facing upwards.
Adding to The Slow Cooker
The fun part to this dish is adding all these wonderful additional ingredients to the slow cooker, so at the moment you should just have that seared brisket in the cooker. Now add some crushed garlic to the top of the brisket and then throw in the onions that we cooked while preparing the beef brisket.
Next, mix those 2 cup fulls of beef broth with the 2 tablespoons of Worcestershire sauce and 1 tablespoon of soy sauce. Pour this mixture onto and around the beef brisket.
You are now ready to begin the cooking process…
Slow Cooking Your Brisket is The Key to Success
Put the dial down to a LOW temperature setting on the slow cooker and let that beef brisket slowly cook for around 7 hours until the meat becomes very tender, succulent and mouth-watering. Remember once you have cooked it, it’s always advisable to leave it to rest for a good 15 minutes so that the juices can redistribute themselves around the meat which just makes the brisket more tender than it already is and moist to the bite.
When you come to serving up the brisket it should literally shred at the cut because of how tender the meat is, but you can also slice it as well this is your choice. Pour over the liquid mixture and onions and then let your dinner guests tuck in.
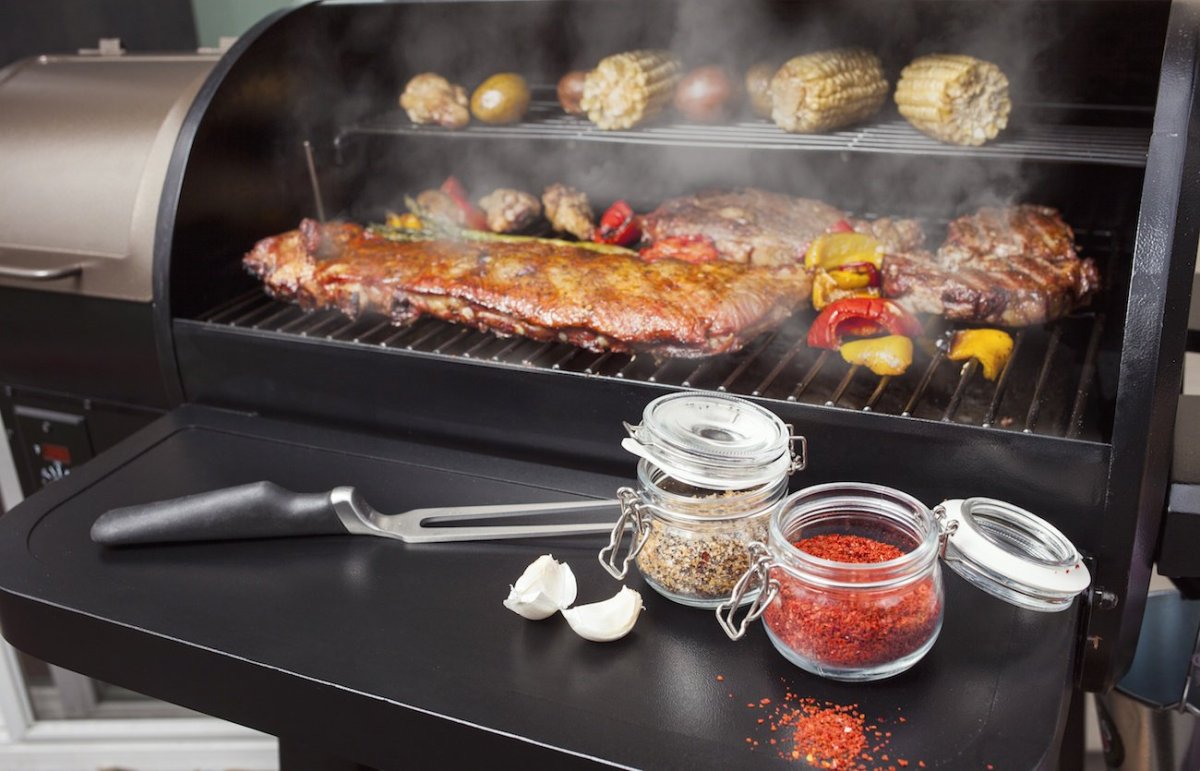
As grilling season gears into full swing, you might be wondering what kind of grill you’ll need for your cooking endeavors this year. If so, don't worry. These Pit Boss 820 reviews will help you out.
We’ve collected together information to help you understand which kind of grill or smoker you might need, and the types of wood to use for the food you’re cooking. We’ve also pulled together a review based on real-life users of the Pit Boss 820.
What Types of Grills Are There?
Knowing the types of grills available can help you determine the type of grill that will most effectively meet your needs.
Propane or Gas Grills
One of the easiest types of grills to use and clean is a propane or natural gas grill—which is great for when you're in a hurry.
Gas grills often have smoker boxes, but smoky flavor isn’t a strong feature.
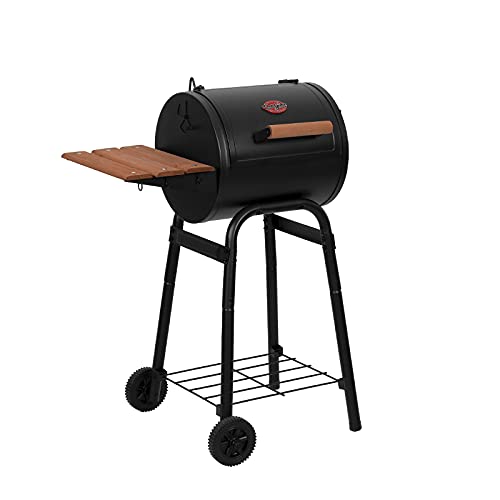
Charcoal Grills
Char-Griller® Patio Pro Charcoal Grill and Smoker with Cast Iron...
- CHARCOAL GRILL - Barrel style BBQ Grill with heavy duty steel construction and powder coating finish, the perfect...
- LARGE COOKING AREA - 250 square inch total cooking area delivers exceptional taste and charcoal flavor
- BARBECUE GRILL FEATURES - Thick Cast Iron Cooking Grates, Bottom Storage Rack, Heavy-Duty Steel Construction, Side Air...
The classic grilled flavor that most of us grew up with comes from a charcoal grill and its flame broiler. Many hard-core cooks and meat smokers won’t use anything but a charcoal unit. They love the smoky flavors and deep sear marks given from it versus any other grill.
Smaller, portable charcoal models usually don’t cost as much; however, they are perfect for camping, picnics, and other outings.
Electric Grills
On the other hand, electric grills are one of the easiest to use because they don’t involve flames and has a digital control. They’re great for people who have strict housing rules. Patios or porches and decks attached to buildings often do not permit charcoal, gas, or pellet grills, but electric grills are acceptable.
Electric grills may also come in both indoor and outdoor options. Plus, they are usually stainless steel or porcelain coated, which gives them a pristine look.
The main disadvantage of an electric grill is that they really don’t offer a smoky flavor— unless you purchase one that’s specifically uses wood chunks.
Pellet Grills
Pellet grills or pellet smokers are great and offer lots of versatility. They combine the elements of a charcoal smoker, kitchen oven, and gas grill.
Pellet smokers or grills are only appropriate for open air, outdoor spaces. However, each brand will vary, but pellet grills function in a variety of ways:
- Baking
- Smoking
- Grilling
- Barbecuing
- Char-grilling
- Roasting
- Braising
- Searing
Like charcoal grills, pellet units offer some of the best flavors to your food. But, you’ll have to choose the right wood chips for the right taste, though.
Pellet grills quickly smoke food and automatically feed the pellets for you. Therefore, meaning you don’t have to pay as close attention while grilling.
Also, pellet models feature electronic controls which help you regulate the unit’s airflow, and maintain and regulate cooking temperatures.
The fuel for pellet grills comes from a variety of wood sources, all of which give distinctive flavors to your meat and veggies. For specific suggestions on what kind of to use, see the list below.
Pellets give a cleaner burn than charcoal, which makes some people feel safer using them for cooking. On the other hand, you must use food-grade pellets, or you could risk health problems from ingesting toxic smoke.
What is Smoking Meat?
Smoking meat is a process of flavoring and preserving meat by allowing it to be exposed to smoke. This technique dates back to prehistoric times and has been used throughout history for preserving food.
There are four basic meat smoking methods used.
Hot Smoking
Hot smoking is the most common process. When most people think of smoking meat, this is the process that comes to mind.
The hot smoking procedure includes an enclosed environment, such as a smokehouse or oven. When the food is placed in the smokers, the temperatures range from 126 to 176 degrees Fahrenheit.
Warm Smoking
Warm smoking is a process similar to that of hot smoking, except it takes place at a lower temperature. The temperatures are set between 77 to 104 degrees Fahrenheit, and it takes longer than hot smoking.
Cold Smoking
Cold smoking is the technique of preserving meat in which the meat remains raw throughout the process. Because the process does not cook the meat, it is cured beforehand.
By utilizing temperatures between 68 degrees to 86 degrees Fahrenheit, the food is smoked to help give it a rich taste. Some of the different types of meat that are used in this process include salmon, scallops, steak, and beef.
After the cold smoking process, you can grill, steam, bake, or roast your food before consumption.
Liquid Smoking
Liquid smoking is dipping or spraying liquid to meat to replicate the taste of smoked meat flavor.
The liquid smoke product is often added to things like barbecue sauce to add that rich, smoky taste.
A Brief History of Pellet Grills
Pellet grills were created a few decades after the advent of pellet heaters in the early 1930s. Pellet heaters became useful in the 1970s, during the shortage of oil during the crisis.
A decade after the crisis, Joe Traeger—the owner of a family-based heating business— started exploring the possibilities of using pellets for grills. In 1985, he produced his first unit and received his patent for the grill one year later.
Before You Begin Grilling and Smoking
One of the most important aspects of successfully cooking and smoking delicious food is selecting the right wood pellets.
It can get confusing, so we’ve pulled together the best types of wood to choose.
Wood Types for Cooking and Smoking Pork
- Birch
- Cherry
- Pear
- Oak
- Citrus
- Alder
- Almond
- Plum
- Pecan
- Apricot
- Hickory
- Maple
- Peach
- Nectarine
Woods Types for Cooking and Smoking Beef
- Pecan
- Walnut
- Hickory
- Cherry
- Mesquite
Wood Types for Cooking and Smoking Poultry
- Alder
- Apricot
- Plum
- Almond
- Pear
- Pecan
- Maple
- Mesquite
- Birch
- Cherry
- Citrus
- Peach
- Nectarine
Wood Types for Cooking and Smoking Cheese
- Walnut
- Maple
- Alder
- Almond
- Apple
- Cherry
- Hickory – for a harder smoke flavor Orange
- Corn cob
- Pecan
- Pear
- Peach
- Cherry
- Oak
Wood Types for Cooking and Smoking Fish
- Ash
- Citrus
- Alder
- Almond
- Peach
- Apricot
- Lilac
- Nectarine
- Mesquite
- Oak
- Plum
How to Cook and Smoke with Wood Pellets
1. Get Your Pellets and Hopper Ready
After you’ve gotten your pellet grill set up and seasoned, you’re ready to go.
You’ll need to open the pellet hopper, which are on the back or the side of the grill.
Don’t forget to close the hopper lid.
2. Ready Your Grill and Turn it On
Just like with other types of grills, you have a little bit of preparation work. Thankfully, pellet grills are easy to understand because they have electronic control panels.
Find the cooking mode and turn it to “Cook.”
Next, you’ll need to set the control to “Ignite,” and the press the “Start” button.
3. Make Adjustments According to the Plans
Once you see smoke coming out, close the lid.
Wait for the smoke to clear and look for the flame in the burn pot. Once you see that, your grill is ready for use.
4. Preheat Your Grill
Now that your grill is ready, you’ll need to pre-heat it according to the food you’re planning to cook. Turn the control to the “Pre-heat” mode, and let it run for about 10 to 15 minutes.
5. Use Your Recipes and Plans
Your recipes or plans will give specific instructions for the temperatures you’re going to need to set your unit for preparing your food. A basic guideline is:
- 500-550 degrees Fahrenheit for lamb chops, steak, and hamburgers.
- 350 degrees Fahrenheit is standard for cooking ham, pork, and chicken.
- 310 degrees Fahrenheit is perfect for cooking turkey or doing slow cooking for ribs.
You’ll need to flip veggies and meats throughout the process of cooking, so make you sure you keep an eye on the clock to help avoid burning one side or the other.
6. Clean that Grill
After you’ve removed all of your food, it’s important to clean the grill to both maintain its quality, prolong its life, and make your unit easier to use in future.
Turn the heat to high to burn off the food residue. If you were smoking with the grill, remember to re-set the control back to “Cook.” This should take about ten minutes.
After the grill is clean, turn off the heat and let the grill cool before using brushes or cleansers to clean up the fallen residue or ash.
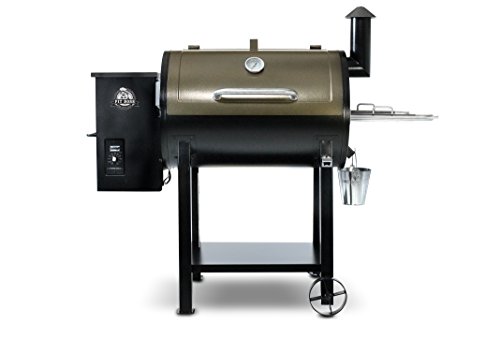
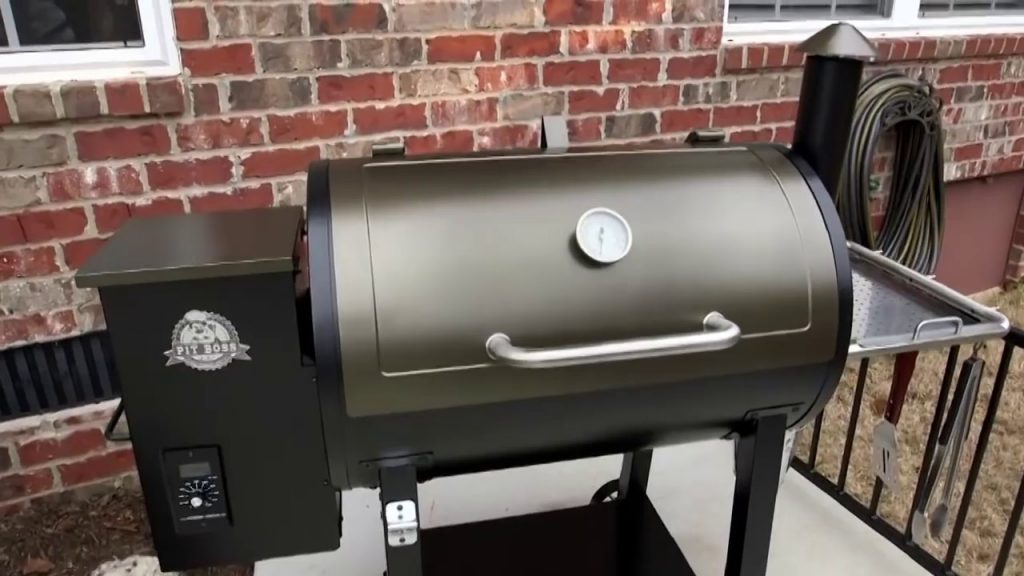
What is the Pit Boss 820?
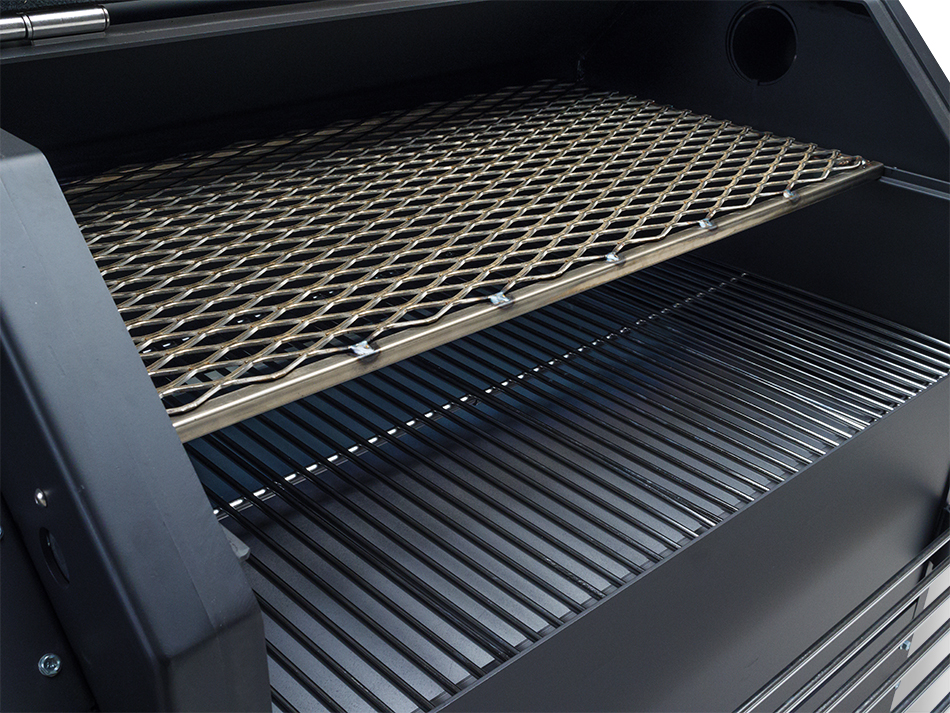
The Pit Boss 820 is a pellet smoker marketed by Dansons. The Pit Boss line offers different models which include the Small 340, Medium 440 Deluxe, Large 820, and 820 Deluxe. The number in the name indicates the number of square inches of space used for cooking/smoking surface. So, the Pit Boss 820 has 820 square inches of cooking and warming space.
The Pit Boss has a 16-gauge black coated steel cast iron grate and has a secondary removable cooking rack and wire lower shelf. It also includes a handle on the left side of the grill to aid in moving the smoker across cement aprons, grassy yards, or even gravel.
What Do the Pit Boss 820 Reviews Say About the Grill?
Positive Pit Boss 820 Reviews
While the Pit Boss 820 is similar to a variety of models from Traeger, the Pit Boss models are significantly less expensive than Traegers. If you’re on a tighter budget, that’s definitely a positive worth noting. Professional reviewers have stated that it is similar to the more expensive models—so it's worth purchasing.
Some positive reviews advised that the grill is easy to use. They’re simple that rookie grill masters feel great about their new found interest, and the Pit Boss helps to perpetuate their hobby.
It also has a built-in safety feature that’s handy for newbies. The screen cover on the hopper helps to prevent you from burning your fingers. If you’re clumsy, that’s definitely a feature you’ll want to keep in mind as you look at pellet grills.
Negative Pit Boss 820 Reviews
One thing that reviewers noted is that the warranties for the Pit Boss are for one year, while other brands, like Traeger, are three years.
Another downside is the electronics in the control panel make the Pit Boss require a steady electrical connection, unlike non-electric models.
One of the specific negatives about the unit is that it apparently requires a lot of pellets to keep the temperatures high enough.
Final Thoughts On Pit Boss 820 Reviews
Overall, the Pit Boss 820 is a great model that compares with higher end models for less money. You won’t get the top of the line, but the machine is sturdy.
This model offers a one-year warranty, safety features, and other positives that earn it our recommendation for one of the best lower-budget pellet grills.

Basmati rice, or any rice for that matter should be served tender, and each rice grain should be separate from the other rice grains. If your rice comes out in clumps, mushy, or still hard to the bite then you are doing it completely wrong. Don’t despair though as we are going to talk you through the ways that you should be cooking basmati rice, and believe us, it may sound easy cooking rice but it can take its toll on even the most experienced chefs in our world.
Generally, rice shouldn’t take more than 20 minutes to cook and by using the right measure of rice to water ratio, along with the right heat you can have the perfect bowl of rice as a result of it.
What is The Perfect Bowl of Rice?
As we mentioned above you shouldn’t be serving up a bowl of rice that is in clumps, mushed up or soggy looking. The perfect bowl of basmati rice, put simply, should be soft and fluffy with each grain being noticeably separate from each other grain. Unfortunately for most people achieving this end result can be much harder than initially expected.
The First Steps to Getting it Right
One of the biggest pieces of advice I love to give to cooks, that to be honest with you is overlooked regularly is that before you even start cooking the rice you should prepare it.
Preparing rice? What do you mean?
All you need to do is grab a strainer or sieve, put the rice you wish to cook into it and then run that under some cold water for a few minutes to rinse the rice out. This is quite an important step in the process because what you actually are doing is removing a lot of starch that covers the rice. Starch is what makes your rice looking gloopy and all stuck together at the end so by just adding this two minute preoperational task to the beginning of the cooking process can really make a huge difference at the end.
Transferring The Rice to a Pot
The next step is to put the rice into a decent sized saucepan, but don’t add any water to the mix just yet because there is one more tip we can offer you that can help your rice become much more fluffy and light once cooked. Just take a pinch of salt and put it over the rice and then shake the rice about so the salt absorbs into the grains.
Don’t do this when cooking or at the end as it can make your rice very overpowering salty and uneatable.
Once you have added the salt the next step is important because many people add cold water and then cook the rice to a boil. Instead of cold water you should add boiling water to the rice, and as a rule of thumb it’s one cup or mug full of rice to every two cup or mug fulls of boiling water. If you cook this on a medium heat the water will evaporate away and you will be left with the perfect fluffy basmati rice left in the saucepan.
Additional Advice
Some people don’t over the saucepan for the period where the rice is cooking but a tight fitting lid, or simply some kitchen foil that is sealed over the top can help keep the steam produced by the heat, in the pan. Again, what this does is it allows the steam to cook the rice which as we all know is a constantly increasing form of cooking in most parts of the world.
This steaming method will take slightly longer but you are guaranteed fluffy and separated grains of rice as an end result.
Once cooked you just need to drain the excess water from the rice pan and then take a fork, run it through the rice and see how it is looking. By now, you have probably just pulled off a great bowl of rice and this type of rice can go with many types of meals.
Basmati is the ideal component to curries, so you can serve up the bowl with a fresh sprig of coriander on top or you can use the rice bowl to accompany other cultural dishes from jerk chicken, peas and mushrooms, to more traditional menu items.
Cooking rice to perfection isn’t as hard as it first seems, it’s just knowing the tips and tricks that you need to do in order to help increase your success rate when cooking it. So if you haven’t already done so, we are sure you are eager to head into the kitchen and get to work on cooking some basmati rice so don’t let us keep you from it.

When it comes to cooking bacon there is only usually one way, and that’s frying it up next to some mushrooms and sausages, perhaps next to some Sunnyside up eggs. This is usually one of the best starts to a day for most people or the ideal hangover cure for many more.
Aside from frying bacon people also tend to grill it, however you will more than likely find that grilling anything that contains a substantial amount of fat will lead to a problematic clear up job come the end of the cooking period.
Frying and grilling bacon has been spoken about and written about many times in the past so we aren’t here to cover old ground, instead we wanted to take you down a new avenue of how to cook bacon, and that method is oven cooking. We know, you most likely have never attempted this in your life before but trust us when we say that oven cooking bacon really does bring out some amazing flavours and smells, and when it comes to taste its unparalleled.
The only drawback is time, as with anything oven cooked it’s usually best left to when you don’t have to rush out of the house. So without any further ado let’s cook some bacon in the oven…
Smoked or Unsmoked, That is The Question!
The age old debate crops its head to start with and this really comes down to your own personal preference, are you more of a smoked bacon fan or unsmoked bacon fan? This really has no effect on how you go about oven cooking bacon but it’s a decision that is important especially if you are having dinner guests over.
You see, many people may not like the smoked flavours and all your hard work could go down the pan if you choose to be ignorant towards your guests, so our advice is to simply put the question out there before you even start oven cooking any bacon because you can just cook both types on different racks in the oven and then everyone is happy.
Preparing Your Baking Tray and Temperature
Firstly we want to start the whole process off by turning up the oven so we can preheat it nicely, usually its best to whack up the dial to its fullest and then bring it down to a lower temperature when we finally come to introducing the bacon.
Now, bacon has many wonderful flavours that emanate from the meat so you don’t need to season it with salt or pepper, it’s one of those cuts of meat that seasons itself if you like. What you do need to prepare for is a lot of fat to drop away.
Therefore there are two ways to do this, you can either cook your bacon on a wire rack and let the fat deposit underneath or you can use a baking tray to let the bacon cook in its own fat to add to the flavour. For the purpose of this article we are going to use a baking tray.
So take a baking tray and line the bacon across it (you don’t need oil as the amount of fat from the bacon will keep it from sticking to the tray).
You can either place the bacon straight onto the tray or you can use some foil to make a bed for the bacon to rest on the choice is totally up to you. Once you have the bacon ready lower the temperature of the oven to 200C and then introduce the baking tray to the oven and cook for 20-30 minutes.
By 20 minutes you will want to double check the bacon as we know that some people like theirs well done whilst some like it quite chewy.
Once You Have Cooked The Bacon
When you are happy with the bacon you can remove it from the oven and then leave it to rest. It’s important to let meats rest because it helps the juices get absorbed and redistributed around the meat, it’s also wise to give the meat 5-10 minutes if you want to cut or dice it up.
Oven cooked bacon won’t have the exact same texture as you would expect from bacon that has been fried or grilled because those methods are quick cook methods where the bacon comes up against direct heat sources. Instead you will have a much more versatile, tender and moreish tasting bacon that you can add to anything from full English breakfasts, through to mouth-watering pastas and crisp summer salad.
We don’t need to tell you about the kinds of dishes bacon can be added to as it really does compliment the majority of dishes and food types out there, whether its soups, roast dinners or anything else you can put your creative minds to.

Many of us just don’t have the time in our busy day to day lives to cook, so one handy invention of the past 30 years has been the microwave. Sure, the microwave is there to help us cook quick meals and take the time out of having to oven cook many things, but the truth is cooking in a microwave isn’t the same as cooking in the oven.
A lot of you will already know that baked potatoes have different tastes and textures when cooked in the oven, and if you haven’t tried to do this yet then let me tell you that you are missing out immensely.
So How Do We Cook a Baked Potato?
First things first, we need to have a reasonably sized baking potato at hand. You want to wash the skin under some cool running water and use a vegetable brush to try and get the excess dirt of the skin. The skin is one of the most nutritious parts of a potato and when seasoned and cooked it can be a tasty additional to the internal soft and fluffy potato.
Once you have managed to get rid of all the dirt on the outside of the potato, pat the skin dry with a paper towel to soak up that excess moisture.
Place the potatoes to the side for a brief moment and turn up the oven so you have it preheated nicely when it comes to introducing the potato to it. For this you want to knock the oven up to about 450F and then we can get back to preparing the potato.
Seasoning the Potatoes
Seasoning is an important part to giving the skin that crunch and mouth-watering taste. Grab a fork first and make some prod marks deep into the potato, going around it circumference as you do it. This will help the potato cook nicely internally but also unlock all the flavours.
Now get some extra virgin olive oil and coat the outer skin of the potato in this, before then applying a few pinches of salt and pepper.
Your potato is now ready to go into the oven but first it’s advisable to place some foil around it so that the steam and flavours are locked in. This also helps the potato cook better. Put the potato in a baking tray and then cook for 45 minutes to one hour on a high heat (usually around 300/350F).
Once the Potato Has Cooked
Now, there are many things you can have with a jacket potato, some people prefer it has it is with a knob of butter to make the inside more of a creamy mash. Some other people enjoy bacon and mushrooms, whilst other may prefer baked beans and cheese, or coleslaw and cheese. Whatever toppings you are going to introduce to your potato once cooked is your choice and this is the cherry on top if you like to the perfect baked potato.
If you are wanting topping it’s advisable that you get these cooked either when the jacket potato is cooling down on the side for the 5-10 minutes before you serve it to your guests, or during the last 5-10 minutes of baking the potato. That way, none of your ingredients will get cold and when you come to taking the potato to your guests they will have the best experience possible.
Take the potato out of the oven and pull back the foil, but be careful as the steam will be incredibly hot and you don’t want to end up burning your hands. Let the potato cool down and then make two cuts across the top of the potato. Once cut lengthways and the other width ways. Use your hands on the side of the potato towards the bottom to then push inwards and loosen the potato up inside.
To make the potato really fluffy at this stage all you need to do it use a fork to mash and fluff the potato up, before you apply that knob of butter which will then melt across and down into the potato, giving it a sweet and succulent taste.
Serving Your Potato
As we know, anything straight out of the oven can be very hot so let the butter melt, and the cheese if you are using that on your potato. After 5 minutes take it into your guests and then serve the jacket potato with a fresh salad. This again can be served in a sharing bowl or individually placed onto peoples dining plates (we recommend the personal touch here rather than the sharing option as it goes well for presentation purposes as well).
We can assure you that this will be one of the best potatoes you have baked, and it will taste on a different level compared to microwaved baked potatoes.
Our final tip is also to take a taste of that crispy skin, you won’t be disappointed!