

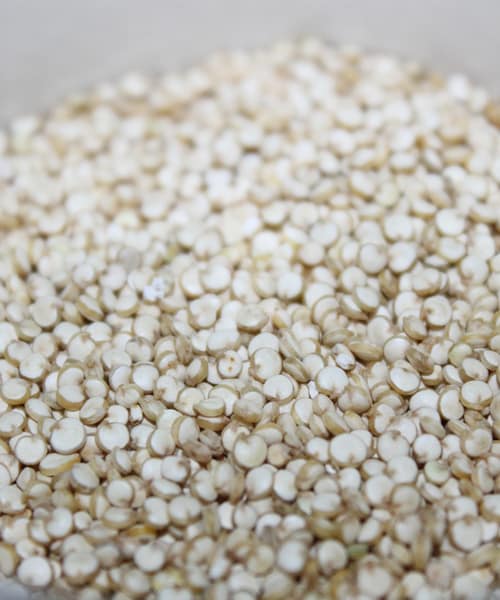
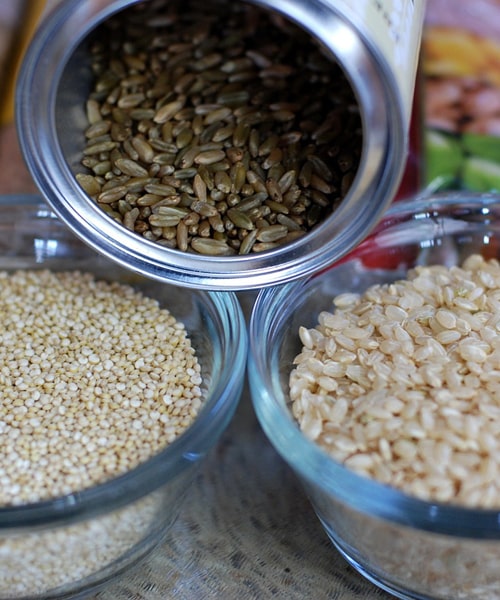
If you are not a fan of white rice or couscous then Quinoa could be the alternative you have been looking for, but take note that you need to cook it to perfection in order to benefit from its fluffy and light texture. If you have already cooked couscous or rice before then you are half way there to getting the consistency right for Quinoa but we are going to give you a little helping hand by showing you some quick and effective tips to cooking it the best way.
Firstly the process of actually cooking Quinoa is straight forward, so here is the recipe that you will need to follow:
Put a saucepan onto your hob and turn up the heat to medium and add the 3 cups mentioned above to the pan. You want to keep them on a rolling low boil and cover the saucepan with a lid so the Qunoa is allowed to simmer. After about 15 minutes lift the lid and just check to see how things are going, what you want to see is most of the liquid being absorbed into the Quino, if there is still quite a bit of liquid leave the dish to simmer for another 5 minutes.
Once cooked, take the saucepan of the heat and then fluff the Quinoa with a fork, it should be light a fluffy and enough for a good 3 servings (or 3 cupfuls).
Using Quinoa in the same way can get boring, just like any other food type really. What you want to do is look for new ways you can enjoy this food, but bring out different tastes of this nutty delicacy.
It may sound absurd but you can add a lot of flavour to Quinoa just by toasting it in a skillet and adding some oil. Do this for about 5 minutes so the uncooked Quinoa becomes a golden bronze color and then add it to the boiling water as you normally would (per our instructions above). Notice the taste difference?
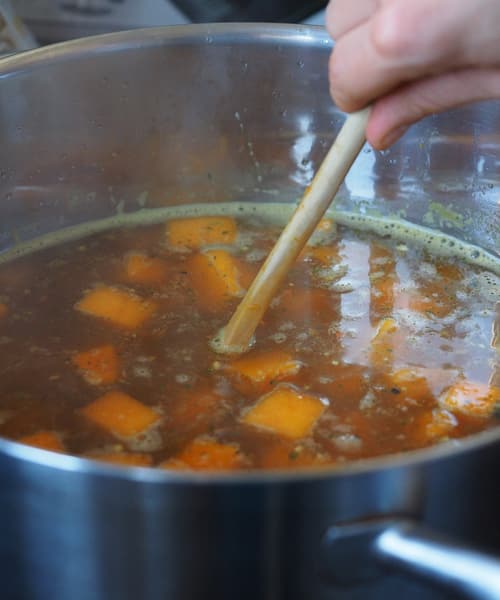
You don’t have to cook Quinoa in water, instead look for alternatives such as chicken stock or beef stock cubes that can give a little pizaz to the overall taste. Other flavors can include vegetable broths or mushroom broths, anything to add a little bit more excitement into your dish. Give it a try you won’t be disappointed.
Oh no, you can actually use Quinoa to make a really tasty breakfast cereal, much like you would with oats. By adding aromatic spices such as cinnamon, nutmeg and ginger you can really bring out the best from Quinoa and enjoy it as your first meal of the day.
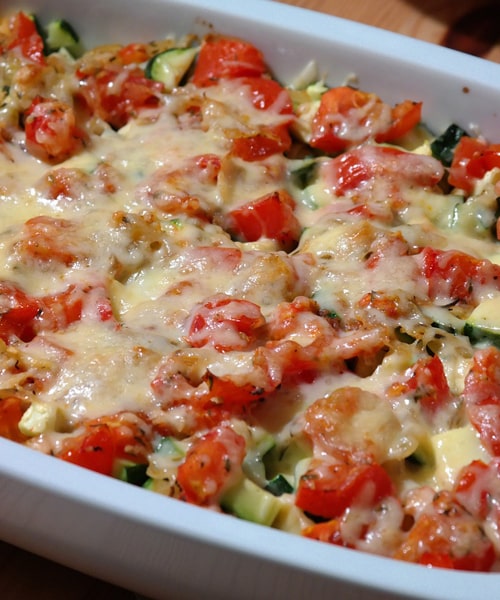
If you are a vegetarian then have you ever thought of a quinoa packed lasagne instead of meat-free or noodles? You can add cheese, herbs, vegetables and Quinoa to each layer of your lasagne and even thought it sounds stodgy it’s actually a very low calorie dish, and tasty too, Just give it a go and see what you think.

This may sound like an obvious pointer but take it from us, it’s the most important because of the way Quinoa cooks. Usually if you follow the 2 cups of water and 1 cup of Quinoa instructions it takes 15-20 minutes to cook on the correct heat, but don’t just take that for granted. Always lift the lid to make sure that your Quinoa isn’t drying out too much, or the water isn’t being absorbed as quickly as you need it to.
Cooking Quinoa can take some practice, but like anything, the more you do it the better you are going to become by learning from your previous attempts. Soon enough you will be cooking the perfect Quinoa dish before you realize it.


www.hotsmoked.co.uk
The best thing about Electric smokers is that they operate on a simple philosophy of set it and then forget it. You do not have to spend on buying charcoal and will not be left over with ash to clean up at the end of cooking. You can simple use them to get tender and mouthwatering meal.
Bradley Smokers original smoker is a huge refrigerator sized electric smoker. It makes it easy and simple for a professional chef or even an amateur to prepare restaurant style smoked meat. If you are looking for perfection and do not compromise on quality then Bradley Smokers original smoker is the most suitable choice. The electric smoker is very easy to operate and is thermostatically temperature controlled.
Bradley is a brand with established reputation in the market for creating finest quality smokers. This refrigerator sized smoker is the best product offered by the brand.Bradley Smokers original smoker can be used either for slow cooking or for slow roasting. Let’s take a look at this highly desirable and extremely durable electric smoker’s features:
Temperature controls of this smoker allow controlled and consistent temperature. The electric smoker has two heaters, a 125W heater that is used for smoldering the “bisquettes” and another 500W heater that is for cooking meat. The cooking element will generate 250 degrees Fahrenheit at the maximum. It has old style dials that make temperature setting a breeze for new users.
You can use Bradley Smoker for slow cooking as well as roasting. You can use it to perfectly cook any type of meet. The food trays can easily hold two racks of ribs and an entire turkey as well. The refrigerator can be used to easily cook meat for a medium family feast.
The electric smoker has a highly attractive and sturdy exterior for perfect outdoor use along with a stainless steel interior to provide protection against rusting. It is compact even though it offers a great load capacity and is exactly a medium sized refrigerator in its size.
[wpr-pros-cons]
If you do not take care of maintenance and cleaning of your electric smoker then it’s life span will decrease. Only a little care and regular cleaning will ensure you can use it even for a life time. Following simple and easy tips that I have personally benefitted from will make sure your smoker stays with you for a lifetime.
An electric smoker like Bradley Smokers original smoker will always be your great companion. I have used Bradley Smokers original smoker and created wonderful memories like my daughter’s birthday when I served mouthwatering meat to the guests that they still remember. Just a little maintenance and keeping it properly will ensure that your electric smoker stays for a lifetime. If you do not have extra money then buy this one as it perfectly fits your budget as well as your needs.
Bradley Smokers original smoker can easily cater to large number of guests and makes them remember your meal forever, It makes it as easy as a pie for you to simply cook tender and juiciest meat for your family and your guests. It has temperature control system that helps you not panic about checking temperature constantly while cooking.
It does not matter whether you are a professional chef or have never cooked meat. Using this perfect electric smoker, you can easily follow a simple as well as a complex recipe. If quality is something that you can never ignore then let me assure you this is the highest quality electric smoker available in the market and will prove to be your best choice that you will never regret. Buy it and be ready to amaze your family and guests with tastiest meat.


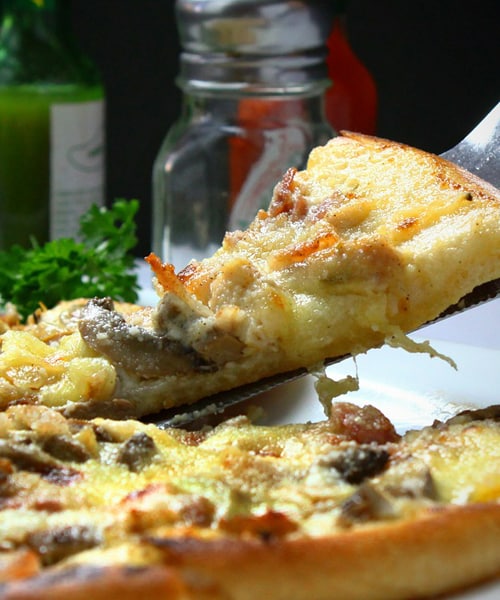
Pizza is a food that we enjoy across the world, whether we indulge in the dish as a snack or include it as part of a dinner there is no getting away from the fact that it’s one of the most popular dishes. However, cooking your own pizza from the comfort of your own home isn’t as hard as it sounds and it’s considerably cheaper to do.
Forget about the fancy dough spinning you have probably seen on the TV, and prepare yourself for a selection of great tips that we are about to give you on how you can make awesome pizza at home.
Firstly, we have to start with measuring your ingredients, and in our opinion a lot of homemade pizza bases tend to go wrong at this very step. If you get too much or too little of one type of ingredient then you are heading down a slippery slope of disaster when it comes to creating an awesome pizza.
For many people they tend to give up for good, but just by using a set of good measuring scales you can forget about all that worry and get it done right!
Instructions on how to make awesome pizza at home
It all starts with the ingredients and how big you want the pizza to be, for the purpose of today’s article we are going to look at how you can cook a 10-inch pizza which can serve 3 people.
What you need:
Note: you can either pre-make the dough at home if you know how to or you can head to your local grocery store where you can pick up some that has been already made. The latter option is the ideal one if you don’t want to have to measure your ingredients prior to making the base, and also serves as a time saving options when you need to cook a pizza within that 30-minute mark.
No products found.

Your first step should be always to pre-heat your oven and its usually good practice to set the oven to its highest setting at this stage as you will benefit from a nice crispy and crunchy crust to your pizza. Leave the oven a good half hour before you place your pizza into it, which will give you enough time to start making your pizza base.

There are many types of method on rolling out your dough, from the type of flour you are using to the type of parchment or baking sheets you choose to use. For this method we are going to use the popular choice of baking a pizza on a baking sheet.
Firstly, tear off a good sized baking sheet and then brush it over with some olive oil so the pizza base doesn’t stick to the sheet. Knead the dough into a circular shape with your hands, pushing out from the middle and then use a rolling pin if needed to flatten the dough to around ¼-inch thick.
Take a good 5-10 minutes in getting this step right as the perfect base if a fundamental part to a perfect pizza.

The best part of making any homemade pizza comes with the decision on what delicious toppings that you want to cook with. Firstly you will want to pour over some tomato sauce (passata will do nicely), and then with the back of a spoon circle the sauce around the base until it is evenly covered. Once you have done this throw on your onions, mushrooms, pepperoni and anything else you wish to complete the pizza with.
This is another step that people tend to get wrong and overcook the pizza by leaving it in the oven for way too long, or they end up with a pizza that has been cooked nicely on one side but undercooked on the other side.
Slide your pizza into that high-heated oven and then bake it for around 5 minutes, and then take the pizza out and rotate it, cook again for another 5 minutes. That’s it!
Check to see if your crust is nice golden brown and the cheese has melted to a satisfactory state onto the pizza. If you are happy with the look of it, gently and carefully take the pizza out of the oven.
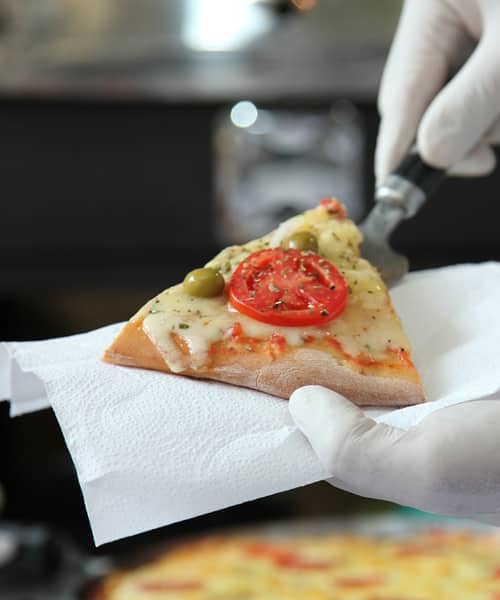
Decisions, decisions! You may have just pulled out possibly the best pizza you have ever made and now you have to share it with friends of family. Whatever the reason was in cooking the pizza you have one last step to perform and that is slicing the pizza.
Firstly let the pizza cool, we know that temptation can easily get the better of you here but cutting a cooled down pizza is much easier and you won’t burn your hands. Once the pizza has cooled down slightly you can now use a pizza cutter to cut the pizza into slices.
There are many ways to create a pizza base, some are left overnight, and some are cooked under a grill, so it’s up to you to find a way that best suits your needs. The method we have given here is the easiest and quickest way to make a base and create a pizza without needing any extra knowledge.
Above all, just enjoy experimenting and finding different ways of making the perfect homemade pizza.


www.homedepot.com
When your electric smoker helps you in achieving perfection with cooking the most tender, mouthwatering and exceptionally finger licking good taste of meat be it pork, fish, beef or chicken then you must also take care of it cautiously by storing it in Electric smoker cover when not in use.
In order to preserve the functionality of your electric smoker cover and to ensure it does not get dirty Masterbuilt 40’’ Smoker cover is the best option for your 40 ” Electric Smoker. The sleek black polyester provides high durability, easy cleaning and maximum weather resistance against wind, rain and sun. This Electric Smoker cover enables you to store it outdoors as well. It enables easy cleaning and maintaining. Having this black cover is a great blessing when it comes to high protection of your Electric Smoker.
Here are brilliant and commendable features of Master Built 40-inch Electric smoker that make it among st the top Electric smoker covers. There are many Electric smoker covers available and remember that buying an electric smoker cover is as important as buying an electric smoker itself otherwise you might end up damaging your electric smoker early:
The cover uses preeminent polyester in its manufacturing. High quality polyester is specifically manufactured with naturally occurring and synthetic chemicals that make it light weight and weather resistant. High quality polyester further does not shrink after being washed and is highly durable.
The cover is made with fade resistant material. When exposed to harsh weather conditions especially bright light, low quality materials are prone to lose their colour and clarity but this high quality polyester is fade resistant and stays new even after years of using.
It is large enough to accommodate your 40-Inch Masterbuilt Electric smoker. It is sewn perfectly keeping in view accurate dimensions and hence perfectly fits your 40” Smoker. This accurate fitting makes it easy for the cover to take off and put on with minimal to zero effort required by the user.
It is crafted with perfection using highest quality polyester to make it withstand high heat, water and light for over a number of years. Masterbuilt 40-Inch Electric smoker cover can be used for longer periods of time hence it is long-lasting and you won’t have to buy a cover again if you buy this right cover for the first time.
This Master Built 40-inch Electric Smoker cover has maximum benefits that an electric smoker cover can provide. Using it will help you keep your precious electric smoker in working condition at all times:
[wpr-pros-cons]
It does not need extra care or high maintenance. You can use t with minimal care and keeping in mind few tips:
Masterbuilt 40-inch Electric smoker cover has all that you ever needed for enhanced protection of your Electric Smoker. Keep your Electric smoker safe from cruel weather conditions through the use of this electric smoker. The heavy duty sheet that is manufactured with preeminent polyester to ensure high durability. The polyester is further covered with polyurethane for extra protection.
The most sought after Masterbuilt Electric smoker cover ensures your smoker stays protected in all seasons. You can easily put it on and off and it is extremely light weight. The black colour ensures high protection from sun and the cover does not appear dirty even after being covered with a lot of dirt unlike light coloured covers.
Click Here to Check Top Best Electric Smoker 2015!

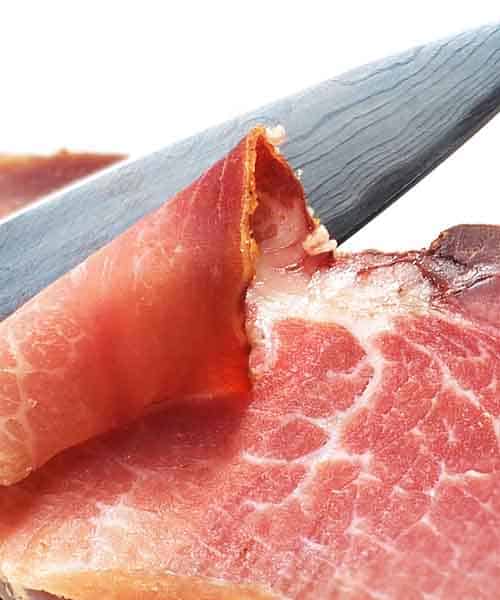
Bacon is one of those foods that really does tickle the taste buds, the rich meat can accompany almost anything from Full English breakfasts, to pasta dishes and much more. But how do you cook bacon to perfection? We are about to show you just how this popular ingredient can be cooked, whether it’s part of a hangover cure or a delicious meal at a dinner party. Sit back, relax and let us take you through the steps to cooking…
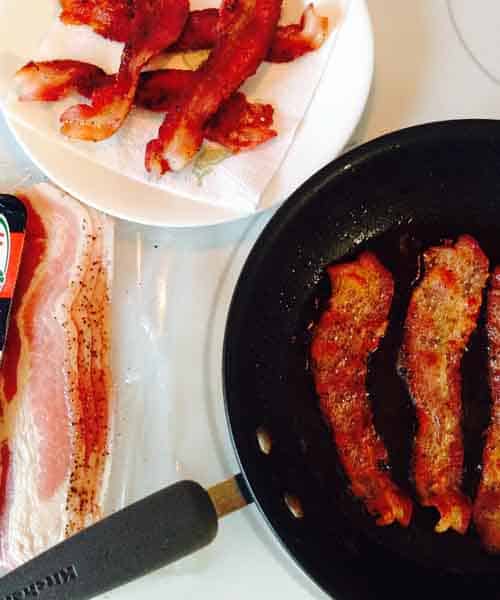
The classic way of cooking bacon is to use a frying pan or griddle; these are usually the quickest and most effective ways of getting the meat cooked. If you decide to use this method to cook then you can cook 3-4 rashers in a decent sized frying pan but make sure that each rasher is lying flat on the pan (no overlapping).
If you are using a griddle then we suggest a heavy cast iron griddle is the best choice but any griddle will suffice.
One big tip is that you don’t need oil, the grease from the bacon itself will provide enough fat to cook each rasher in. When the bacon begins to curl up you can then turn the bacon onto the other side in order to get both sides cooked properly. Usually it takes about 8-15 minutes to completely cook bacon using a griddle pan or frying pan.
Top tip: Keep the heat on a low-medium or the bacon may stick to the pan and be hard to remove.
The second popular way to cook the salty delight that is bacon, is to oven cook it. It has to be said that this method is much cleaner than frying the bacon as you won’t have that splatter across your counter tops.
Fire up your oven to around 400F and then place the bacon on a middle shelf where the heat is at its highest temperature. The bacon rashers will take less time that frying and you can expect a complete cook in around 10 minutes using this method.
Top tip: To keep things clean make sure that you use aluminium foil to line your backing tray or grill, this will help collect the fat that drips from the bacon and saves you from having to clean the oven tray after use.

This may seem like a strange way to cook bacon, but never neglect your microwave as a form of cooking, it may seem like a bit of a cheat but it really can work wonders for you. Take the bacon rashers and pop them onto a plate, then cover the plate with some paper towels (this is to help control the grease that will squirt out from the bacon when it’s cooking).
By using the microwave as a form of cooking you can literally get your bacon from raw to cooked within about a minute per slice. So if you have 4 rashers placed onto a plate you will need to set the microwave to a high cooking level, and then cook them for around 4 minutes.
Of course, if you want extra crispy bacon then you should add another minute onto the clock which will give you that crunchy texture.
The final method that we wanted to look at was how to cook bacon under a grill, this method will cook the bacon in about 10 minutes if you flip the rashers over after 5 minutes of cooking. You don’t want to cook on a high heat however, which is something that many people do. You want a medium-high heat which will give you a great tasting result.
Be careful of the grease splatter as you won’t be able to control this and more often than not you are going to be left with a clean-up job at the end of cooking in order to de-grease the grill filaments.
Once cooked, go ahead and enjoy as part of a breakfast, lunch or tea time dish!

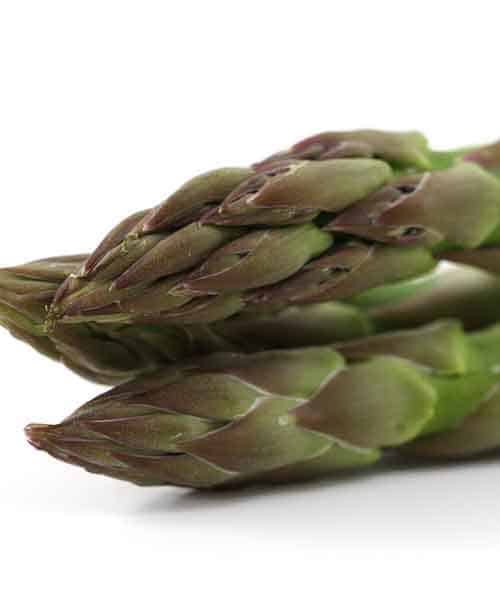
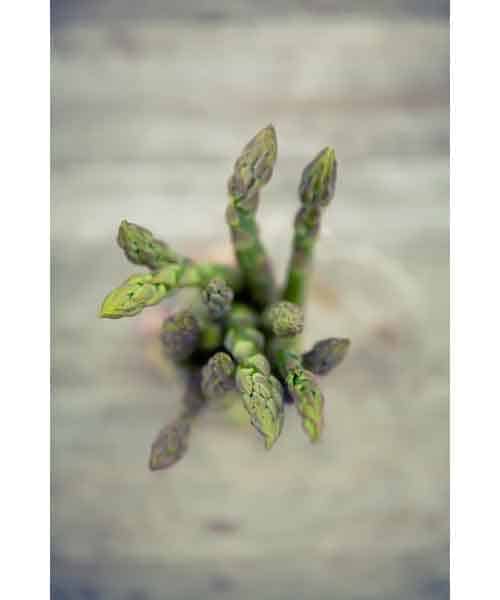
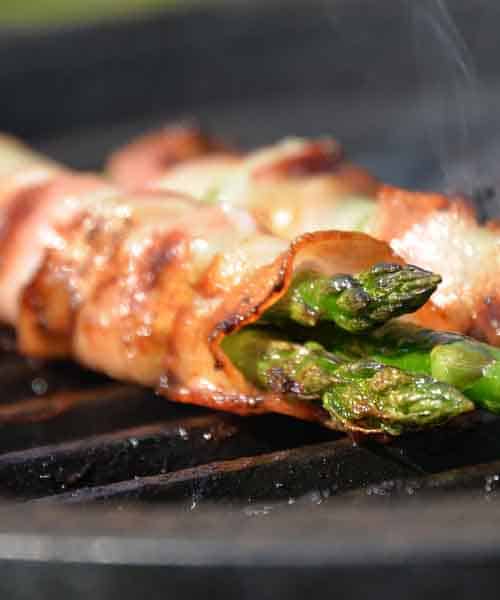
Asparagus is arguably one of the best things you can eat because it contains so many good nutrients. Fresh asparagus can be part of a tasty dish, and will fill you with calcium, iron, vitamins A and C and even potassium. The only downside is that people just don’t know how to cook the fresh vegetable, and even if they do they have no idea on what dish to put it with. Luckily for you guys we are about to show exactly how asparagus can be cooked and what meals it complements.
The first and most important point in getting your asparagus ready to cook is cleaning it. This a step overlooked by many people but please don’t neglect this step. Why? Well asparagus is grown around sand, and the very tips of the vegetable have plenty of cracks and crevices where the sand can creep into. If not washed properly you are going to get a crunchy, gritty taste in your mouth.
Run the asparagus under cool water which should remove the sand.
After you have done this you will want to chop the base ends off your asparagus as these aren’t really palatable, unless you like eating tough wood! Usually a 2-inch chop is enough to cut the unwanted base away.
Now we get stuck into some of the ways you can cook this delicious vegetable. There are three many healthy ways and they are to steam, boil or to blanch.
Blanching is notably the most popular method as asparagus doesn’t need long to cook. Just get yourself a bowl of water, drop in 2 teaspoons of sea salt and let the veg cook for about 2-3 minutes. You don’t want to overcook the asparagus as it will become limp and lifeless, you want an asparagus that crunches on each bite, so test a spear to make sure it’s ready to come out of the water.
In literally 3 minutes of cooking and about 3 minutes of prep you have some tasty blanched asparagus to tuck into.
Tip: Try serving it with a crispy fresh salad.

The second way is to boil the asparagus which takes around 5 minutes but you need to keep a close eye on the spears because this veg is quick cooker and it takes just an extra 30 secs – 1 minute to ruin them.
You don’t need to fill a saucepan to the brim with this method either, you only need enough water to cover the asparagus so a few inches deep with about 2 tablespoons of sea salt is all you need to do the trick.
Tip: Place the asparagus into the saucepan when the water is on a rolling boil, and then cook for 5 minutes once the water returns to a boil.
Finally we come to the steaming option which unlike boiling keeps a lot of the nutrients in the asparagus, and there is also less of a chance you are going to overcook it using this process. Usually you will need to steam them for around 7 minutes depending on what kind of steamer you are using, but just test one spear for crispiness before you serve up.
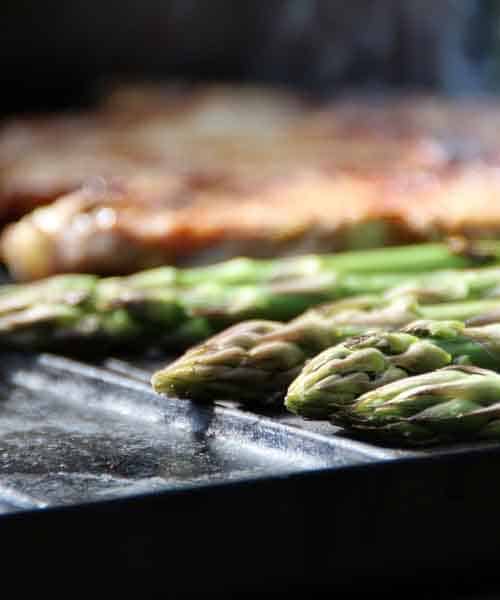
You can also roast and sauté asparagus for different kinds of tastes and finishes. The sauté option will allow you to create the beginning of a fantastic stir fry where you can add onions, peppers, mushrooms and carrots at the same time you add the asparagus. This crunchy little dish can be served anytime of the year and just adds an extra element into how asparagus can be cooked and then served.
Asparagus is a very versatile veg that will go with almost anything, but surprisingly some of the best recipes are soups and chicken dishes. For example you can make a creamy potato and asparagus soup, or you can wrap bacon around your asparagus spears in a chicken and bacon dish.
If you prefer a lighter bite, then you can add asparagus to summer dishes such as fresh salads or Asian spring rolls. The choice is yours!

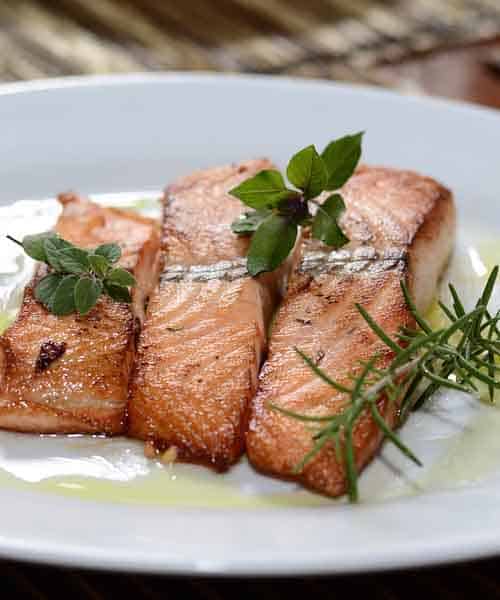
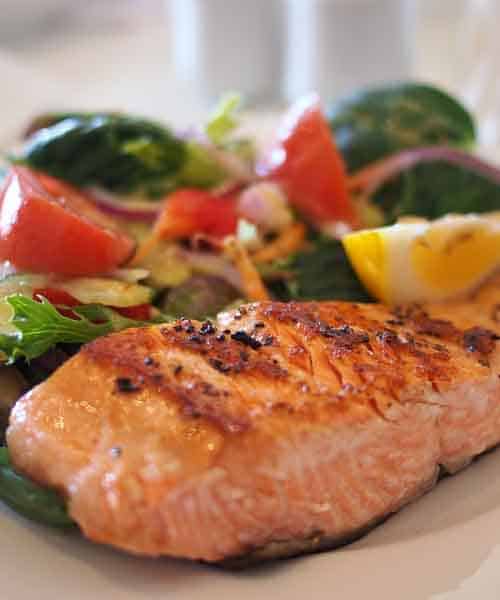
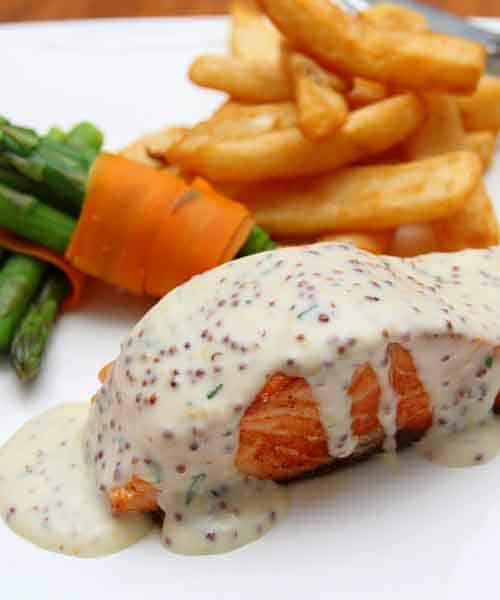
Salmon is very much one of the favorite types of fish out there, and with so many different ways to cook it, and more ways of complimenting it into certain dishes we wanted to show you 5 different ways that you can enjoy that next piece of Salmon that you guy from the local fishmongers, or grocery store. Take a look at these 4 unbeatable ways we have explained for you below.
First of all, you need to think about how much time you actually have to cook the Salmon, by this we mean; are you in a rush? Or are you preparing a spectacular dinner party where time doesn’t particularly matter?

The simplest way, and the quickest is to oven cook you salmon. With a little olive oil on the top and some sprinkling of black pepper and sea salt you are all ready to get underway. For each half-an-inch piece of salmon you want to cook it for a good 4 – 6 minutes on each side, and usually you find that the thickest part of most salmons usually averages around the 1-inch mark, so you can have both sides cooked in around 15 minutes.
Watch out for: The fish becoming less opaque, and use a fork to see if the fish is flaking (key signs the fish is cooked and ready to eat.)
Now you are ready to eat the salmon you can choose some extra dressings, the obvious choice is lemon and fresh herbs that really bring out some of the flavors of the salmon, but you can also try pesto and other herbs and spices that may be in your kitchen cupboard.
You would be surprised at just how much this cooking option works (with any meat or fish). Find a sealable bag and place you salmon inside, now start to dress the fish in a marinating sauce. You can use garlic, salt, olive oil, pepper, lemon juice etc.
Once you have done this start moving the bag around so the juices and ingredients all start to spread evenly and the salmon is fully coated for maximum flavour.
You can then add the salmon to a baking tray and then allow the fish to cook thoroughly before serving.
Note: Another option is to put the bag into a refrigerator for around half-an-hour prior to cooking, to allow the juices to really marinate the fish.
The third option is to grill your salmon which is another popular choice for many people, this step requires you to preheat your grill, and keep the temperature at a medium to high heat in order to give it those grill lines that run diagonally across the fish.
Prepare your salmon in the usual way with some salt, pepper and oil and then place it diagonally on the grill (for those grill lines). Whereas oven cooking requires about 4-6 minutes per half-an-inch, grilling usually takes 3 – 4 minutes so keep that in mind when you are cooking under a grill. Usually you can cook a 1-inch thick piece of salmon in around 6 – 8 minutes (don’t overcook it).
To make sure its cooked, look for that flakiness and make sure that the salmon I less opaque and more firm.
Watch out for: Make sure your grill grate is well oiled as the salmon can easily stick to this and ruin your presentation.
After grilling the salmon you can add yourself some lemon juice, and the serve it with herbs, broccoli or just eat it on its own as it came out of the grill…the choice really is yours!
One method not used much is pan-searing, which can take as little as 6 minutes. All you need to do here is coat a frying pan in cooking spray or oil and then increase the heat to a medium level so its not smoking but it is hot.
Add your salmon to the pan and then cook on both sides for 3 minutes. Again, you will need to check the salmon can flake in the center when you break it with a fork, and it should no longer be translucent to the eye.
Tip: Use a spatula to pick the salmon us as tongs or any other kitchen tool will break it (especially if you need a good presentation).

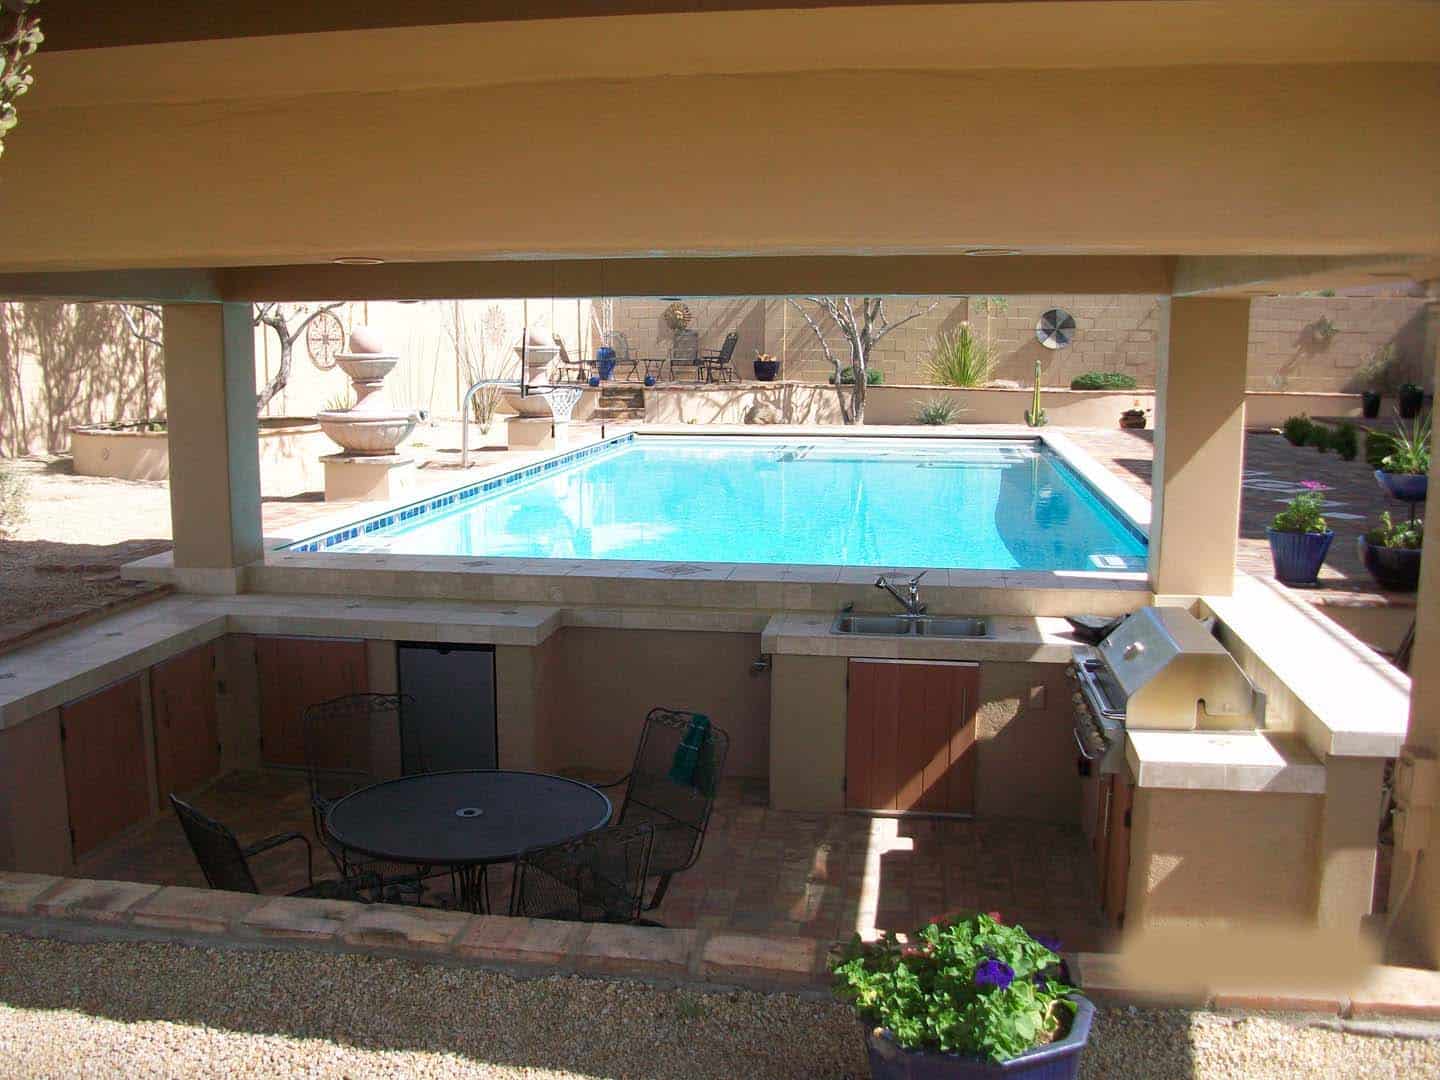
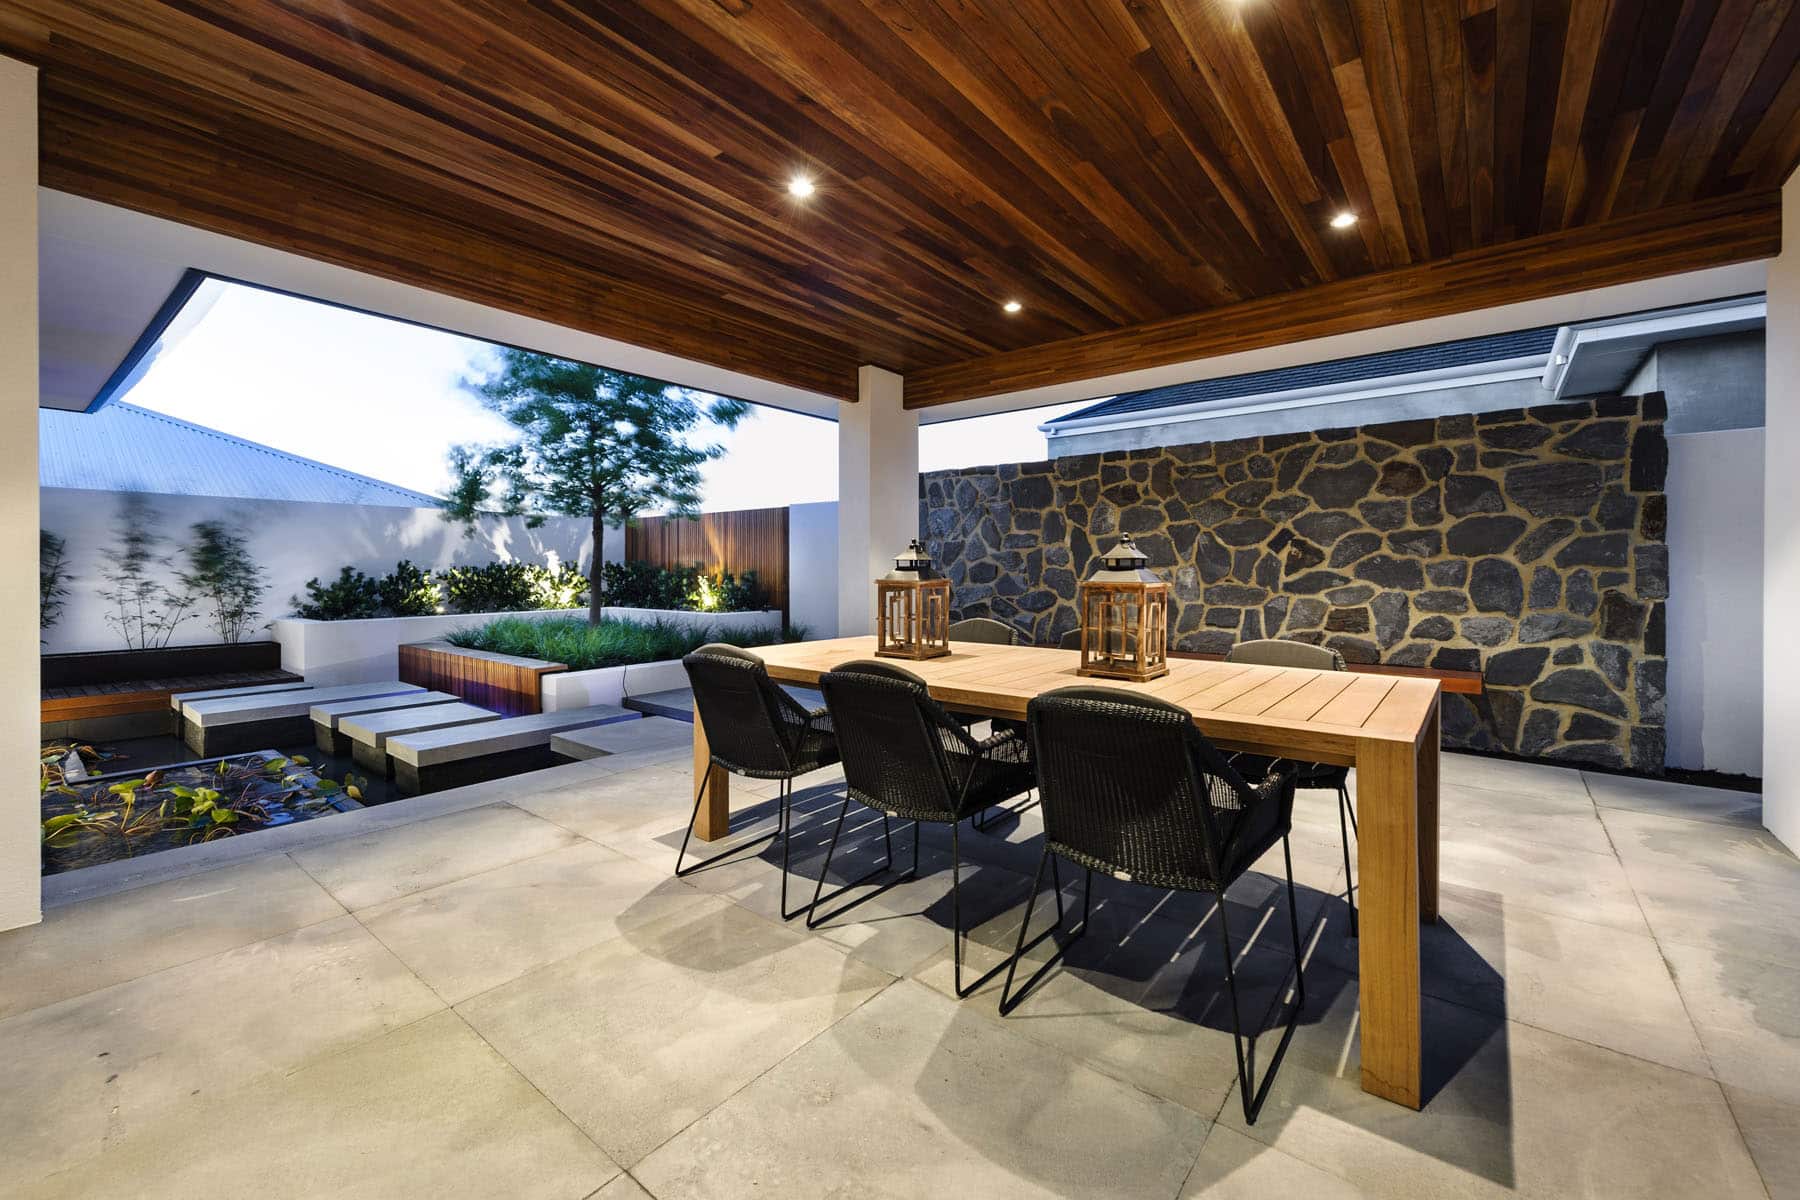
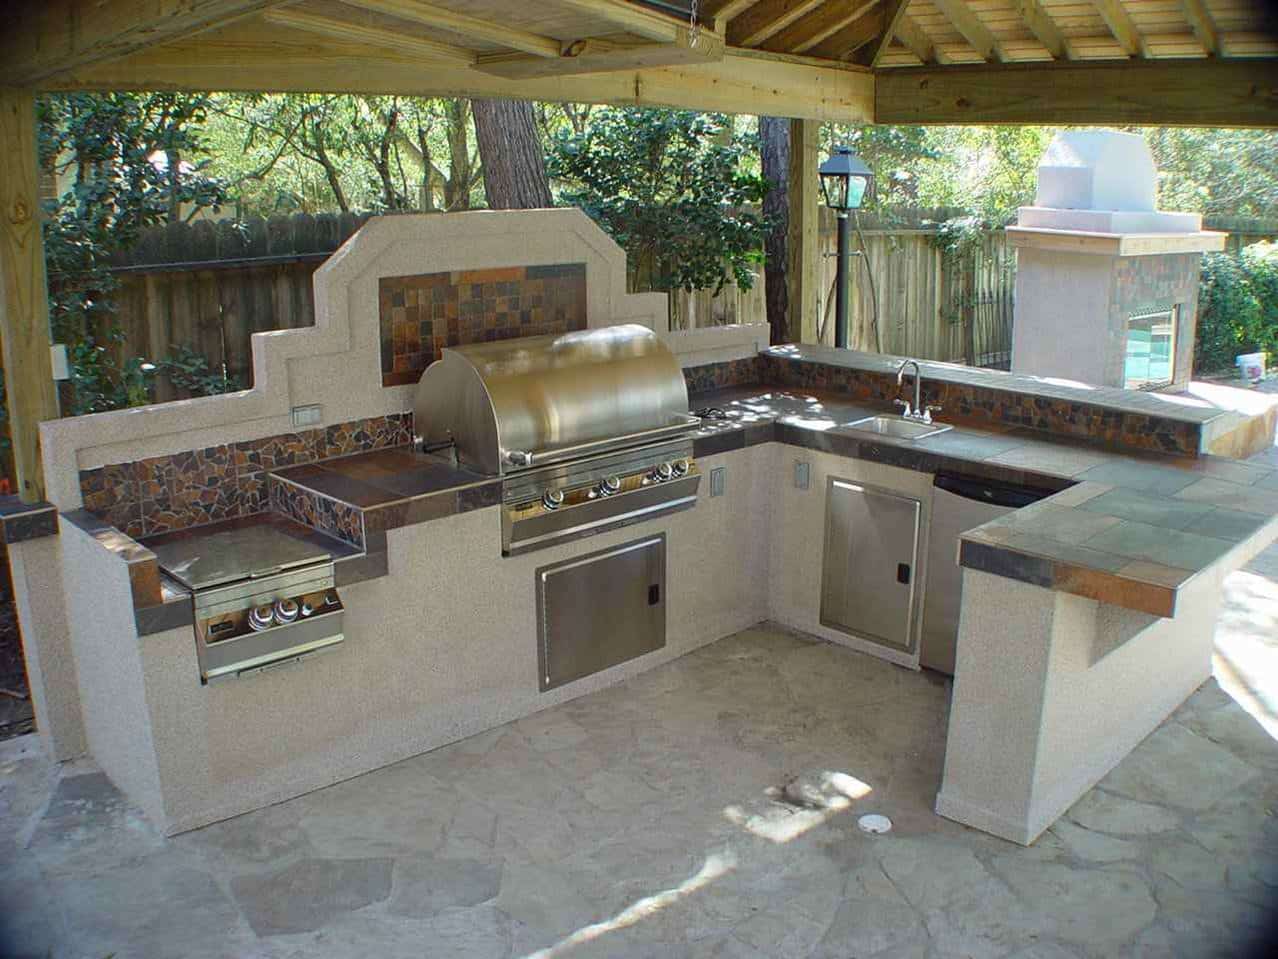
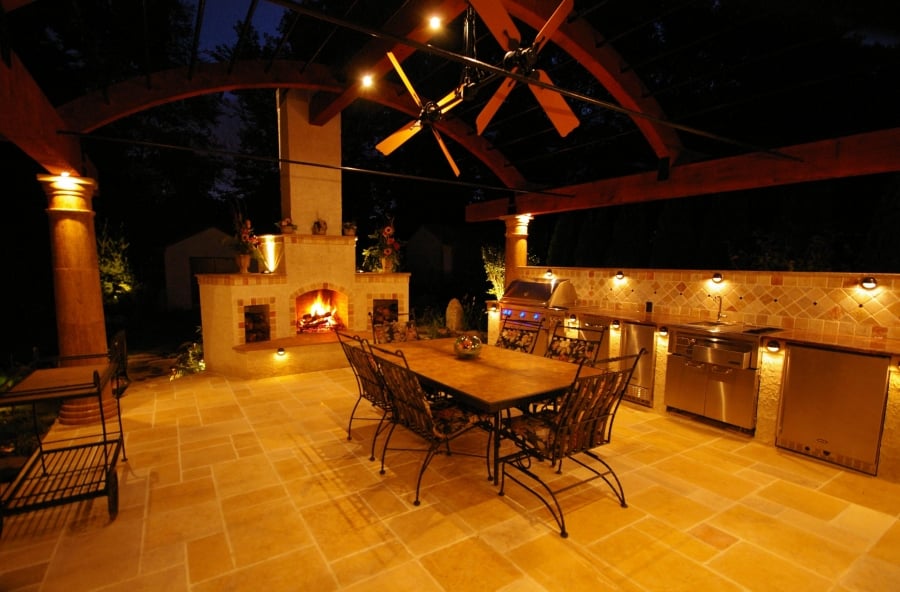
There is no limit to cooking when you have got an awe-inspiring outdoor kitchen and no fear of experimentation when the design is spectacular but smart. In older days, outdoor cooking was only limited to barbecuing and serving cold sodas, but in the present it is much more than that. You can make anything from shakes to pizzas and whatnot! Here today, we will get you to know with all the prerequisites of designing/re-modelling your own outdoor kitchen.
We have divided the entire procedure into easy stages for you to have your dream outdoor kitchen:

The first thing that will come to your mind is where to establish your outdoor kitchen. Remember these points before choosing your sweet-spot:
This is the most important part of planning, as it will be the deciding factor of how stunning your kitchen is going to look. So take your time, talk to your partner and draw a rough layout of how to assemble the kitchen so as to allow easy flow of food and utensils while and after cooking, and also take risk mitigation measures into account while laying down the plan.

Allot an open space for cooking if possible, as you won’t be using any chimney or smokestack. Also, checkout the typical arrangements of appliances and sinks which increase the efficiency of the kitchen while still upholding its beauty.
A wooden or marble flooring would not only make the kitchen look more sophisticated but also keep everything at level on an uneven ground like that of a lawn or backyard. If you live in a cold climate then you could add extra elevation to your kitchen by adding some hefty reinforcements so the steps are semi-covered in the snow adding more beauty to it, obviously, if it fits within your budget. Be open to experimentation!
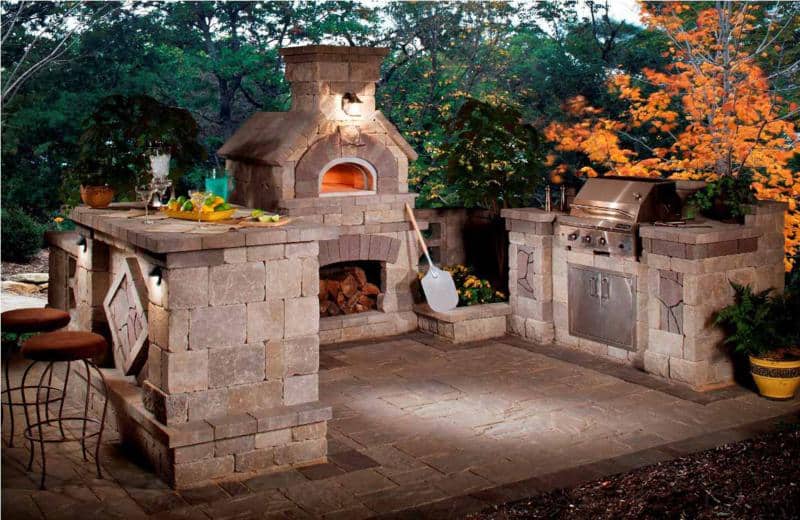
Make sure that your kitchen has all the essential appliances that cover all your fancy cooking needs but be wary with things that you don’t need, for instance, do you really need that tandoor grill? Your kitchen should have just the right number of essential, nothing extra and nothing less.
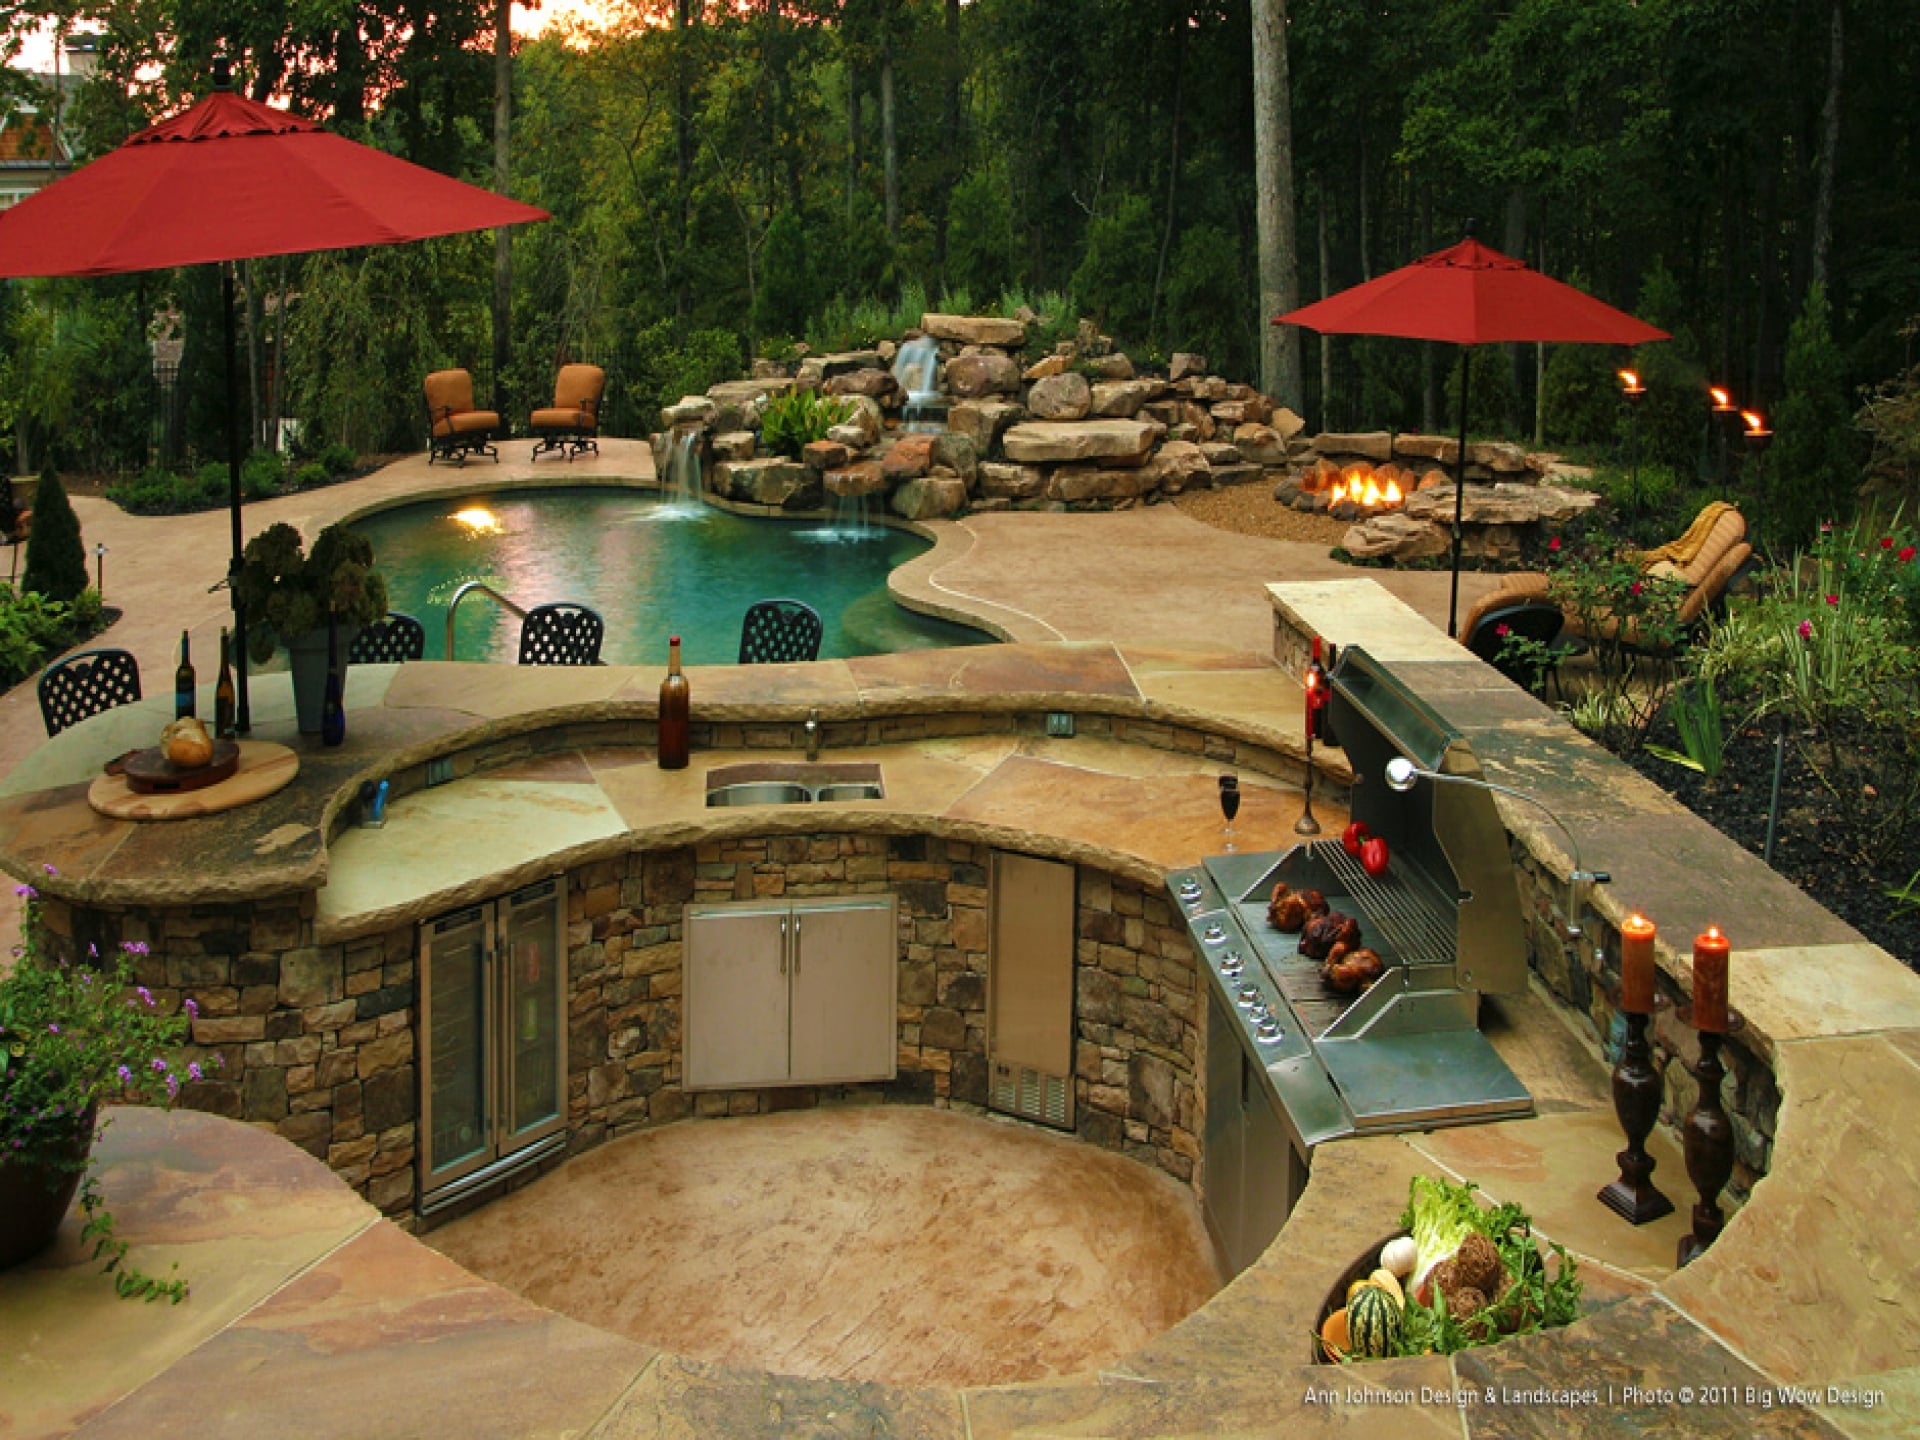
This is the most fun part about having an outdoor kitchen, as this is what transforms your kitchen from a sweet get-together place to a total party frenzy!
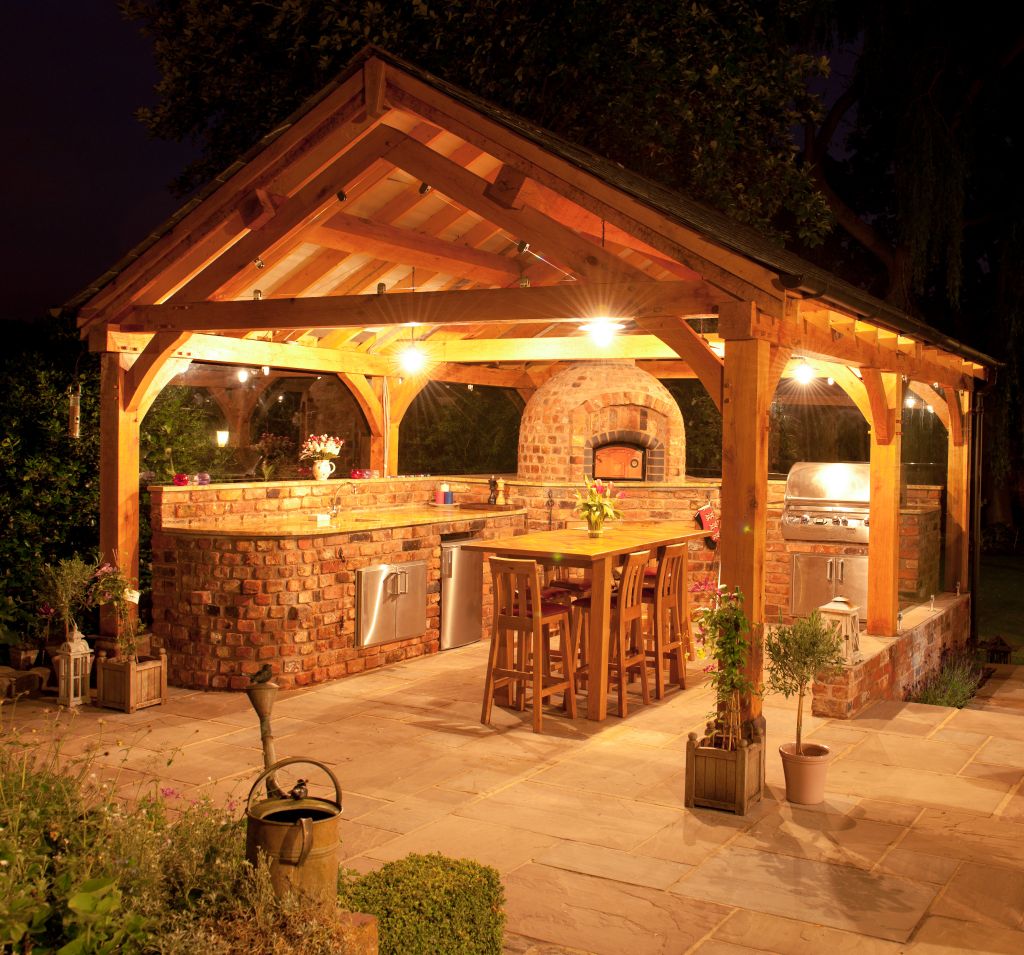
You should add a top to your kitchen. Do not worry, it will still feel outdoor and it won’t make it like a shell. Instead, it will save you from those sudden showers and winds and give you ample time to pack up your stuff and head into your home.

Also, do not forget to use leftover space, if any, as you could add fenced pathways, a little garden and all that jazz. Final suggestion is that keep the kitchen loaded but a little loose to allow a free ventilation passage and prefer sturdy and professional appliances/decorations over cheap ones as you will be using it for at least years if not decades.
So why wait? Let’s start experimenting right now!

No one can deny the fact that they love smoked meat, and with the arrival of electric digital smokers, preparing meat has become so easy. You don’t have to be a great chef in order to make sure that the food is tender, you need is the Masterbuilt 20078715 electric digital smoker.
It offers easy grilling of any meat from pork to chicken. It has thermostat temperature control to ensure even cooking, and it allows you to grill without much effort.
No products found.
The Masterbuilt Electric Digital Smoker offers incredible features at a minimal price. It’s durable and with simple maintenance and regular cleaning, you can ensure that the unit works perfectly for years to come.
This digital electric smoker comes with a blue LED display, and it ensures that you do not have any difficulty reading the temperature in the sunlight. This means you can use it in the backyard with ease.
Most of the time, you can’t control the number of guests that arrive at your place. In such a scenario, having ample cooking space is nothing more than a blessing. The Masterbuilt Electric Digital Smoker ensures that it provides a large cooking space and has 721 square inches available, along with chrome coated racks.
If the steam doesn’t stay locked in the smoker, the flavors escape and result in tasteless meat that no one likes. The Masterbuilt Digital Electric Smoker ensures that the steam stays locked in the smoker, as it has a locking door with inner lining.
It has a thermostat temperature control that ensures even cooking and, it offers even cooking from 100 to 275 degrees F.
Masterbuilt is a known brand for offering high-end electric smokers to customers as it uses top quality materials for manufacturing these electric smokers. They offer a range of features to customers in order to make sure that the meat is cooked to perfection:
By following some maintenance tips, you can make sure that the Electric Digital Smoker stays in perfect condition and functions correctly.
Electric units are great for easy, no-fuss grilling. However, they have a bit of a reputation for not giving foods that nice, smoky flavor to meats and veggies. But don’t let that stop you from buying one. Here’s a list of some delicious foods to put on an electrical unit:
Brats taste yummy no matter how you cook them, but they are amazing on the grill. It doesn’t take a lot to smoke them and they cook in a short amount of time. Unlike some other meats, a little bit goes a long way with bratwursts. Not to mention, most folks smother them with bbq sauce and slaw, so a light smoky flavor is just fine.
Pork chops are another tasty option for electric smokers. They are easy to grill and depending on the cut you buy, they don’t take long to cook. There are some many ways to fix them up and take the taste to the next level—you’ll definitely enjoy them!
Smoked nuts make for a delicious snack that you can’t resist. They are perfect for an electric grill because it doesn’t require much to smoke them. Pop them in and dress them up any way you’d like. Add a sweet topping, bbq flavor, or ranch seasoning. No matter which flavor you choose, you’ll be satisfied with. Plus, it doesn’t matter what type of nuts you choose—pecans, almonds, cashews, and peanuts all work great.
Potatoes are some of the best vegetables to put on the grill. Imagine throwing a nice steak on the grill and making some mouth-watering potatoes to go along with it— that’s a match made in cookout heaven. Next time you have a barbeque, skip the microwave and use your electric smoker.
Yep, that’s right. You can put salt on an electric smoker. It gives it a nice smokey flavor and it enhances the taste of your food. It’s an amazing way to boost the flavor of breakfast, lunch, and dinner. Sprinkle it over veggies, popcorn, or pasta!
Chicken breasts are a little bland if you don’t know how to cook them. Not to mention, if you’re watching your weight the taste can get a bit boring. Putting them on the grill can enhance the chicken and give it a little more “umph”.
The bottom line is electric smokers are awesome, and this particular product is a fantastic choice. It comes with some nice features that helps make your grilling experience a lot better. Not to mention, if you plan on having large cookouts, the extra space comes in handy. Overall, you won’t be disappointed with the Masterbuilt 20078715, and hopefully, this review helps make it easier for you to choose the right electric smoker.

Several people like to get a chance on a nice deer meat recipe. This is not the first time they will try to cook deer meat and for some it will be and these people will be highly grateful to get some nice cooking tips.
In case you are a seasoned cook or a novice the following suggestions will be highly useful:
The first and foremost aspect to know is to never cook the meat. The more you cook red deer the more it will tend to be dry. When the meat is dry there are some cumbersome ways to moisten it.
Useful tips
You need to set the internal temperature to not greater than one hundred and forty degrees due to the fact that in this temperature the meat starts to dry. If you want to ascertain the degree of meat preparedness it is suggested to utilize a meat thermometer.
You need to allow the meat to soak the juices when you actually remove it from the fire. You can keep it covered at least 15 minutes and then you can serve it hot. In case you want to fry or brown the meat over the fire, you can avoid it from getting cooked. You have the chance to allow it to rest prior to serving it. 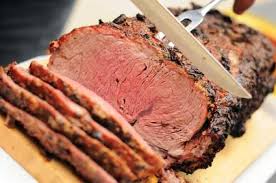
There might be cases when some of you will have to grill the meat, and if you take a decision to grill the meat stop cooking when it is done medium. Several people will consider marinating the meat in some nice sauce. This keeps the meat very soft and it adds to the taste also.
It has been seen that most of the time the adding of moisture to the meat when grilling it is not important. If you spread a small quantity of butter over the meat before cooking then its good. In case you have grilled the meat you need to know that you soak in the juices for ten minutes prior serving it.
Pot roasts and stews are nice ways to prepare meat. There are slow cooking ways and the cooking is done on low temperatures. The methods need crock pots that make the complete cooking process of cooking meat too simple.
When you cook meat it is a nice practice to utilize a pair of tongs to pick the meat. This is a nice way of piercing the meat and enabling some amount of juice to penetrate the meat.
Learning a lot from cooking
You can learn a lot from the meat cooking and there are a great deal of tips that give free information. You can read some books also regarding cooking prior to preparing your own dish. The finest part regarding learning easy is to utilize the basic cooking tips and you can save valuable time and be tension free when dealing with different demands of the lifestyle that make your life busy.
There are some important tips and hints that homemakers utilize in their everyday schedules to plan meals and make preparations for nutritious food for the family and guests. You can prevent Bacon pieces by making them shrink under cold water and then frying them.
The bad quality of beans can be minimized by pre-soaking them in a huge container to which one tablespoon of Soda bicarbonate is added. One better kitchen hint is for boiling eggs, some salt or a dash of vinegar added to boiling water that can keep the shells of the eggs intact. 
Conclusion
It has been seen that cooking experts suggest boiling corn for up to 3 minutes and then add it to the boiling water dish. You can grate cheese that has been pre-frozen near to half an hour and will shred with ease and a pinch of sugar into the batter of pancake will make sure fast browning, a fast recipe for making a nice pastry for replacing teaspoonful of vinegar with water. One more basic suggestions that relates to cooking with fruit that is not ripe is to store them in a brown paper packet bag that is kept in a dark cabinet for some days.
You can chop some lettuce into wedges and utilize them. You can cut out the bad taste of tomatoes when you cook spaghetti sauce to stir in a pinch of Soda Bicarbonate to it and the thick cream soups made of mushrooms, tomatoes, chicken and celery that are good nice, and fast sauce recipes.
Vinegar has quantities that release the natural juices of a meat product and does the cooking. You need to add a tablespoon added to boiling water when cooking the meat and it will provide you a fast stews in a small amount of time.
If you soak dried vegetables in two cups of water it will make them revived. If you want to clean the skewers that are made of wood you can pre-soak them in cold water for at least twenty minutes and this will make sure that you do not burn it. You need to try some fundamental cooking suggestions in order to lift up your life’s quality.